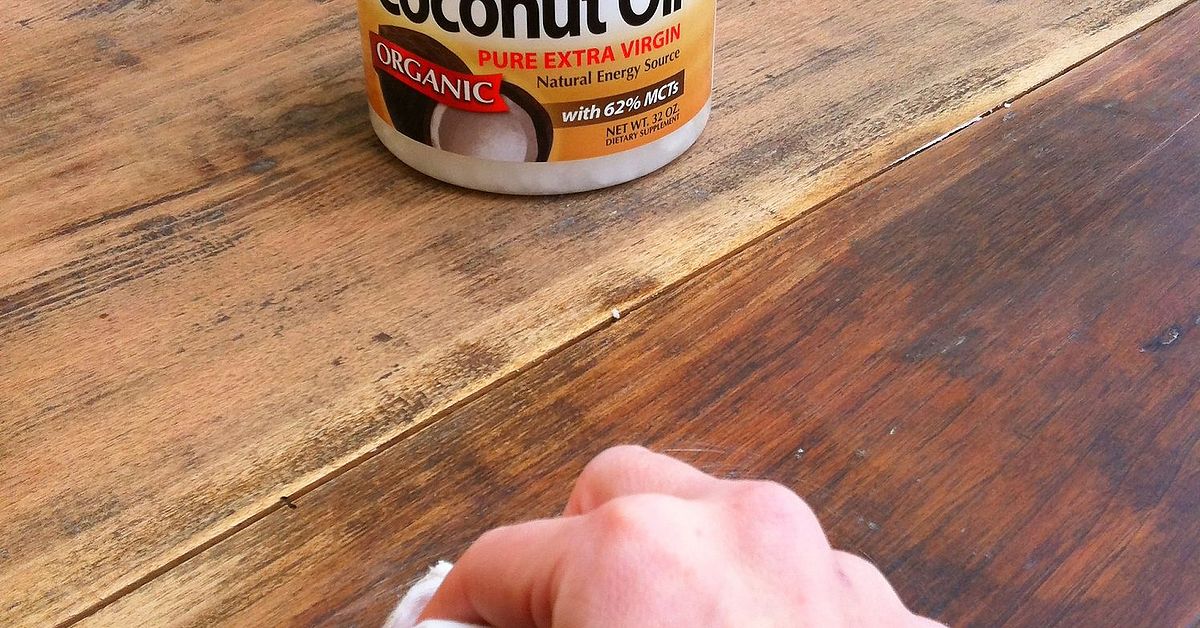
Old wood has a talent for looking dramatically worse than it actually is. A side table that seems destined for the curb may simply be dry, dusty, and wearing a finish that has lost its glow. Before reaching for a belt sander like you are auditioning for a home-renovation reality show, there is a gentler option worth considering: refinishing old wood with coconut oil.
There is, however, an important distinction. Coconut oil is better described as a wood conditioner or refreshing treatment than a traditional refinishing product. True refinishing usually involves removing or repairing an existing finish and applying a new protective coating. Oil conditioning is much less invasive. It can deepen the color of exposed wood, emphasize grain, reduce the chalky appearance of dry surfaces, and leave a pleasant low sheen.
There is another catch: the type of coconut oil matters. Regular culinary coconut oil melts at roughly 78 degrees Fahrenheit and becomes solid at cooler temperatures. Fractionated coconut oil remains liquid and is specifically used in some commercial wood-care formulas because it is considerably more practical for wood treatment.
So, can coconut oil rescue an old wooden stool, tray, shelf, or thrift-store table? Sometimes, absolutely. Can it replace polyurethane on a hardworking dining table? Not unless your dinner guests have agreed never to spill anything again.
What Coconut Oil Actually Does to Old Wood
Wood is porous when it is unfinished or when an old finish has worn thin. A penetrating oil can enter those exposed fibers, making the surface appear darker and richer while reducing the faded, thirsty look associated with neglected wood.
Traditional wood-finishing oils such as tung oil and linseed oil are considered drying oils because oxidation allows them to polymerize and eventually form a more durable finish. Coconut oil behaves differently. Fractionated coconut oil is a non-polymerizing oil, meaning it remains an oil rather than curing into a hard protective film.
This difference explains both the charm and the limitation of using coconut oil on wood. Application is easy, repairs are simple, and the wood retains a natural feel. On the other hand, resistance to abrasion, standing water, alcohol, heat, and repeated cleaning is limited compared with a curing oil, varnish, polyurethane, or modern hard-wax finish. Woodworking references consistently distinguish between easy-to-maintain penetrating treatments and stronger film-forming finishes intended for demanding surfaces.
Regular Coconut Oil vs. Fractionated Coconut Oil
Regular coconut oil
The jar from your kitchen may produce an attractive result initially, especially on dry unfinished wood. Unfortunately, food oils are generally poor choices for long-term wood maintenance because they can oxidize, develop unpleasant odors, or create residues over time. Wood-care guidance for cutting boards commonly recommends stable food-grade mineral oil instead of ordinary vegetable, seed, nut, or coconut cooking oils for precisely this reason.
Regular coconut oil also changes consistency with temperature. That beautiful liquid you rubbed into a project on a hot afternoon may become considerably firmer when the room cools.
Fractionated coconut oil
Fractionation removes portions of the oil that become solid relatively easily, producing a thin, clear liquid dominated by more stable medium-chain triglycerides. Commercial wood-finish manufacturers that use fractionated coconut oil promote it primarily for penetrating and conditioning wood rather than creating a hard film.
For a DIY wood-refreshing project, food-grade, fragrance-free fractionated coconut oil is therefore the more practical form to use. Avoid cosmetic products containing perfumes, dyes, or essential-oil blends when treating cutting boards, utensils, or other food-contact items.
When Refinishing Old Wood with Coconut Oil Makes Sense
Coconut oil works best when you want a natural-looking refresh rather than industrial-strength protection. Good candidates include:
- Unfinished decorative wooden bowls and trays
- Wooden handles and utensils
- Dry shelves and small accent pieces
- Rustic stools and benches used indoors
- Picture frames and decorative carvings
- Wood projects intentionally finished with non-curing oils
- Low-use furniture with exposed or worn wood
It can also make superficial scratches look less obvious because oil darkens exposed wood fibers, allowing pale scratches to blend more closely with the surrounding surface. That is cosmetic camouflage rather than structural repair, but sometimes cosmetic camouflage is exactly what an old nightstand ordered.
When You Should Choose Another Finish
Coconut oil is not the best answer for every piece of furniture. A dining table, bathroom vanity, kitchen countertop, floor, outdoor chair, or desk that receives frequent wet cleaning usually needs greater protection.
Pure tung oil can cure and develop meaningful water resistance, while oil-varnish blends and other protective finishes provide greater resistance to everyday wear. Woodworking guides commonly recommend these more durable systems where moisture and abrasion matter.
Also be cautious with valuable antiques. Historic surfaces may contain shellac, lacquer, wax, paint, gilding, delicate veneer, or an original patina that contributes significantly to the object’s value. Professional conservation guidance favors minimal intervention rather than casually adding layers of household polish or oil to museum-quality objects.
How to Refinish Old Wood with Coconut Oil Step by Step
1. Inspect the existing finish
Look closely at the wood before doing anything irreversible. Is it actually bare wood, or does it have lacquer, polyurethane, shellac, paint, or wax on top?
If an intact film finish covers the piece, coconut oil cannot soak deeply into the wood. It may simply coat the surface, attract dust, and make the furniture temporarily shiny. If the finish is failing badly, true refinishing may require stripping, sanding, and applying a compatible new finish instead. This Old House, Bob Vila, Minwax, and General Finishes all emphasize evaluating and properly preparing an existing coating before applying another finish.
2. Clean before reaching for sandpaper
Many pieces that appear to need refinishing are simply dirty. Years of hand oils, cooking residue, dust, furniture polish, and airborne grime can turn a lovely finish into something resembling brownish fog.
Start with a soft cloth. If necessary, clean with a small amount of mild dish soap diluted in water, taking care not to saturate the wood. More stubborn grime on compatible finishes may require mineral spirits used according to product safety directions and with proper ventilation.
Allow the furniture to dry completely.
3. Repair obvious damage
Tighten loose hardware and address unstable joints before worrying about shine. Fill unwanted holes if appropriate for the piece. Raised fibers and rough spots can be smoothed gently.
Remember that scratches are part of the wood’s surface, while loose joints are part of the furniture’s structure. Coconut oil is excellent at improving appearances. It remains disappointingly unqualified as a carpenter.
4. Sand only when necessary
If the piece is unfinished, heavily weathered, or being fully refinished, sanding can expose fresh wood and create an even surface. Depending on wood species and the intended finish, professional finishing guides commonly progress through moderate grits and stop somewhere around 150 to 220 grit rather than polishing the surface excessively.
For a simple refresh of an intact antique finish, however, aggressive sanding may cause more harm than good.
If old painted surfaces are involved, exercise additional caution. Sanding lead-based paint can generate hazardous dust. The U.S. Environmental Protection Agency warns that renovation work involving painted surfaces in pre-1978 buildings can create dangerous lead exposure and recommends lead-safe practices.
5. Test the coconut oil
Never introduce a new treatment by pouring it enthusiastically across the middle of a tabletop. Test a tiny area underneath, behind a leg, or somewhere else that is normally hidden.
Watch for excessive darkening, blotching, unexpected gloss, softened existing finish, or uneven absorption.
6. Apply an extremely thin coat
Place a small amount of fractionated coconut oil on a clean, lint-free cotton cloth. Wipe with the grain, spreading the oil over a manageable area.
The goal is not to leave the wood swimming in oil. Penetrating finishes generally work best when excess material is removed instead of being allowed to remain as a greasy surface layer. Oil-finishing instructions commonly call for wiping away material that the wood has not absorbed.
7. Let it penetrate, then buff thoroughly
Give the oil a short period to penetrate exposed wood, then buff aggressively with a fresh dry cloth. When you are finished, the furniture should feel like woodnot like the countertop beside a deep fryer.
If the cloth continues picking up oily residue, keep buffing.
8. Evaluate before adding another coat
More oil does not automatically mean more protection. Apply another thin treatment only if the wood still appears noticeably dry and readily absorbs the first coat.
Once the desired appearance is reached, stop. The safest DIY finishing principle is sometimes astonishingly sophisticated: know when to quit.
What Results Should You Expect?
On walnut, mahogany, cherry, teak, and other naturally rich woods, oil can dramatically emphasize figure and grain. Pale woods may become slightly warmer. Dry scratches can appear darker and less obvious.
The final appearance is usually closer to satin or matte than a glossy polyurethane finish. The surface should retain the tactile character of wood rather than feeling wrapped in transparent plastic.
Oil and wax finishes are popular partly because of this pleasant hand-rubbed feel, though woodworking experts note that these easy-to-repair finishes typically provide less protection than more substantial coating systems.
Common Coconut-Oil Refinishing Mistakes
Using too much oil
A thick coat does not magically transform a non-curing treatment into varnish. Excess oil simply stays where your elbows, sleeves, dust, and cat can discover it.
Applying oil over dirty furniture
Oil can deepen the appearance of dirt as effectively as it deepens wood grain. Clean first.
Using scented cosmetic coconut oil
Added fragrances and other ingredients provide no useful wood-finishing benefit and may be undesirable on food-contact surfaces.
Assuming oil equals waterproof
A conditioned surface may temporarily repel small amounts of moisture, but fractionated coconut oil does not cure into a waterproof barrier. For surfaces subjected to regular spills, stronger finishes are more appropriate.
Automatically sanding every old piece
Old patina can be beautiful, historically meaningful, and difficult to reproduce. Sometimes cleaning and careful maintenance are smarter than starting from bare wood.
Coconut Oil vs. Other Popular Wood Treatments
| Finish | Best Use | Protection | Maintenance |
|---|---|---|---|
| Fractionated coconut oil | Conditioning low-use or food-contact wood | Low | Frequent |
| Food-grade mineral oil | Cutting boards and utensils | Low | Frequent |
| Pure tung oil | Furniture and natural-finish projects | Moderate to good after curing | Periodic |
| Oil/varnish blend | Furniture needing additional durability | Moderate | Occasional |
| Polyurethane or varnish | High-use surfaces | High | Relatively low |
There is no universally perfect wood finish. The best product depends on what the object does. A decorative walnut tray and a kitchen table occupied by three children have very different career paths.
How to Maintain Coconut-Oil-Treated Wood
Dust regularly with a dry microfiber or cotton cloth. Wipe spills promptly rather than allowing liquid to soak into the grain. Keep indoor furniture away from prolonged direct sunlight when possible, and protect tabletops from hot cookware and wet glasses with coasters or trivets. Routine furniture-care guidance likewise emphasizes controlling moisture, heat, sunlight, and aggressive cleaners.
Reapply a very thin layer of fractionated coconut oil when the wood actually looks dry rather than following an unnecessarily rigid calendar. Highly handled objects may require attention sooner than decorative pieces.
If the piece starts feeling sticky, greasy, or increasingly dirty, stop adding oil and clean the surface appropriately. Continually piling one maintenance product on top of another is how a pleasant patina becomes archaeological sediment.
Practical Experience: What Real-World Wood Refreshing Projects Teach You
One of the most useful lessons in refinishing old wood is that the dramatic-looking projects are not always the difficult ones. Consider a dry oak stool that has spent years in a garage. The surface may look gray and lifeless, yet a careful cleaning followed by very light sanding and a thin application of fractionated coconut oil can make the grain suddenly appear several shades richer. The transformation feels enormous even though relatively little material has been removed.
The opposite situation happens with old finished tables. A mahogany side table may look dry enough to absorb half a bottle of oil, but testing underneath can reveal that lacquer still covers almost the entire piece. Coconut oil applied to the top then remains largely on the coating rather than soaking into the wood. Buffing may improve the shine temporarily, but repeated applications create residue instead of restoration. That is the moment to stop treating coconut oil as a miracle cure and determine what the original finish actually needs.
Pine provides another useful lesson. Softwoods often absorb liquids unevenly, particularly after patches have been sanded more aggressively than surrounding areas. Applying too much oil can produce dark islands and pale patches. Using tiny amounts and working across complete sections gives more predictable results. A hidden test area becomes especially important because the color shift can be stronger than expected.
Small objects are where coconut oil treatments tend to be most enjoyable. Picture frames, carved handles, wooden spoons, decorative boxes, and serving boards are easy to wipe down and buff thoroughly. You can see immediately where the fibers are absorbing oil, and there are few large flat areas where excess residue can become obvious.
A thrift-store walnut tray offers a perfect example. After cleaning, its faded areas might appear almost beige compared with protected sections. A small quantity of fractionated coconut oil wiped across the bare spots can restore visual depth within minutes. After thorough buffing, the tray looks refreshed without acquiring the thick glossy appearance of a film finish.
Another practical lesson concerns expectations. Coconut oil cannot remove dents, rebuild missing veneer, stabilize cracked joints, or replace a failed protective coating. What it can do surprisingly well is make sound but neglected wood look cared for again.
Finally, the best results usually come from using less product than expected. Beginners tend to believe that thirsty-looking wood wants a tropical vacation’s worth of coconut oil. In reality, thin applications provide better control. Wipe it on, observe the surface, remove every trace of excess, and evaluate the result under normal room lighting before deciding whether more is needed.
That restrained approach is especially valuable with older furniture. Refinishing is not always about erasing age. Sometimes the scratches, color variation, softened edges, and tiny dents are precisely what make old wood interesting. The goal can simply be to reveal that character again instead of sanding the piece until it looks as though it left a factory yesterday.
Conclusion
Refinishing old wood with coconut oil can be an inexpensive, simple way to revive dry-looking wood, but the method works best when its limitations are understood. Fractionated coconut oil is preferable to ordinary cooking coconut oil because it remains liquid and is commonly used as a non-polymerizing wood conditioner. It can enrich grain, reduce the visual severity of dry scratches, and produce a soft natural sheen, but it does not cure into the kind of hard coating required for heavily used or moisture-prone furniture.
The successful approach is straightforward: inspect the old finish, clean carefully, repair genuine damage, sand only when necessary, test an inconspicuous area, apply very little oil, and buff away everything the wood does not absorb.
For a rustic stool, wooden tray, decorative box, or low-use furniture piece, the result can be wonderfully satisfying. For a kitchen table expected to survive coffee, spaghetti sauce, hot plates, homework, and the occasional unexplained sticky substance, reach for a finish designed to cure and protect.
Note: Coconut oil treatment should not be considered professional conservation for valuable antique, historic, painted, veneered, or museum-quality furniture. Test any treatment first, and seek a qualified furniture conservator when preserving originality or monetary value is important.