There is a certain kind of electronics hobbyist who sees one old electrolytic capacitor and immediately reaches for the soldering iron like a sheriff in a dusty Western. “It’s old,” they say. “Replace it.” Then, with heroic confidence, they remove every aluminum can in sight, install shiny new parts, power up the device, and discover that the original problem was actually a cracked solder joint, a noisy switch, or a transistor that left the chat in 1987.
To be fair, electrolytic capacitors do fail. They dry out, leak current, drift out of tolerance, develop high ESR, and occasionally vent in ways that make a workbench smell like regret. But the idea that every old electrolytic must automatically be replaced is too simple. Sometimes replacement is wise. Sometimes testing first is smarter. Sometimes the original part is doing fine, and your “upgrade” may create new problems.
This guide takes a practical, evidence-based look at old electrolytic capacitors: when to replace them, when to reform them, when to leave them alone, and how to avoid turning a repair into an accidental archaeology dig with smoke effects.
What Electrolytic Capacitors Actually Do
Electrolytic capacitors are used because they pack a lot of capacitance into a small, affordable package. In power supplies, they smooth rectified DC. In audio gear, they couple signals, bypass noise, and stabilize rails. In computers and switch-mode power supplies, they help handle pulsed current and reduce ripple voltage. In other words, they are the shock absorbers of many electronic circuits.
The most common type in vintage electronics is the aluminum electrolytic capacitor. It uses an aluminum oxide layer as the dielectric and a liquid electrolyte as part of the internal structure. That liquid is both the capacitor’s secret sauce and its long-term weakness. Over time, heat, ripple current, storage conditions, and seal quality can cause electrolyte loss. As the electrolyte dries, capacitance usually decreases and equivalent series resistance, or ESR, rises.
That is why old electrolytics deserve respect. They are not immortal. But they are also not tiny time bombs just because they have birthdays older than your streaming password.
The “Replace Them All” Argument
The strongest case for replacing old electrolytics is reliability. If a 40-year-old power supply capacitor has spent decades near warm transformers, rectifiers, regulators, or vacuum tubes, it may be living on borrowed time. A failing filter capacitor can cause hum, unstable voltage, overheating, blown fuses, stressed rectifiers, or intermittent startup issues.
In vintage radios, televisions, amplifiers, and test equipment, large power-supply electrolytics are often among the first parts technicians inspect. If a capacitor is bulging, leaking, cracked, corroded, or running hot, the debate is over. Replace it. If a device has been stored in a humid attic since the Carter administration, replacement may also be the safer path.
Another reason people recap entire boards is labor efficiency. If a device is already disassembled, replacing all electrolytics can be faster than revisiting the same board six months later. This approach makes sense in equipment where failure is common, access is painful, or downtime is expensive.
But the “replace them all” strategy has a shadow side. Not every new capacitor is automatically better in every circuit. Installing the wrong ESR, voltage rating, temperature rating, polarity, physical size, ripple-current rating, or lead spacing can create faults that were not present before. A repair can become a remix: same song, worse bass line.
The “Not So Fast” Argument
Old does not always mean bad. Many electrolytics from quality manufacturers remain usable for decades, especially if they were operated cool, lightly loaded, and below their rated voltage. Storage also matters. A capacitor kept in a dry, moderate environment may age very differently from one baked inside a hot power supply.
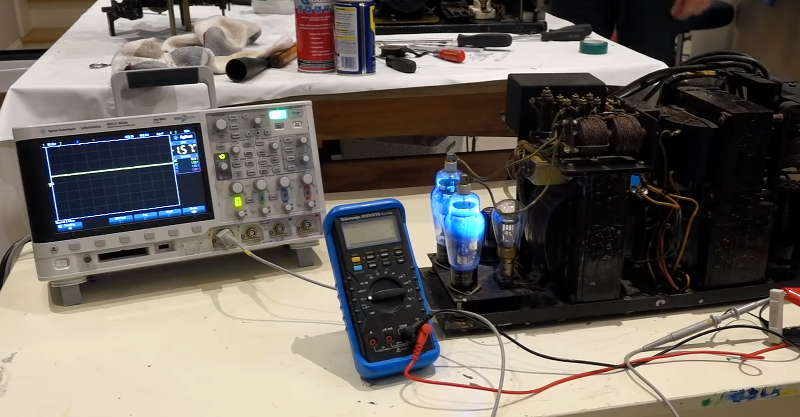
Testing can reveal whether a capacitor is actually failing. A capacitance meter, ESR meter, leakage tester, and visual inspection together provide a much better picture than age alone. A part that measures close to value, has acceptable ESR, and shows low leakage at working voltage may not need immediate replacement in a non-critical circuit.
This matters especially in collectible or historically important equipment. Original parts can affect appearance, authenticity, and sometimes even circuit behavior. In vintage audio, radio, and laboratory gear, indiscriminate replacement can reduce originality. In some cases, restorers choose to restuff original capacitor cans with modern parts to preserve the look while improving reliability.
So the smarter question is not, “Is it old?” The smarter question is, “Is it still electrically fit for the job it is doing?”
Common Electrolytic Capacitor Failure Signs
Bulging or Venting
A domed top, split vent, pushed-out rubber seal, or crusty residue is not character. It is evidence. Replace the capacitor and inspect nearby parts for damage.
Leakage or Corrosion
Electrolyte leakage can corrode traces, component leads, and pads. Even if the device still works, corrosion can quietly spread like a tiny villain with excellent patience.
High ESR
Equivalent series resistance is the internal resistance that makes capacitors heat under ripple current. High ESR is especially troublesome in switch-mode power supplies, voltage regulators, and high-current circuits. A capacitor may still measure near its marked capacitance but fail badly under real operating conditions because ESR has climbed too high.
Low Capacitance
If a 1000 µF capacitor now behaves like a 220 µF capacitor, it is not “vintage tone.” It is tired. Low capacitance in power-supply filtering can increase ripple, hum, and instability.
Excessive Leakage Current
Electrolytic capacitors pass a small amount of DC leakage current by nature. Too much leakage means wasted power, heat, and stress on surrounding circuitry. In high-voltage equipment, excessive leakage can be dangerous to the capacitor and the device.
Why ESR and Ripple Current Matter More Than Many Beginners Think
Capacitance gets all the attention because it is printed in big friendly numbers: 47 µF, 470 µF, 2200 µF. But ESR and ripple-current rating often decide whether a replacement will survive.
Ripple current is the AC component flowing through the capacitor. Because real capacitors have ESR, ripple current creates internal heat. More heat accelerates electrolyte loss. More electrolyte loss raises ESR. Higher ESR creates even more heat. This loop is why capacitors in hot switch-mode power supplies often fail before their quieter cousins in low-stress circuits.
For example, replacing a low-ESR capacitor in a switching supply with a general-purpose capacitor of the same capacitance and voltage may look correct on paper but fail in practice. The new capacitor may overheat, the output ripple may increase, and the supply may become unstable. That is not a repair. That is a small electrical prank.
When selecting replacements, match or exceed the original voltage rating, temperature rating, ripple-current rating, and endurance rating. Use low-ESR parts where the circuit requires them. But do not blindly install ultra-low-ESR capacitors in circuits designed around older capacitor characteristics, especially some linear regulators and older switchers that rely on a certain ESR range for stability.
Reforming Old Electrolytics: Useful Tool or Wishful Thinking?
Reforming is the process of gradually applying voltage to an aluminum electrolytic capacitor to rebuild or repair the oxide dielectric layer. It is most relevant for capacitors that have been stored without voltage for a long time. During storage, leakage current can rise. A controlled reforming process may reduce leakage and make the capacitor usable again.
Reforming is not magic. It cannot refill dried electrolyte, repair corroded foil, fix a cracked seal, or reverse decades of heat damage. A capacitor with high ESR because it has dried out will not become young again because you whispered encouraging words through a current-limited power supply.
Reforming can be reasonable for large, expensive, or hard-to-replace capacitors that are physically intact and historically significant. It should be done with current limiting, proper voltage monitoring, and patience. If leakage does not fall to an acceptable level, or if the capacitor warms, vents, smells odd, or behaves unpredictably, stop and replace it.
When You Should Replace Old Electrolytics Immediately
Replacement is the right move when the capacitor shows visible damage, measurable failure, or sits in a critical high-stress location. Power-supply filter capacitors in tube equipment, high-ripple switch-mode supply capacitors, motor-drive DC-link capacitors, and capacitors near hot heatsinks deserve special caution.
You should also replace electrolytics if the device is mission-critical, safety-related, or expensive to access later. A $2 capacitor buried under three boards and a metal shield can become a $200 headache if you have to open the unit again.
In consumer electronics affected by the well-known capacitor plague era, replacement is often justified when the suspect capacitors match known failure patterns. During that period, many devices suffered from bulging and leaking electrolytics, especially on motherboards and power-supply boards. In those cases, “test first” is still helpful, but visible failure usually makes the decision easy.
When You Might Leave Them Alone
You might leave old electrolytics in place if they test well, are in a low-stress section of the circuit, show no leakage or corrosion, and are part of equipment where originality matters. This is especially true for signal-path capacitors in certain vintage devices, where changing type, value, or ESR may slightly alter behavior.
Another reason to pause is risk. Old circuit boards can have fragile pads and traces. Removing parts from single-sided phenolic boards, early printed circuit boards, or tightly packed assemblies can cause damage. If the capacitor is healthy and the board is delicate, unnecessary surgery may be worse than watchful waiting.
Think like a doctor, not a demolition crew. Diagnose, measure, evaluate the risk, then decide.
How to Test Before Replacing
Start With Visual Inspection
Look for bulging tops, cracked sleeves, leakage, corrosion, heat discoloration, loose terminals, and bad solder joints. A flashlight and magnifier can save hours of guesswork.
Measure Capacitance
Capacitance should generally be within the tolerance printed on the part or specified in the service manual. Many electrolytics have wide tolerances, so capacitance alone is not enough.
Measure ESR
An ESR meter is one of the most useful tools for capacitor troubleshooting. Compare the reading to datasheets, known-good parts, or general ESR tables for similar capacitors. Be careful with in-circuit readings, because parallel components can affect results.
Check Leakage at Working Voltage
A capacitor can look fine on a low-voltage meter but leak badly near its rated voltage. For power-supply capacitors, leakage testing at or near operating voltage gives more meaningful information. Use proper safety procedures, especially with high-voltage equipment.
Observe the Circuit
Ripple voltage, startup behavior, hum, heat, and regulator stability all tell stories. An oscilloscope can reveal ripple and noise that a basic meter will miss.
Choosing the Right Replacement
If replacement is necessary, choose thoughtfully. Match capacitance unless you have a good design reason to change it. Use the same or higher voltage rating, but avoid huge physical changes that may stress leads or interfere with airflow. Choose a temperature rating of 105°C when possible for power supplies and warm areas. Match ripple-current capability and ESR requirements.
For switch-mode power supplies, use capacitors rated for switching service, low ESR, and adequate ripple current. For audio coupling, leakage, dielectric type, physical orientation, and value may matter more than ripple current. For high-voltage tube gear, ensure voltage ratings, surge ratings, insulation, and mounting are appropriate.
Polarity matters. Installing a polarized electrolytic backward can cause failure, leakage, heat, or venting. The capacitor will not appreciate your creativity.
Specific Examples: Replace, Reform, or Wait?
Example 1: 1980s Audio Receiver With Hum
If both channels hum and the hum changes little with volume, the power-supply filter capacitors are suspects. Test ESR, capacitance, leakage, and ripple. If the main filters are weak or hot, replace them with suitable high-ripple parts. If smaller supply capacitors near regulators are cooked, replace those too.
Example 2: Vintage Radio Stored for 30 Years
Do not simply plug it into the wall and hope nostalgia is fireproof. Inspect first. Old paper capacitors and electrolytics may be leaky. Large electrolytics may be candidates for controlled reforming, but many restorers replace power-supply electrolytics for safety and reliability.
Example 3: Working Test Instrument With Original Capacitors
If the instrument is stable, accurate, cool-running, and its capacitors test well, a full recap may not be necessary. Replacing parts can affect calibration or introduce board damage. Targeted replacement is often the better strategy.
Example 4: Computer Motherboard With Bulging Caps
Replace them. Use low-ESR, high-ripple capacitors from reputable brands, or appropriate polymer replacements if the circuit permits. Do not install bargain-bin mystery capacitors unless you enjoy repeating the repair like a bad movie sequel.
The Balanced Rule: Test, Then Decide
The best approach is not “replace everything” or “never replace originals.” It is conditional. Replace visibly damaged, electrically failed, high-stress, or safety-critical electrolytics. Test the rest. Consider the circuit, operating temperature, ripple current, access difficulty, and value of originality.
Capacitors age by physics, not by internet arguments. Heat, ripple current, storage, voltage stress, electrolyte chemistry, and construction quality all matter. A careful technician respects those factors instead of treating every capacitor like a guilty suspect.
Extra Field Notes: Real-World Experience With Old Electrolytics
After working around older electronics, one pattern becomes obvious: the worst capacitor is not always the oldest one. Sometimes the little electrolytic hiding next to a hot voltage regulator is in worse shape than the large main filter can that everyone was ready to blame. Heat is a sneaky accountant. It collects payment slowly, year after year, until the capacitor’s ESR rises and the circuit starts acting possessed.
A common experience in vintage audio repair is the “one bad small cap” problem. A receiver may have weak bass, random popping, or a channel that fades after warm-up. The giant filter capacitors look dramatic, so beginners suspect them first. But the actual trouble may be a small coupling capacitor, a dried bypass capacitor, or an electrolytic in the protection circuit. Replacing only the big cans would make the inside look refreshed while leaving the gremlin comfortably employed.
Another lesson: in-circuit ESR testing is useful, but it is not a courtroom verdict. Parallel paths can make a bad capacitor look better than it is. A suspicious reading should be confirmed by lifting one lead or removing the part. On the other hand, an obviously high ESR reading in a circuit location where other paths should lower the result is usually a strong warning sign.
There is also the “new part, new problem” experience. A modern low-ESR capacitor may be electrically excellent but inappropriate in an older regulator circuit that expects some ESR for stability. After replacement, the device may oscillate, run hotter, or produce strange noise. This is why datasheets and service manuals matter. The best replacement is not always the capacitor with the lowest ESR; it is the capacitor with the right ESR, ripple rating, temperature rating, and physical fit for that circuit.
Restoration work also teaches humility. Old boards can be fragile. Pads lift. Traces crack. Wires break at terminals. A simple recap can become a board-repair adventure starring solder wick, jumper wire, and emotional support coffee. Before replacing every electrolytic, inspect the board quality and ask whether the benefit outweighs the risk.
For equipment that will be used daily, I lean toward replacing electrolytics in hot, high-ripple, or safety-critical sections. For rare vintage gear that works well and tests well, I prefer targeted replacement and documentation. Take photos, record original values, note polarity, and replace one section at a time. This keeps mistakes manageable. Nothing ruins a peaceful repair session like discovering three removed capacitors on the bench and realizing you trusted your memory. Your memory is a liar with confidence.
The most practical habit is to build a capacitor decision checklist. Is it visibly damaged? Does it run hot? Is ESR high? Is capacitance low? Is leakage excessive? Is the circuit high ripple or high voltage? Is the device hard to reopen? Does originality matter? Answer those questions before touching the soldering iron. The result is better work, fewer unnecessary replacements, and fewer mysterious failures introduced by good intentions wearing safety glasses.
So, should you replace old electrolytics? Sometimes absolutely. Sometimes not yet. The wise move is to let measurement, circuit context, and reliability goals guide the decision. A good technician does not worship old parts or new parts. A good technician worships evidence, preferably with a clean solder tip.
Conclusion
Old electrolytic capacitors deserve attention, but not panic. They are limited-life components, and many do fail through electrolyte loss, rising ESR, leakage current, or heat stress. Yet age alone does not prove failure. Some old capacitors remain serviceable, especially in cool, lightly loaded circuits. The smartest repair strategy is to inspect, test, understand the circuit, and replace selectively when the evidence supports it.
If a capacitor is bulging, leaking, hot, electrically weak, or located in a critical power section, replacement is usually the right call. If it tests well and sits in a low-stress part of a historically valuable device, leaving it alone may be the better decision. In electronics repair, “not so fast” is not hesitation. It is craftsmanship.