Every old table has a biography. Some remember family dinners, some remember coffee rings, and somelike our lonely library tableremember sitting quietly in a corner while everyone walked past saying, “That could be cute someday.” Poor thing. “Someday” can be a long sentence for furniture.
This refinished library table had all the classic signs of a once-loved piece: dings, dull wood, tired legs, mystery marks, and the general expression of a table that had seen one too many garage corners. But beneath the scratches was something worth saving: solid structure, graceful lines, and the kind of old-school charm modern flat-pack furniture keeps trying to impersonate.
Refinishing a vintage library table is more than a weekend DIY project. It is part restoration, part design decision, part patience test, and part emotional support activity for people who believe old furniture deserves a second act. With the right cleaning, sanding, staining, sealing, and styling, a forgotten table can become a writing desk, entryway statement, reading nook centerpiece, game table, craft station, or the official headquarters for coffee and overthinking.
Why a Library Table Is Worth Saving
A library table is built with purpose. Traditionally, these tables were designed for reading rooms, studies, offices, and quiet corners where books lived like royalty. Many have wide tops, sturdy bases, drawers, stretchers, carved details, or rounded “drum table” shapes that make them both useful and decorative. They are not shy little accent pieces; they have presence.
That presence is exactly why refinishing one can be so rewarding. Unlike flimsy furniture made from thin laminate or particleboard, many older library tables were made from real wood or quality veneer over a strong frame. If the table has “good bones”solid joints, balanced proportions, and repairable damageit is often a better candidate for restoration than replacement.
And let’s be honest: buying a brand-new table with character is suspiciously expensive. Restoring one with character already baked in? That feels like discovering treasure under a pile of dust bunnies.
First Look: Meet the Lonely Table
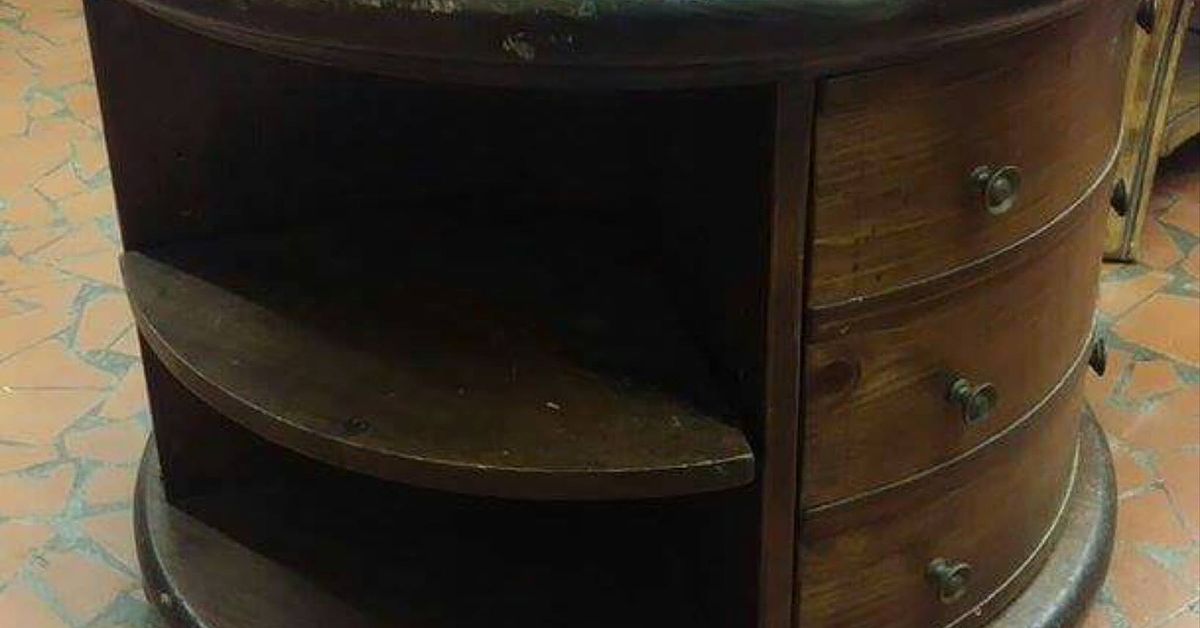
Before the makeover, the table looked like it had been through a small emotional event. The finish was flat and uneven. The top had dents, scratches, and rings from drinks that apparently believed coasters were optional. The legs had scuffs. The surface felt tired rather than charming. There is a difference between “vintage patina” and “help me.” This table was politely whispering the second one.
The goal was not to erase every sign of age. A refinished library table should still feel like it has a story. The goal was to clean up the damage, refresh the wood, protect the surface, and give the table a future that did not involve being ignored under a stack of holiday decorations.
Step One: Decide Whether to Refinish, Restore, or Paint
Before sandpaper enters the chat, take a moment to study the piece. Not every old table needs a full strip-and-stain transformation. Sometimes the finish only needs cleaning, gentle scuff sanding, and a fresh protective coat. Sometimes it needs a complete refinish. Sometimes painting is the smartest solution, especially if the wood is badly mismatched, damaged, or not especially beautiful.
For this lonely library table, refinishing made sense because the shape was elegant and the wood deserved to be seen. Paint would have been cute, but stain allowed the grain to return to the spotlight. The table had earned its glow-up, not a disguise.
Check the Wood Before You Commit
Look for solid wood edges, consistent grain, veneer thickness, loose joints, missing trim, water damage, and deep cracks. A thin veneer top can still be refinished, but it requires a gentle hand because sanding too aggressively can burn right through the veneer. That is the furniture equivalent of cutting your own bangs during a stressful week: technically possible, but risky.
Step Two: Clean Before Sanding
One of the most common mistakes in furniture refinishing is sanding dirt into the surface. Old furniture can carry wax, polish, oil, grime, dust, and unknown sticky substances that nobody wants to identify. Start with a thorough cleaning using a soft cloth and a gentle wood-safe cleaner. Avoid soaking the wood. Water and old finishes are not best friends.
For tight details, a soft brush can loosen dust from corners and carved areas. If the finish is flaking or fragile, avoid scrubbing those sections. A table may be sturdy, but old finishes can be dramatic.
Step Three: Remove the Old Finish
Once the table is clean and dry, decide how to remove the old finish. There are two main routes: sanding or using a chemical stripper. Sanding works well when the old finish is thin, already worn, or easy to remove. A stripper can be useful when the table has heavy varnish, paint, or stubborn coatings.
Safety matters here. Work in a well-ventilated area, wear gloves, protect your eyes, and use a suitable respirator when sanding or working with strippers. If the table may have been painted before 1978, do not sand blindly. Older paint can contain lead, and disturbing it can create hazardous dust. When in doubt, test first or consult a professional. Furniture is fun; lead dust is absolutely not invited.
The Sanding Progression
For a wood table, sanding usually works best in stages. Begin with a medium grit to remove the damaged finish, then move to finer grits to smooth the surface. A common approach is 120-grit, then 150-grit, then 180-grit, finishing around 220-grit before staining. Always sand with the grain when possible. Circular scratches may look small at first, but stain has a mischievous way of making them famous.
After sanding, remove dust with a vacuum, tack cloth, or clean lint-free rag. Dust left behind can create bumps in the stain or finish. A smooth table surface begins before the first coat of stain ever touches the wood.
Step Four: Repair the Dents, Dings, and Wobbles
This library table had the usual battle scars: small dents, tiny chips, and a few marks that looked like they came from either decades of use or one extremely determined house cat. Minor dents can sometimes be reduced with careful steaming, while deeper holes may need stainable wood filler.
If joints are loose, fix them before finishing. Tighten screws, reglue wobbly sections, clamp loose joints, and check the table’s stability. A beautiful finish on a wobbly table is like wearing a tuxedo on roller skates: impressive, but not fully practical.
Step Five: Choose the Right Stain
Stain is where the personality returns. A darker stain can make a library table feel classic, scholarly, and dramatic. A warm medium brown can highlight grain while keeping the piece friendly and versatile. A lighter stain can modernize the table, especially in spaces with neutral walls and natural textures.
Always test stain on a hidden area or scrap piece if possible. Different woods absorb stain differently. Pine, maple, and other porous or uneven-grain woods may benefit from pre-stain wood conditioner to reduce blotchiness. The conditioner helps the stain absorb more evenly, which is helpful when the wood wants to behave like a moody sponge.
Apply stain with a brush or lint-free cloth, working with the grain. Let it penetrate for the recommended time, then wipe off the excess. Leaving excess stain sitting on top can cause sticky, uneven results. If a richer color is desired, apply another coat after the first has dried according to the product directions.
Step Six: Seal It for Real Life
A library table may look poetic, but it still has to survive real life: coffee mugs, laptops, books, elbows, keys, mail piles, and the occasional person who thinks furniture is a coaster. That is why a protective topcoat matters.
Polyurethane is a popular choice for tabletops because it creates a durable protective surface. Oil-based polyurethane tends to add warmth and amber tone, while water-based polyurethane dries clearer and usually has lower odor. Both can work well when applied correctly.
Use thin coats rather than one heavy coat. Heavy coats can drip, bubble, or dry unevenly. Brush or wipe with the grain, allow proper drying time, then lightly sand between coats with fine-grit paper. Remove dust before applying the next coat. For a tabletop, two coats may work, but three coats often provide better durability.
Do Not Rush the Cure Time
A finish may feel dry before it is fully cured. That means the table might be touchable but not ready for heavy use. Give the finish time to harden before placing books, lamps, plants, or decorative trays on top. This waiting period is the hardest part because the table looks finished and your brain says, “Let’s decorate immediately.” Your brain is excited, but the finish needs a nap.
The Big Reveal: From Forgotten to Fabulous
After refinishing, the lonely library table no longer looked like a piece waiting for permission to matter. The refreshed wood tone brought out its grain. The scratches softened into character. The top looked clean, smooth, and ready for use. The base regained its dignity. The whole table seemed to stand a little taller, as if it knew it had avoided furniture exile.
That is the magic of refinishing. It does not simply make old furniture look new. It makes old furniture look valued. A refinished library table still carries history, but now it also carries possibility.
Styling Ideas for a Refinished Library Table
Once the table is restored, the next question is where it should live. A library table is wonderfully flexible because it can work in several rooms without looking lost.
Use It as a Writing Desk
Place the table near a window, add a comfortable chair, a small lamp, a notebook, and a pencil cup. Suddenly it becomes a writing desk with old-world charm. This setup works especially well for people who want a home office that does not scream “corporate spreadsheet cave.”
Turn It Into an Entryway Statement
A library table in an entryway can hold a lamp, bowl for keys, stack of books, and seasonal flowers. It creates a warm first impression and gives guests something better to notice than the pile of shoes nobody admits belongs to them.
Create a Reading Nook
Pair the table with a cozy chair, a floor lamp, and a small bookshelf. The refinished table becomes a landing spot for tea, glasses, bookmarks, and the book you swear you will finish before starting another one.
Make It a Creative Workstation
Artists, crafters, scrapbookers, and journal lovers can use a sturdy library table as a project surface. Add protective mats or trays if glue, paint, or sharp tools are involved. A table can have a new adventure without being sacrificed to glitter.
Care Tips After Refinishing
A newly refinished table needs simple, consistent care. Dust with a soft cloth. Avoid harsh cleaners, silicone-heavy sprays, and soaking wet rags. Use coasters, felt pads under decor, and trivets for warm items. Keep the table out of harsh direct sunlight when possible, since UV exposure can fade wood and finish over time.
If a spill happens, wipe it quickly. If a scratch appears, do not panic. A refinished table is meant to be used, not worshiped from across the room. Small signs of use become part of the next chapter.
Why Furniture Makeovers Feel So Satisfying
Refinishing furniture offers a rare kind of satisfaction. You can see progress with your own eyes. The grime comes off. The old finish disappears. The grain reappears. The first coat of stain transforms the piece so dramatically that you may say “Oh wow” out loud, even if you are alone in the garage wearing sanding dust like a powdered donut.
There is also a sustainability angle. Restoring furniture keeps useful pieces out of landfills and reduces the need to buy new materials. It encourages slower decorating, thoughtful ownership, and appreciation for craftsmanship. Plus, it gives you bragging rights. When someone compliments the table, you get to say, “Thanks, I refinished it,” and then act casual while your soul does a tiny parade.
Common Mistakes to Avoid
Refinishing a library table is beginner-friendly, but a few mistakes can make the project harder than it needs to be.
Skipping Prep Work
Cleaning, sanding, and dust removal are not glamorous, but they are the foundation of a smooth finish. Poor prep can lead to peeling, blotching, rough texture, and regret.
Using the Wrong Grit
Starting too coarse can gouge the wood. Finishing too coarse can leave scratches that show through stain. Move gradually through grits and let each step do its job.
Applying Thick Finish Coats
Thick coats may seem efficient, but they often create drips, bubbles, and uneven curing. Thin coats take patience, but they look better and last longer.
Ignoring Drying Times
Every product has instructions for a reason. Drying time depends on temperature, humidity, airflow, and product type. Rushing can ruin an otherwise beautiful finish.
A 500-Word Experience: What This Lonely Library Table Taught Me
The most surprising part of refinishing a lonely library table is how quickly the project starts feeling personal. At first, it is just furniture. You see scratches, dull stain, dusty corners, and a top that looks like it hosted a very chaotic coffee club. Then you start cleaning, and the table begins revealing small clues: a hidden grain pattern, a smoother edge where hands once rested, a drawer that still slides nicely, a leg detail you somehow missed before.
That is when the project changes. You are no longer just “fixing a table.” You are negotiating with history. You want to improve it without erasing everything that made it interesting in the first place. Every dent becomes a decision. Should it be filled, softened, or left alone? Should the finish be dark and traditional, or warm and updated? Should the old hardware be polished, replaced, or proudly imperfect?
During a refinishing project, patience becomes the real tool. Sanding takes longer than expected. Dust appears in places dust should not legally be allowed to appear. Stain always looks terrifying for the first few seconds, like you may have made a dramatic mistake. Then it settles, the grain deepens, and suddenly the whole table looks alive again.
There is also a funny emotional roller coaster built into the process. You begin with confidence. Then you hit a stubborn spot of old finish and briefly consider moving to a cabin where tables do not exist. Then you wipe on the first coat of stain and become a furniture artist in your own mind. Then you find a drip. Then you fix the drip. Then you stand back and admire the table from six different angles, including the angle where the lighting is most flattering. This is normal. This is DIY.
The best moment comes after the final coat has cured and the table moves into its new home. A lamp goes on top. Maybe a book. Maybe a plant. Maybe a mug placed responsibly on a coaster because we are adults now, allegedly. The table no longer feels lonely. It has a job again. It has a reason to be noticed.
That is the deeper pleasure of furniture refinishing: it reminds us that worn does not mean worthless. A scratched table can still be strong. A forgotten piece can still become beautiful. Something that looked outdated can become the most interesting object in the room with care, time, and a willingness to get a little dusty.
The lonely library table is now ready for a new adventure, and honestly, it looks rather pleased with itself.
Conclusion
A refinished library table is more than a successful furniture makeover. It is a practical, beautiful example of how old pieces can be refreshed instead of replaced. With careful cleaning, thoughtful sanding, smart stain choices, and a durable protective finish, a tired table can become a standout feature in a home.
The real charm lies in balance. Keep enough age to preserve the story, but add enough polish to make the piece useful for daily life. Whether it becomes a desk, entry table, reading nook companion, or creative workstation, this once-lonely library table is ready for a new adventureand probably a few compliments along the way.
Note: Before refinishing very old painted furniture, test for lead and use proper ventilation, protective equipment, and safe disposal methods. When a piece is rare, fragile, or historically valuable, consider asking a professional furniture restorer for guidance.