Note: This article is written for web publication and synthesizes practical furniture-painting guidance from reputable U.S. DIY, home improvement, and paint-brand resources in original wording.
Introduction: Give That Tired TV Cabinet a Second Act
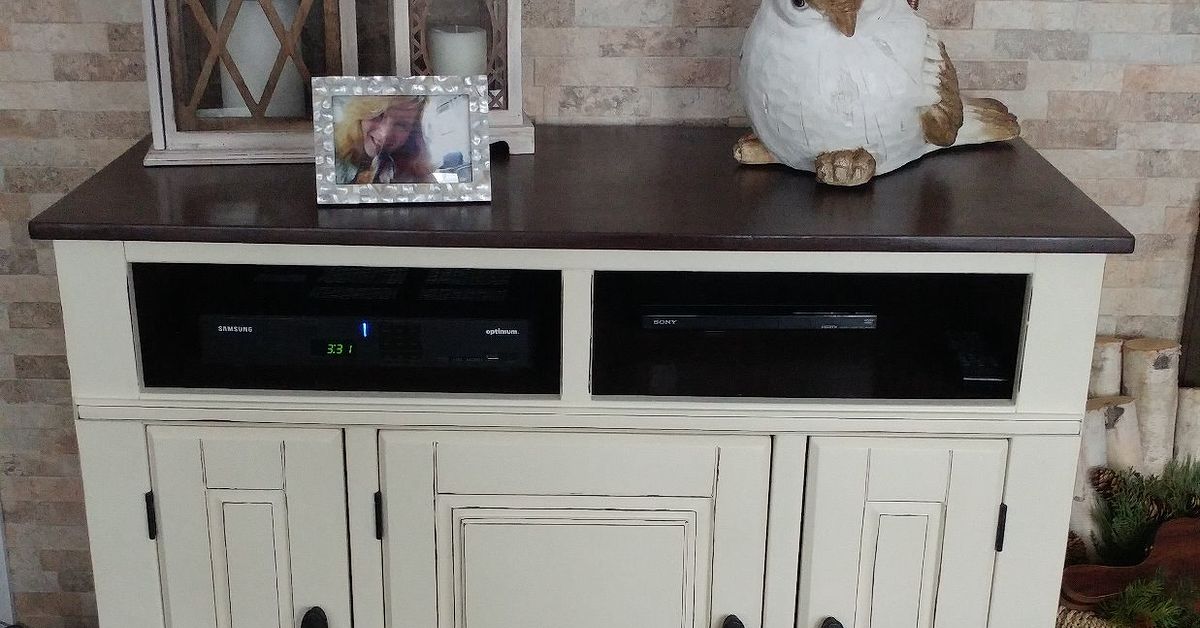
A TV cabinet has a tough job. It holds the television, hides the remotes, swallows mystery cables, stores game controllers, and silently judges the dust bunnies collecting behind the router. After a few years, even a sturdy media console can start looking like it wandered out of a forgotten basement sale. The good news? A TV cabinet makeover with chalk paint can turn that bulky, dated piece into a stylish focal point without requiring professional tools, advanced carpentry skills, or a dramatic home renovation montage.
Chalk paint is popular for furniture makeovers because it creates a soft, matte finish and usually sticks well to wood, laminate, previously painted surfaces, and decorative details. It is especially friendly for beginners because it is forgiving, easy to distress, and less fussy than many traditional furniture paints. That does not mean you should slap it on while eating chips and hope for the best. A beautiful, durable finish still depends on cleaning, light prep, thin coats, proper sealing, and patience.
This guide walks you through how to repaint a TV cabinet with chalk paint from start to finish. You will learn what supplies to gather, how to prepare the surface, how to choose a color, how to paint around doors and shelves, when to wax or topcoat, and how to avoid common mistakes that make DIY furniture look less “custom boutique” and more “garage experiment gone rogue.”
Why Chalk Paint Works So Well on TV Cabinets
A TV cabinet is a perfect chalk paint candidate because it usually has large flat areas, small trim details, doors, shelves, and hardware that can all benefit from a fresh finish. Unlike wall paint, chalk-style paint is designed with furniture and decorative surfaces in mind. It gives an ultra-matte look that works beautifully with farmhouse, coastal, cottage, modern rustic, vintage, and transitional interiors.
It Can Modernize Heavy Furniture
Many older TV cabinets were built when furniture believed bigger was better. Dark cherry, orange oak, black laminate, oversized entertainment centers, and chunky media consoles can make a room feel visually heavy. Chalk paint softens the piece and allows it to blend with current decor. A creamy white TV cabinet can brighten a small living room, while charcoal, sage green, navy, or greige can create a designer-style statement.
It Is Beginner-Friendly
Chalk paint is thicker than many standard paints, so it covers well and drips less when applied carefully. It also accepts brush texture, which means you do not need to obsess over a perfectly sprayed factory finish. If you want a smoother look, a high-quality synthetic brush and foam roller can help. If you want character, visible brush movement and gentle distressing can become part of the charm.
It Makes Old Details Look Intentional
Raised panels, carved trim, beadboard doors, turned legs, and decorative edges all look better once chalk paint settles into the design. Add a clear wax for a soft glow, a dark wax for an aged effect, or a water-based protective topcoat for extra durability. Suddenly the cabinet’s old details look less dated and more “found vintage treasure.” Very convenient, considering the treasure may have been hiding under your television for eight years.
Supplies You Need for a Chalk Paint TV Cabinet Makeover
Before you begin, gather everything in one place. Running around the house looking for painter’s tape with wet paint on your hands is not a project plan; it is slapstick comedy.
Basic Supply List
- Chalk paint or chalk-style furniture paint
- Degreasing cleaner or mild soap and warm water
- Lint-free cloths or microfiber towels
- Screwdriver or drill for removing hardware
- Painter’s tape
- Drop cloth or cardboard
- Fine-grit sanding sponge, usually 180- to 220-grit
- High-quality synthetic paintbrush
- Small foam roller for flat surfaces
- Primer or stain-blocking primer, if needed
- Clear furniture wax, dark wax, polycrylic, or water-based polyurethane
- New knobs, pulls, hinges, or decorative feet, if desired
For a small TV stand, one quart of chalk paint may be enough. For a large entertainment center or cabinet with many shelves and doors, plan for more. Dark colors often cover faster than bright whites, while painting a dark cabinet white may require extra coats or primer to prevent bleed-through.
Step 1: Choose the Right Color and Finish
Color is where the fun starts, but it is also where many DIYers accidentally create a cabinet that fights the rest of the room. Before buying paint, look at your wall color, flooring, sofa fabric, rug, curtain tone, and metal finishes. The TV cabinet should either blend smoothly or contrast intentionally.
Best Chalk Paint Colors for TV Cabinets
Warm white is a safe choice for cottage, farmhouse, and coastal rooms. Soft gray works well in modern spaces and hides dust better than pure white. Navy blue gives a media cabinet a polished, built-in look. Sage green feels calm and current without screaming for attention. Matte black can look sleek and dramatic, especially with brass or leather hardware. Greige is a reliable middle ground when white feels too bright and gray feels too cool.
Smooth, Distressed, or Two-Tone?
A smooth chalk paint finish looks clean and updated. A distressed finish gives the cabinet a vintage feel by lightly sanding edges where natural wear would occur. A two-tone makeover can be especially attractive: paint the body one color and leave the top stained, or paint the exterior dark and the inside shelves a lighter shade. For example, a charcoal cabinet with warm wood shelves can look custom without requiring a custom furniture budget.
Step 2: Remove Doors, Drawers, Shelves, and Hardware
Yes, you can technically paint around hinges and knobs. You can also technically eat soup with a fork. Neither is ideal.
Remove doors, drawers, adjustable shelves, knobs, pulls, and hinges whenever possible. Label pieces as you go, especially if the cabinet has multiple doors that look similar but fit slightly differently. Put screws in labeled bags or tape them to the matching hardware. This small step saves you from the classic DIY finale where you stand in a pile of screws whispering, “Why are there three extra?”
Removing parts lets you paint edges cleanly, avoid hardware buildup, and create a more professional finish. It also makes sanding and sealing easier because you can lay doors flat and work with gravity instead of against it.
Step 3: Clean the Cabinet Like You Mean It
Chalk paint has a reputation for requiring little prep, but “little prep” does not mean “paint over dust, wax, fingerprints, furniture polish, and snack residue from 2017.” TV cabinets attract grime because people touch the doors, stack electronics on top, and hide cables behind them. If the cabinet has lived near a kitchen or fireplace, it may also have grease or soot on the surface.
Wipe the entire piece with a mild degreasing cleaner or warm soapy water. Pay close attention to handles, edges, door corners, and shelf fronts. Rinse with a clean damp cloth if your cleaner requires it, then let the cabinet dry completely. Paint does not like moisture trapped under it. Paint is dramatic that way.
When Cleaning Is Not Enough
If the surface feels slick, waxy, oily, or glossy after cleaning, lightly scuff-sand it. This gives the paint something to grip. Laminate furniture, high-gloss finishes, and cabinets treated with furniture polish may need a bonding primer before chalk paint. If you are painting over dark stained wood, especially red-toned wood, use a stain-blocking primer to prevent tannins from bleeding through your beautiful new finish.
Step 4: Lightly Sand Problem Areas
One of chalk paint’s biggest selling points is that you often do not need heavy sanding. Still, a quick pass with a fine-grit sanding sponge can improve the final result. Sand rough spots, chipped finish, glossy areas, and places where old paint is peeling. You are not trying to strip the cabinet to bare wood. You are simply smoothing bumps and dulling shine.
After sanding, vacuum the dust and wipe the piece with a barely damp cloth. Dust left behind can create a gritty finish. Unless you are going for “desert countertop chic,” remove it before painting.
Step 5: Prime Only Where Needed
Not every chalk paint project needs primer, but some TV cabinets absolutely benefit from it. Use primer if the cabinet is laminate, glossy, very dark, reddish wood, previously oil-painted, smoky, stained, or likely to bleed through. Primer can also help when painting a dark cabinet a pale color.
For laminate or slick surfaces, choose a bonding primer. For stain-prone wood, choose a stain-blocking primer. Let the primer dry according to the product directions, then lightly sand if it feels rough. A smooth primer layer creates a smoother paint layer.
Step 6: Apply the First Coat of Chalk Paint
Stir the paint thoroughly before starting. Chalk paint can be thick, and pigment may settle at the bottom of the can. Use a brush for edges, corners, trim, and decorative grooves. Use a foam roller on flat panels if you want a smoother finish. Work in thin coats rather than one heavy coat. Thick paint may look satisfying at first, but it can leave ridges, slow drying, and chip more easily later.
Brush in different directions if you want a textured, hand-painted look. For a cleaner modern finish, brush or roll in one direction and avoid overworking the paint once it begins to set. Let the first coat dry fully before adding the next. Most chalk-style paints are dry to the touch within about an hour under normal indoor conditions, but humidity, temperature, color depth, and coat thickness can change drying time.
What the First Coat Usually Looks Like
The first coat may look streaky, especially over dark furniture. Do not panic. The first coat is the awkward teenage phase of a furniture makeover. It is not supposed to be the final look. Let it dry, then continue.
Step 7: Add a Second Coat for Full Coverage
Apply the second coat using the same method. For many TV cabinets, two coats are enough. If you are painting white over dark wood or covering a high-contrast surface, a third thin coat may be necessary. Thin, patient layers produce a stronger and prettier result than one gloopy coat that looks like frosting applied during an earthquake.
Between coats, inspect the surface under good lighting. Look for missed edges, paint buildup in corners, and drips underneath shelves. If you find rough spots, lightly sand after the paint dries, wipe away dust, and continue.
Step 8: Distress or Detail the Cabinet
Distressing is optional, but it can add charm to a chalk-painted TV cabinet. Use fine-grit sandpaper to gently rub corners, raised trim, drawer edges, and areas that would naturally wear over time. The key word is gently. A few highlighted edges look intentional. Random aggressive sanding across the front panel can look like the cabinet lost a fight with a raccoon.
For a more custom look, consider painting the back panel a contrasting color, adding peel-and-stick wallpaper inside open shelves, replacing plain knobs with aged brass pulls, or installing cane webbing or decorative mesh in door inserts. Chalk paint provides the foundation, but hardware and styling complete the makeover.
Step 9: Seal the Chalk Paint
Sealing is essential for a TV cabinet because the surface will be touched, dusted, bumped, and used. Unsealed chalk paint has a soft matte finish that can mark or wear faster than sealed paint. The two most common options are wax and clear water-based topcoat.
Option 1: Clear Wax
Clear furniture wax gives chalk paint a soft, velvety finish. Apply a thin layer with a wax brush or lint-free cloth, working it into the painted surface. Wipe away excess wax, then buff after it dries according to the product directions. Wax is beautiful for low- to medium-use furniture and creates a classic chalk-painted look.
Option 2: Dark Wax
Dark wax adds age and depth. It settles into grooves and corners, making trim details more visible. Always use dark wax carefully, and consider applying clear wax first so the dark wax is easier to control. A little goes a long way. Too much dark wax can make your cabinet look less “antique” and more “rescued from a haunted attic.”
Option 3: Water-Based Polycrylic or Polyurethane
A clear water-based topcoat is often the better choice for a hardworking TV cabinet, especially the top surface where remotes, speakers, gaming consoles, and decor may sit. Choose a matte, satin, or ultra-matte finish if you want to keep the chalk paint look. Apply thin coats with a quality synthetic brush or applicator, and avoid overbrushing. Let each coat dry as directed.
Step 10: Let the Finish Cure Before Heavy Use
Dry and cured are not the same thing. Paint may feel dry within hours, but the finish can take days or weeks to fully harden. During this curing period, treat the TV cabinet gently. Avoid dragging electronics across the top, placing heavy decor immediately, or aggressively cleaning the surface. Use felt pads under decorative objects and lift items instead of sliding them.
Once cured, your chalk-painted TV cabinet will be much more durable. It will still appreciate gentle cleaning with a soft damp cloth instead of harsh chemicals. Furniture makeovers are like houseplants: they thrive when you do not attack them with the wrong products.
Styling Ideas After the Makeover
Once the paint has dried and the cabinet is reassembled, style it with intention. A freshly painted TV cabinet can look unfinished if the surrounding cords, clutter, and accessories are ignored.
Hide the Cable Chaos
Use cord clips, cable sleeves, adhesive cable channels, or small baskets to organize wires. If your cabinet has a back panel, consider drilling a neat cord hole with a grommet. This small upgrade makes the whole makeover look more polished.
Balance the Television
If the TV sits on top of the cabinet, keep decor low and simple so it does not block the screen. Try a small stack of books, a ceramic bowl, a plant, or a pair of matching baskets. If the TV is wall-mounted, use the cabinet top for layered art, lamps, greenery, or seasonal accents.
Upgrade the Hardware
New knobs and pulls can completely change the mood. Brass warms up navy, black, and green paint. Matte black hardware looks crisp on white or gray. Glass knobs add vintage sparkle. Leather pulls can make a simple cabinet feel modern and handmade.
Common Mistakes to Avoid
Skipping the Cleaning Step
Grease, dust, and furniture polish can cause paint to resist, streak, or peel. Cleaning is not glamorous, but neither is repainting the same door six times because one greasy fingerprint keeps showing through.
Painting Too Thickly
Thick coats can create brush marks, ridges, long drying times, and weak adhesion. Apply thin coats and build coverage gradually.
Forgetting to Seal
Chalk paint needs protection on furniture that gets regular use. A TV cabinet may not be a dining table, but it still handles dusting, remotes, electronics, and the occasional snack bowl.
Reassembling Too Soon
Freshly painted doors and drawers can stick if reinstalled before the finish has hardened. Give the paint and topcoat enough time before closing doors tightly or placing heavy items on the surface.
Choosing the Wrong Topcoat
Wax looks beautiful but may require maintenance. A water-based topcoat is usually tougher for high-use surfaces. Choose based on how the cabinet will be used, not just how romantic the product label sounds.
Budget-Friendly Upgrade Ideas
A chalk paint TV cabinet makeover can stay affordable, especially if you already own basic tools. Paint and sealer are the main costs, but small upgrades can make the finished piece look much more expensive.
- Add modern hardware for an instant style shift.
- Install peel-and-stick wallpaper on the inside back panel.
- Use wood trim to create faux shaker doors.
- Replace solid door inserts with cane webbing.
- Add short furniture legs to raise a low cabinet.
- Use baskets to hide controllers, remotes, and cords.
- Paint the inside shelves a contrasting color for depth.
For example, an old black TV stand can become a coastal-style media cabinet with warm white chalk paint, brushed nickel pulls, and woven baskets. A dated oak entertainment center can become a moody living room anchor with charcoal paint, brass hardware, and a matte protective topcoat. The structure stays the same, but the personality gets a complete wardrobe change.
Real-World Experience: What a TV Cabinet Makeover Actually Feels Like
The first thing you learn during a TV cabinet makeover with chalk paint is that the cabinet is larger than it looked yesterday. Somehow, once you remove the hardware and start cleaning, every shelf, door, corner, and decorative groove reveals itself like a tiny unpaid intern demanding attention. This is normal. Do not let it scare you. The project feels big at the beginning because preparation is the least glamorous part, but it is also the part that determines whether the finished cabinet looks polished or patched together.
In real-life projects, cleaning usually takes longer than expected. TV cabinets collect a strange combination of dust, hand oils, candle soot, pet hair, and electronic-device grime. The top may seem clean until you wipe it and discover that your cloth has turned a color not found in nature. Spending extra time here pays off. A clean cabinet accepts paint better, and the final finish looks smoother. If there is one experience-based rule worth taping to the wall, it is this: never trust furniture that has been sitting under a television for years. Clean it twice.
Painting the first coat can feel discouraging. Many beginners expect the cabinet to look transformed immediately, but the first coat often looks streaky and uneven. This is especially true when painting a dark brown or black cabinet with white, cream, or pale gray chalk paint. The secret is not to keep brushing the same area until it behaves. Let the first coat dry. Chalk paint improves dramatically with the second coat, and by the third coat, if needed, the cabinet usually starts looking like it has a future and maybe a Pinterest account.
Another practical lesson is that doors are easier to paint when laid flat, but edges still need attention. Paint one side, let it dry, flip carefully, and avoid stacking freshly painted pieces. If space is limited, use painter’s pyramids, small blocks, or a clean worktable covered with a drop cloth. Labeling doors also matters more than people think. Older cabinets are rarely perfectly square, and a door that fits on the left may not close properly on the right. Future you will be grateful for a small piece of tape marked “left door.” Future you is already tired.
Sealing is where patience becomes your best tool. Wax gives a lovely soft finish, but it needs to be applied thinly. Beginners often use too much, which can leave the surface tacky or uneven. A clear water-based topcoat feels more straightforward for many TV cabinets because the top surface gets used often. However, even topcoat needs gentle handling while it cures. The cabinet may look ready for speakers, gaming consoles, books, candles, and a decorative bowl full of remotes, but give it breathing room first. Place items back slowly and use pads under anything heavy.
The most satisfying moment comes after the hardware goes back on. New pulls or knobs can make the painted cabinet feel truly finished. It is surprising how much a small brass handle or matte black knob can change the entire piece. Once the TV is back, cords are tucked away, and the shelves are styled, the room feels cleaner and more intentional. The best part is that the makeover does not just save money; it saves a useful piece of furniture from being discarded. That is a win for your home, your budget, and the cabinet, which frankly was just waiting for someone to believe in it again.
Conclusion: A Fresh Cabinet Without Buying New Furniture
A TV cabinet makeover with chalk paint is one of the most approachable ways to refresh a living room, family room, bedroom, or media area. The project does not require expert-level skills, but it does reward thoughtful preparation. Clean the piece well, remove hardware, sand problem areas, prime when necessary, apply thin coats, seal the finish, and allow time for curing. These simple steps can turn a dated cabinet into a custom-looking media console that feels right at home with your current decor.
Whether you choose warm white, deep navy, sage green, matte black, or soft gray, chalk paint gives old furniture a second life. Add new hardware, hide the cords, style the shelves, and suddenly your TV cabinet is no longer the awkward storage box under the screen. It becomes part of the room’s design. And all it took was paint, patience, and the willingness to ignore that tiny voice saying, “Maybe we should just buy a new one.” Nice try, tiny voice. We have a brush.