Note: This original DIY guide is written for homeowners who want practical, careful wallpaper repair advice before deciding whether a wall needs a full replacement.
When Wallpaper Starts Peeling, Don’t PanicIt’s Usually Fixable
Wallpaper has a funny way of looking elegant one day and slightly dramatic the next. One loose seam near the window, one sneaky air bubble behind the sofa, and suddenly your beautiful accent wall appears to be auditioning for a haunted-house renovation show. The good news? Most peeling wallpaper, loose seams, curled edges, and air bubbles can be repaired without stripping the entire wall.
Whether you have traditional pasted wallpaper, pre-pasted paper, vinyl wallcovering, or peel-and-stick wallpaper, the repair process comes down to three big ideas: clean the area, use the right adhesive, and press the paper back smoothly without stretching or tearing it. That sounds simpleand it isbut small details make the difference between an invisible fix and a repair that looks like it was performed during a caffeine emergency.
This guide explains why wallpaper peels, how to fix loose seams, how to remove air bubbles, and how to prevent the problem from returning. You will also find practical experience-based tips from real-world repair situations, including what to do when the paper is old, brittle, textured, glossy, or installed in a humid room.
Why Wallpaper Peels, Lifts, or Bubbles
Wallpaper peeling is rarely random. It usually happens because something interferes with adhesion. That “something” might be moisture, dust, old paste, poor wall preparation, too little adhesive, too much adhesive squeezed out during installation, or simple age. Wallpaper is decorative, yes, but it is also a thin material trying to stay married to a wall through humidity, temperature changes, cleaning, sunlight, and the occasional furniture bump.
Common causes of peeling wallpaper
The most common cause is weak adhesive at the seam. Seams are vulnerable because two strips meet there, and if the edges did not receive enough pasteor if paste was wiped away too aggressivelythe paper can curl back over time. Corners, edges near trim, and areas around windows are also frequent trouble spots because they experience more movement, moisture, and handling.
Humidity is another major culprit. Bathrooms, kitchens, laundry rooms, and poorly ventilated spaces can soften wallpaper paste. Once adhesive weakens, air slips behind the paper. That small opening grows into a bubble or loose seam, and before long, the wall looks like it has developed a tiny paper mustache.
Why air bubbles appear under wallpaper
Air bubbles form when air, dust, debris, or moisture becomes trapped behind the wallpaper. Sometimes bubbles appear shortly after installation because the paper was not smoothed properly. Other times, they show up months later when humidity loosens the adhesive around a tiny speck of dirt or an uneven patch of wall.
The repair method depends on what is inside the bubble. If it is only air, you can usually release it and re-adhere the paper. If there is debris underneath, you may need to make a tiny slit, remove the object with tweezers, add adhesive, and smooth the area flat.
Tools and Materials You’ll Need
Before repairing wallpaper seams or bubbles, gather the right tools. You do not need a contractor’s truck or a belt full of gadgets. A small, tidy repair kit is enough for most jobs.
- Wallpaper seam adhesive or wallcovering repair adhesive
- Small artist’s brush or narrow adhesive applicator
- Seam roller or wallpaper smoothing tool
- Sharp utility knife, craft knife, or razor blade
- Glue syringe for bubbles
- Clean sponge or microfiber cloth
- Warm water
- Tweezers for removing debris
- Painter’s tape, if needed to protect nearby trim
- Hair dryer for stubborn vinyl or curled seams
Use wallpaper seam adhesive instead of regular school glue, craft glue, or random mystery adhesive from the junk drawer. Wallpaper adhesives are designed to bond paper or vinyl to walls while drying clear and allowing cleanup with water. The right product gives the repair a better chance of staying flat rather than becoming a glossy, crunchy reminder of impatience.
How to Fix Loose Wallpaper Seams
Loose seams are one of the easiest wallpaper problems to repair when the paper is still in good condition. The key is to work gently. Pulling too hard can stretch, crease, or tear the wallpaper, especially if it is older paper or has a delicate printed surface.
Step 1: Gently lift the loose edge
Start by lifting the loose seam only as far as it naturally comes away from the wall. Do not force it. Your goal is to expose the back of the wallpaper and the wall surface beneath it without creating a larger repair. If the seam is brittle, warm it slightly with a hair dryer on a low setting. Keep the dryer moving and avoid overheating the paper.
Step 2: Clean away dust and dried paste
Use a clean, slightly damp cloth to remove dust, grit, and loose adhesive from the wall and the back of the paper. If the old paste is lumpy, carefully scrape away only the loose bits. Let the area dry before adding new adhesive. New glue does not bond well to damp grime, which is also a solid life lesson.
Step 3: Apply wallpaper seam adhesive
Using a small artist’s brush or a precision nozzle, apply a thin, even layer of wallpaper seam adhesive behind the lifted edge. Avoid overloading the seam. Too much adhesive can ooze out, stain delicate wallpaper, or create a raised ridge. The goal is full coverage, not frosting a cupcake.
Step 4: Press the seam back into place
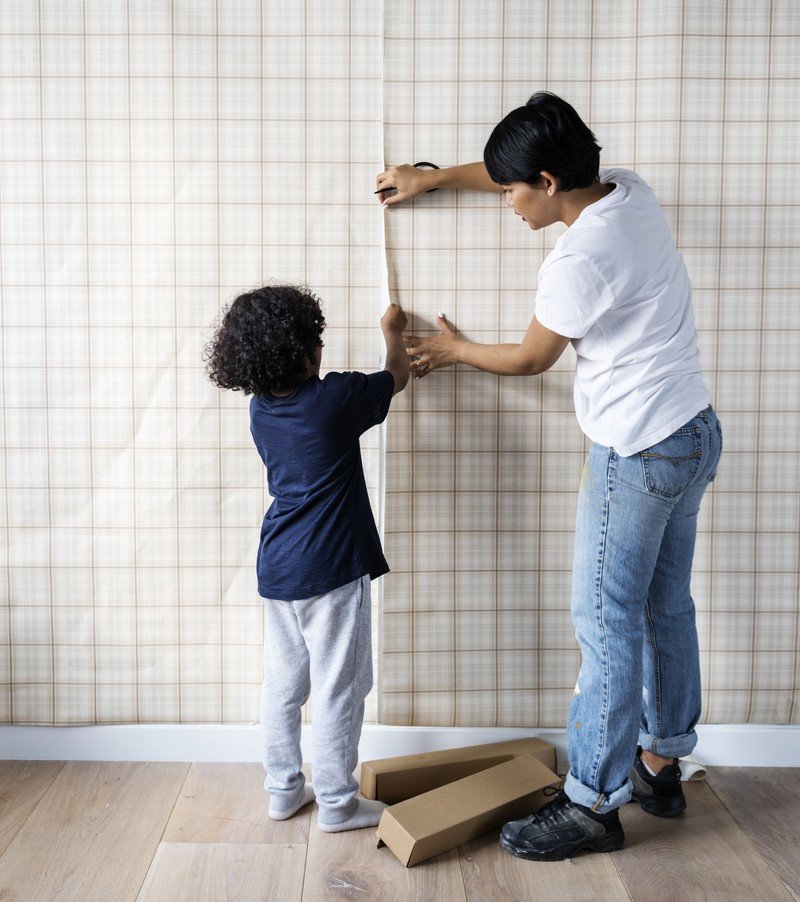
Carefully align the wallpaper pattern before pressing the seam down. Start where the paper is still firmly attached and work outward toward the loose edge. This helps push air out instead of trapping it underneath. Use a seam roller with light to moderate pressure, moving along the seam rather than grinding across it.
Step 5: Wipe away excess adhesive
Use a clean damp sponge to wipe away adhesive that squeezes out from the seam. Blot gently instead of scrubbing. Scrubbing can damage ink, texture, or delicate finishes. After wiping, use a dry cloth to remove remaining moisture.
Step 6: Let the seam dry undisturbed
Allow the repair to dry according to the adhesive manufacturer’s instructions. Avoid touching, cleaning, or pressing the seam repeatedly while it cures. If the edge wants to lift, a small piece of low-tack painter’s tape can hold it temporarily, but test first in an inconspicuous area to avoid pulling off the wallpaper surface.
How to Fix Wallpaper Air Bubbles
Air bubbles require a slightly different approach. You need to release trapped air, add adhesive, and flatten the paper without leaving a visible cut. The best repair is small, patient, and precise.
Step 1: Press the bubble lightly
Before cutting, press the bubble with your finger. If it feels hollow and soft, it is probably trapped air. If you feel a bump or hard speck, there may be debris behind the wallpaper. Knowing the difference helps you choose the right repair.
Step 2: Make a tiny slit
Use a sharp utility knife or razor blade to make a tiny slit in the bubble. Follow the wallpaper pattern if possible so the cut blends in. For small bubbles, a pinhole may be enough. For larger bubbles, a short slit or tiny X-shaped cut may allow better access.
Step 3: Remove debris if needed
If something is trapped under the wallpaper, use tweezers to remove it through the slit. Work slowly. Tugging at the wallpaper can tear the paper or enlarge the cut. Once the debris is gone, the surface should lie flatter.
Step 4: Inject wallpaper adhesive
Fill a glue syringe with wallpaper paste or seam adhesive. Insert the syringe tip into the slit and apply a small amount behind the bubble. Spread the adhesive by gently pressing around the bubble with your fingers or a smoothing tool. The wallpaper should feel lightly coated underneath, not soaked.
Step 5: Smooth from the outside toward the cut
Use a smoothing tool or seam roller to press the bubble flat. Work from the outer edge of the bubble toward the slit so air and excess adhesive escape. Wipe away any adhesive with a damp sponge, then blot dry.
Step 6: Let it dry flat
Leave the repair alone while it dries. If the bubble was large, check it after the adhesive has set. A faint repair line may remain in certain lighting, especially on shiny vinyl or grasscloth-style surfaces, but the wall should look far better than it did when the bubble was waving hello from across the room.
Special Tips for Peel-and-Stick Wallpaper
Peel-and-stick wallpaper is convenient, renter-friendly, and wonderfully tempting, but it can still lift at seams or trap air bubbles. The adhesive on removable wallpaper is pressure-sensitive, which means it needs clean walls, firm smoothing, and the right surface to bond well.
If peel-and-stick wallpaper is lifting at the edges, first clean the wall behind the loose area. Dust, grease, and wall texture can all weaken adhesion. Warm the paper gently with a hair dryer to make it more flexible, then press it back with a smoothing tool. If the adhesive has lost its grip, a small amount of removable-wallpaper-safe adhesive may help, but always test first because some products can make future removal harder.
For bubbles in peel-and-stick wallpaper, try smoothing the bubble toward the nearest edge. If that does not work, prick the bubble with a fine pin and press the air out. Be careful with large cuts; peel-and-stick wallpaper can stretch or wrinkle if pulled too aggressively.
How to Prevent Wallpaper Peeling in the Future
Repairing wallpaper is satisfying, but preventing the same problem from returning is even better. A durable wallpaper job begins before the first strip goes up.
Prepare the wall properly
Walls should be clean, dry, smooth, and sound before wallpaper is installed. Remove dust, grease, flaking paint, and old adhesive. Fill holes and cracks, sand rough patches, and wipe away sanding residue. Wallpaper is not a magical invisibility cloak; if the wall underneath is bumpy or dirty, the finished wall will eventually tell on you.
Use primer when needed
A wallcovering primer can improve adhesion, help wallpaper slide into position during installation, and make future removal easier. Primer is especially useful on new drywall, repaired areas, glossy paint, porous plaster, or walls with inconsistent surfaces.
Control humidity
In bathrooms, kitchens, and laundry rooms, ventilation matters. Use exhaust fans, open windows when possible, and avoid letting steam sit on wallpapered surfaces. If a room regularly feels damp, choose wallpaper designed for that environment and follow the manufacturer’s adhesive recommendations.
Do not overwork the seams
During installation, seams need firm contact, but aggressive rolling can squeeze out too much adhesive. That leaves the seam starved for paste and more likely to open later. Use a seam roller carefully and wipe excess paste gently.
Choose the right wallpaper for the room
Not every wallpaper belongs in every space. Vinyl and moisture-resistant wallcoverings are often better choices for high-humidity areas. Delicate paper may be better suited to bedrooms, dining rooms, or powder rooms with good ventilation.
When Repair Is Not Enough
Sometimes peeling wallpaper is a symptom of a larger problem. If the wall feels damp, smells musty, shows staining, or has widespread bubbling, do not simply glue the wallpaper back down and hope for the best. Moisture problems need to be addressed first. Otherwise, the repair may fail, and the hidden wall may continue to deteriorate.
You may also need replacement instead of repair if the wallpaper is torn, faded, brittle, or shrinking badly at multiple seams. Small repairs are worthwhile when the paper is attractive and mostly secure. But if every seam is curling like a potato chip, replacement may be the cleaner long-term answer.
Common Wallpaper Repair Mistakes to Avoid
Using too much adhesive
More glue does not mean a better repair. Excess adhesive can seep out, stain the surface, attract dirt, or dry unevenly. Use a thin, controlled layer.
Pressing too hard with a seam roller
A seam roller is helpful, but it should not be used like a rolling pin on stubborn pizza dough. Too much pressure can flatten texture, damage printed finishes, or push adhesive out from behind the seam.
Skipping cleanup
Adhesive left on the wallpaper surface can dry shiny or sticky. Wipe it immediately with a damp sponge, then dry the area gently.
Ignoring wall moisture
If humidity or water intrusion caused the peeling, glue alone will not solve the problem. Fix leaks, improve ventilation, and let the wall dry completely before repairing wallpaper.
Cutting bubbles with a dull blade
A dull blade tears instead of slicing cleanly. Always use a sharp blade for small, neat cuts that disappear more easily after smoothing.
Experience-Based Advice: What Actually Helps When Wallpaper Misbehaves
After dealing with wallpaper repairs in real homes, one lesson becomes clear: the wall is usually more important than the wallpaper. People often blame the paper first, but the wall underneath may be dusty, glossy, damp, uneven, or poorly primed. If a seam keeps lifting after repair, look behind it. A clean, dry, slightly absorbent surface gives adhesive something to grip. A chalky, greasy, or sealed surface does not.
Another practical lesson is to repair small issues early. A loose seam that is only one inch long can be fixed in minutes. Leave it alone for six months, and that same seam may curl, collect dust, and become much harder to hide. Wallpaper problems are like laundry: ignoring them rarely makes them smaller.
For older wallpaper, patience matters more than strength. Old paper can become brittle, especially near sunny windows or heating vents. If you yank it back to apply adhesive, it may crack. Warm the area gently, lift only what is loose, and use a tiny brush to work adhesive underneath. The repair might take longer, but the result will look much cleaner.
Pattern matching is another place where experience saves the day. Before pressing a loose seam flat, align the pattern carefully. Once adhesive grabs, shifting the paper can smear glue or stretch the edge. Take a few extra seconds to line up stripes, florals, geometrics, or faux brick. Nothing announces “DIY repair” quite like a vine that suddenly changes direction at the seam.
In humid rooms, ventilation is not optional. Wallpaper in a bathroom can survive, but it needs help. Run the exhaust fan during showers and for a while afterward. Keep splashing away from seams when possible. If the room has no fan and the mirror fogs like a mystery movie, wallpaper seams may eventually complain.
For bubbles, do not cut first unless smoothing fails. Freshly installed wallpaper can sometimes release bubbles as it dries, depending on the material and adhesive. If the wallpaper is already dry and the bubble remains, then use the smallest opening possible. A pinhole, tiny slit, or discreet cut along the pattern is usually better than a bold slash across the design.
A glue syringe is one of those tools that seems unnecessary until you use it once. It lets you place adhesive exactly where it is needed without flooding the area. This is especially useful for bubbles in the middle of a panel, where lifting the paper from an edge would create a much bigger problem.
Finally, know when to stop. If a repair area becomes too wet, too soft, or too fragile, pause and let it dry. Rushing can turn a small bubble into a torn patch. Wallpaper rewards calm hands. Put on good lighting, gather your tools, and work slowly. The goal is not to fight the wall into submission; it is to persuade the wallpaper to behave again.
Conclusion
Peeling wallpaper, loose seams, and air bubbles can look intimidating, but most are manageable DIY repairs. With wallpaper seam adhesive, a sharp blade, a smoothing tool, and a patient approach, you can reattach curling edges, flatten bubbles, and restore a polished look without replacing the entire wallcovering. The secret is simple: clean the surface, use the right adhesive, apply it sparingly, smooth carefully, and fix the causeespecially moisture or poor wall preparationso the problem does not return.
Wallpaper may be dramatic by nature, but your repair process does not need to be. Treat the wall gently, respect the material, and give the adhesive time to cure. Your wallpaper will look smoother, your room will feel fresher, and your wall can stop trying to peel itself into modern art.