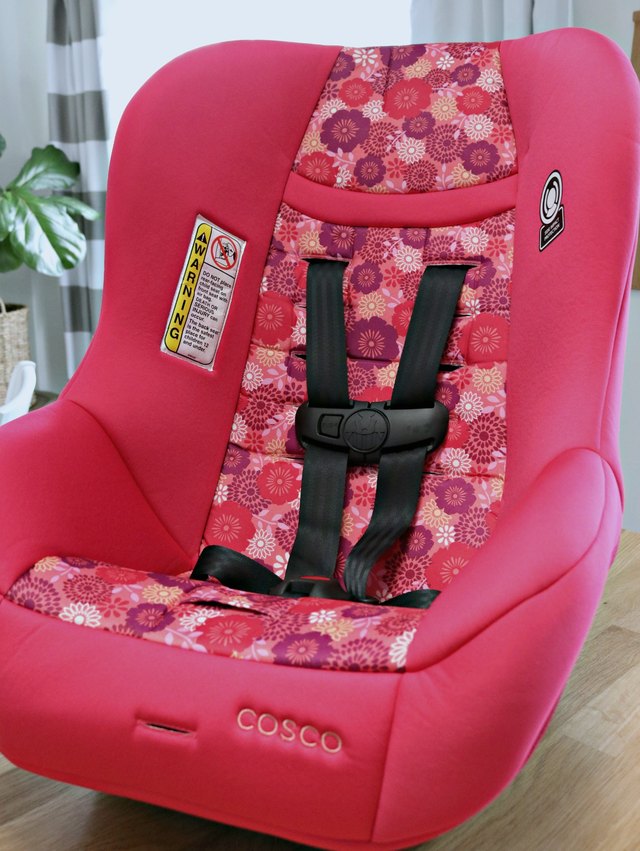
Cleaning a child’s car seat is one of those parenting tasks that sounds simple until you meet the enemy: crushed crackers, mystery stickiness, milk stains, dried mud, and that one raisin that appears to have become part of the seat’s architecture. But here’s the important part: a car seat is not just another piece of fabric-covered baby gear. It is safety equipment. That means the goal is not only to make it look and smell better, but also to clean it without weakening the harness, damaging the shell, or creating a reassembly puzzle worthy of a reality show.
If you are wondering how to clean and sanitize a child’s car seat safely, the golden rule is simple: always follow the car seat manual first. Most manufacturers allow gentle cleaning with mild soap and water, but many do not allow bleach, strong disinfectants, soaking, machine-washing harness straps, steam cleaning, pressure washing, or harsh stain removers. Those products may make a seat look spotless, but they can also damage materials that are designed to protect your child in a crash.
This guide walks you through a safe, practical, step-by-step method for cleaning the cover, harness straps, buckle, plastic shell, cup holders, and base. You will also learn what “sanitize” realistically means for a child car seat, how to handle big messes like vomit or diaper leaks, and what not to do even when your parent brain is whispering, “Just spray everything.”
Why Cleaning a Child’s Car Seat Requires Extra Care
A child’s car seat is built from carefully tested materials: webbing, foam, plastic, padding, metal parts, buckles, labels, and sometimes energy-absorbing components hidden under the cover. Each part has a job. The harness straps must hold firm. The buckle must latch correctly. The shell must stay structurally reliable. The cover must fit back exactly as designed. A cleaning mistake can interfere with one or more of these jobs.
That is why cleaning a car seat is different from cleaning a high chair, stroller, or sofa cushion. With a high chair, you can usually scrub, spray, and rinse with confidence. With a car seat, you need a gentler strategy. Think “careful detail cleaning,” not “laundry day revenge.”
Cleaning vs. Sanitizing vs. Disinfecting: What Parents Should Know
Before grabbing supplies, it helps to understand the difference between three common terms:
Cleaning
Cleaning removes dirt, crumbs, sticky residue, stains, and many germs from surfaces using soap, water, and physical wiping or scrubbing. For most child car seats, cleaning is the main safe method recommended by manufacturers.
Sanitizing
Sanitizing reduces germs to safer levels. In kitchens and child-care settings, sanitizing often involves approved sprays or diluted solutions. However, car seats are special because many sanitizing products may not be approved for the seat’s fabric, harness, buckle, or plastic parts. For a child’s car seat, “sanitize” usually means cleaning thoroughly with manufacturer-approved methods and allowing everything to dry completely.
Disinfecting
Disinfecting uses stronger chemicals to kill germs. It may sound comforting after a stomach bug, but most disinfectants are not automatically safe for car seats. Bleach, alcohol, solvents, abrasive cleaners, vinegar-heavy solutions, and strong sprays can weaken or damage components. Unless your car seat manual specifically allows a disinfecting product for a certain part, do not use it.
Before You Start: Find the Car Seat Manual
The manual is your boss for this project. Not your neighbor, not a random viral cleaning hack, and definitely not a video where someone hoses down a car seat in the driveway like it owes them money.
Look for the manual in the storage pocket on the seat, in your car’s glove compartment, or on the manufacturer’s website. Search by brand and model name if needed. The manual should tell you:
- whether the fabric cover is machine washable or hand wash only;
- what water temperature is allowed;
- whether the cover can go in the dryer or must air dry;
- how to clean harness straps safely;
- how to clean the buckle;
- how to remove and reinstall the cover correctly;
- which cleaners are prohibited.
If the manual is missing and you cannot confirm the correct cleaning method, use the gentlest approach: vacuum, wipe with a damp cloth, use a small amount of mild soap where allowed, and air dry completely.
Supplies You’ll Need
You do not need a professional detailing kit. In fact, simple supplies are usually safer. Gather these items before you begin:
- the car seat manual;
- a vacuum with a crevice attachment;
- soft microfiber cloths;
- a small bowl of warm water;
- mild soap or mild detergent approved by the manual;
- a soft toothbrush or soft detailing brush;
- paper towels for major mess removal;
- a towel for air-drying parts;
- your phone to take “before removal” photos.
That last item matters more than you think. Take photos of the harness, cover, buckle path, shoulder pads, crotch buckle position, and any loops or elastic hooks before removing anything. Reassembling a car seat without photos can turn a 30-minute cleanup into an emotional journey.
Step-by-Step: How to Clean and Sanitize a Child’s Car Seat
Step 1: Remove the Car Seat from the Vehicle
If the mess is large, remove the car seat from the vehicle and place it on a clean towel or outdoor table. Before uninstalling, notice how the seat is installed: seat belt or LATCH, top tether, recline angle, and base position. If you are not confident reinstalling it, take pictures and consider visiting a certified child passenger safety technician afterward.
Step 2: Remove Loose Crumbs and Debris
Turn the seat gently upside down and give it a light shake. You may discover enough snacks to build a small trail mix empire. Then vacuum every crevice, especially around the buckle, cup holders, recline mechanisms, and harness adjuster area. Use a crevice tool, not brute force.
A soft brush can loosen dried crumbs from seams and fabric folds. Avoid sharp tools that could tear fabric or scratch plastic.
Step 3: Remove the Fabric Cover Carefully
Follow the manual to remove the cover. Do not pull aggressively. Many covers are attached with loops, clips, snaps, tabs, elastic bands, or hidden anchors. If something resists, pause and check the instructions. Car seat covers are often designed like tiny engineering projects, not casual slipcovers.
Once the cover is off, check the care label. If machine washing is allowed, use the temperature, cycle, and detergent type listed in the manual. If the manual says hand wash only, hand wash only. Avoid bleach, fabric softener, scent boosters, stain-removal chemicals, and dryer sheets unless your manual specifically allows them.
Step 4: Wash the Cover the Right Way
For machine-washable covers, a gentle cycle with mild detergent is commonly recommended, but always check your seat’s instructions. For hand-wash-only covers, soak only if the manual allows it, then gently agitate the fabric in mild soapy water. Rinse thoroughly so soap residue does not irritate your child’s skin.
Air drying is often safest. Some covers may tolerate low-heat drying, but high heat can shrink or damage fabric and make the cover harder to reinstall. A shrunken car seat cover is not “cleaner”; it is just a new problem wearing laundry perfume.
Step 5: Clean the Harness Straps Without Soaking Them
The harness straps are one of the most important parts of the car seat, so treat them gently. In most cases, harness straps should not be machine washed, soaked, submerged, bleached, ironed, scrubbed aggressively, or treated with harsh chemicals.
To clean them safely, use a soft cloth dampened with warm water and mild soap if the manual allows it. Wipe the straps from top to bottom. For sticky spots, hold the damp cloth on the area briefly, then wipe again. Do not saturate the webbing. Do not twist or wring the straps. Let them air dry completely before using the seat.
If the straps are frayed, stiff, badly stained, moldy, or soaked with a substance you cannot safely remove, contact the manufacturer. Replacement harness parts may be available for some models. If replacement is not allowed or available, the entire seat may need to be replaced.
Step 6: Clean the Buckle and Chest Clip
Buckles are crumb magnets. If the buckle does not click properly or feels sticky, check the manual. Many manufacturers recommend cleaning buckles with warm water only, without soap, lubricants, sprays, or oils. Soap residue or lubricant can interfere with how the buckle works.
Hold the buckle under warm running water only if your manual allows that method. Shake out excess water and let it air dry fully. Test it several times before reinstalling the seat. You should hear a clear click, and the tongues should not slide out unless you press the release button.
Step 7: Wipe the Plastic Shell and Base
The hard plastic shell and base can usually be wiped with a damp cloth and mild soap. Pay attention to cup holders, lower anchor storage areas, recline feet, and belt paths. Use a soft toothbrush for textured plastic and tight seams.
Do not use abrasive pads, bleach, solvents, heavy degreasers, or household disinfectant sprays unless the manual specifically permits them. Plastic may look tough, but strong chemicals can weaken or degrade materials over time.
Step 8: Clean Cup Holders and Removable Accessories
Some cup holders detach and may be hand washed separately. Others are built into the shell. Check the manual before popping anything off. Wash removable cup holders with mild soap and water, rinse, and dry fully before reinstalling.
Only reinstall accessories that came with the car seat or are approved by the manufacturer. Aftermarket padding, strap covers, liners, trays, or head supports may interfere with the way the seat was crash-tested.
Step 9: Dry Everything Completely
Never use a child car seat while it is damp. Moisture trapped in fabric, foam, buckles, or metal areas can lead to odors, mildew, rust, or poor function. Place parts in a well-ventilated area and allow them to air dry. Avoid high heat, hair dryers, clothes dryers, or direct heat sources unless your manual specifically allows them.
Sunshine can help with odors, but do not leave a seat baking outside for days. A few hours of airflow is helpful; extreme heat is not.
Step 10: Reassemble the Car Seat Exactly as Directed
Once everything is dry, reinstall the cover, pads, buckle, harness, chest clip, and any approved accessories according to the manual. Use your photos as a reference. Make sure straps are not twisted, the buckle is in the correct slot, the chest clip is present, and the harness moves smoothly.
After reassembly, pull the harness tight and loosen it several times. Buckle and unbuckle it. Check that the cover does not block the harness path or buckle. Then reinstall the car seat in the vehicle and confirm that it is secure.
How to Handle Big Messes: Vomit, Diaper Leaks, Milk, and Mold
Vomit or Diaper Blowout
Remove solids first with paper towels. Do not smear the mess deeper into the fabric. Remove the cover if allowed and wash it according to the manual. Wipe the shell with mild soap and water. For harness straps, spot clean gently without soaking. If the straps remain contaminated or smell strongly after safe cleaning, contact the manufacturer about replacement options.
Milk or Formula Spill
Milk can smell like it has joined a science fair after a warm day in the car. Clean it quickly. Remove the cover if possible, wash as directed, and wipe the shell. For the harness, use a damp cloth and mild soap if allowed. Let everything dry completely before reinstalling.
Urine
Blot first, then clean the cover according to the manual. Wipe the shell and buckle area carefully. Do not soak the harness. If odor remains, more soap is not always the answer; extra soap can leave residue. Rinse fabric covers thoroughly and air dry fully.
Mold
Mold is tricky because many products used to kill mold are not safe for car seat components. If you find mold on the harness, foam, or inside hard-to-clean areas, contact the manufacturer before attempting deep cleaning. Depending on the severity, replacement parts or a new seat may be the safest solution.
What Not to Use on a Child’s Car Seat
Some cleaning products sound helpful but are risky for car seats. Avoid these unless your specific manual says otherwise:
- bleach;
- rubbing alcohol;
- hydrogen peroxide sprays;
- vinegar-heavy solutions;
- essential oils;
- abrasive powders;
- fabric softener;
- dryer sheets;
- steam cleaners;
- pressure washers;
- carpet extractors on harness straps;
- strong odor-removing sprays;
- lubricants for buckles;
- harsh upholstery cleaners.
The safest product is usually the boring one: mild soap and water. Parenting has many dramatic moments. Car seat cleaning should not be one of them.
How Often Should You Clean a Child’s Car Seat?
A light cleaning once a month is a good habit for many families. Vacuum crumbs, wipe cup holders, check the buckle, and look for sticky spots. A deeper cleaning may be needed after illness, food spills, beach trips, muddy shoes, or long road trips.
It is also smart to inspect the seat during cleaning. Look for frayed straps, cracked plastic, missing labels, damaged foam, rust, loose parts, or a buckle that does not click reliably. Cleaning time can double as safety-check time.
Quick Safety Check After Cleaning
Before your child rides again, run through this checklist:
- The cover is fully dry and correctly attached.
- The harness straps are dry, flat, and not twisted.
- The chest clip is in place and works correctly.
- The buckle clicks and releases properly.
- The harness tightens and loosens smoothly.
- No unapproved accessories were added.
- The seat is installed tightly in the vehicle.
- The recline angle is correct for your child’s age and seat type.
- The top tether is used when required for a forward-facing seat.
If anything seems wrong, do not guess. Contact the car seat manufacturer or a certified child passenger safety technician.
Common Mistakes Parents Make When Cleaning Car Seats
Using Too Much Water
A damp cloth is helpful. A soaked harness is not. Too much water can affect webbing, padding, labels, metal parts, and drying time.
Forgetting How the Cover Goes Back On
Take photos before removing the cover. Future you will be grateful. Future you may even forgive present you for buying yogurt tubes.
Using “Natural” Cleaners Without Checking the Manual
Natural does not always mean safe for car seats. Vinegar, essential oils, and plant-based sprays can still leave residue or affect materials.
Cleaning the Straps Like Laundry
Harness straps are not regular fabric. They are safety webbing. Do not machine wash, soak, bleach, or dry them with heat.
Reinstalling Before Everything Is Dry
Damp parts can develop odors and mildew. Drying is not the boring final step; it is part of the cleaning process.
Extra Experience Section: Real-Life Lessons from Cleaning a Child’s Car Seat
If you have ever cleaned a child’s car seat after a road trip, you already know the experience can feel like archaeology. First layer: goldfish crackers. Second layer: sand. Third layer: something sticky that nobody will admit touching. The job becomes easier when you stop treating the car seat like a washable chair and start treating it like safety equipment with snack damage.
One practical lesson is to clean in stages. Start with dry debris before adding moisture. Vacuuming first prevents crumbs from turning into paste. This is especially useful around cup holders, buckle slots, and the harness adjuster area. A small soft brush can loosen grit without damaging fabric. Parents often want to jump straight to soap, but dry removal saves time and reduces smearing.
Another helpful habit is creating a “car seat cleaning station.” Lay a clean towel on the floor or a table, place small parts in a bowl, and keep your manual nearby. Take photos before removing the cover. Even if you think, “I’ll remember this,” you probably will not remember which elastic loop went under which plastic tab after the washing machine finishes its tiny thunderstorm.
For everyday messes, speed matters. A fresh spill is much easier to clean than a spill that has spent three hot afternoons becoming part of the family. Keep a small cleanup kit in the car: paper towels, unscented wipes approved for quick surface cleanup, a spare towel, and a change of clothes for your child. Do not keep strong cleaners in the vehicle for car seat use. The goal is quick damage control, not a full chemical makeover in the parking lot.
Odor is where many parents get tempted by sprays. The better approach is usually patience, airflow, and correct washing. Wash the removable cover according to the manual, wipe approved hard surfaces, spot clean straps gently, and allow everything to dry completely. If the smell remains in the harness, do not keep adding products. Contact the manufacturer. Some parts can be replaced, and replacement is safer than soaking safety webbing in mystery deodorizer.
Another real-life tip: clean the vehicle seat underneath while the car seat is out. Crumbs and sticky residue often hide under the base. Wipe the vehicle seat, vacuum the surrounding area, and let it dry before reinstalling the child restraint. A clean car seat on a dirty vehicle seat is like putting fresh sheets on a sandbox.
Finally, make cleaning part of a bigger safety routine. While the cover is off, check the expiration date, model label, recall information, harness condition, and buckle function. Look for cracks, fraying, missing foam, or damaged labels. Cleaning is not just about making the seat smell less like old apples. It is also a chance to confirm that the seat is still ready to do its most important job.
Conclusion
Learning how to clean and sanitize a child’s car seat is really about balance. You want the seat fresh, comfortable, and less terrifying when viewed in daylight, but you also need to protect the materials that keep your child safe. The best method is simple: read the manual, remove crumbs first, wash the cover only as directed, spot clean harness straps gently, use mild soap and water where allowed, avoid harsh chemicals, dry everything completely, and reassemble the seat exactly as designed.
A clean car seat feels great. A clean car seat that still works properly is the real win. So go ahead and defeat the crumbsbut let the manual lead the mission.