Note: This article is written for web publishing and synthesizes practical DIY craft methods, upcycling ideas, wire-working basics, home décor styling principles, and candle safety guidance from reputable U.S. home, craft, and fire-safety resources.
Why a Wired Tea Light Holder Is the Tiny DIY Project Your Home Secretly Wants
A wired tea light holder is one of those wonderfully sneaky DIY projects: it looks boutique, costs very little, and makes people say, “Wait, you made that?” with the same suspicious tone they use when someone claims homemade bread is “easy.” The idea is simple: use craft wire to create a decorative frame, handle, wrap, or hanging cradle around a small glass jar or votive cup, then place a tea light inside for a soft, cozy glow.
The beauty of this project is that it does not require advanced tools, a garage workshop, or the ability to identify every item in the hardware aisle. If you can bend wire, twist a loop, and resist the urge to hot-glue your fingers together, you can make a charming tea light holder for a table centerpiece, patio dinner, holiday display, wedding favor, bedroom shelf, or gift basket.
This guide focuses on a beginner-friendly wired tea light holder using glass and craft wire. It also includes design variations, safety notes, styling ideas, and real-world tips from experiencebecause DIY projects always come with one universal truth: the first version teaches you things the instructions politely forgot to mention.
What Is a Wired Tea Light Holder?
A wired tea light holder is a decorative candle holder made by wrapping, shaping, or suspending wire around a heat-safe container such as a glass votive, small mason jar, or recycled candle jar. The wire can be functional, decorative, or both. It may form a handle for hanging, a nest-like base, a spiral design, a geometric cage, or a simple rustic wrap around the rim.
Unlike bulky lanterns, wired holders feel light and handmade. They can lean farmhouse, modern, boho, coastal, industrial, holiday-themed, or “I found this in an expensive lifestyle store and pretended not to check the price tag.” With the right wire color and jar style, the same basic technique can fit almost any décor.
Materials You Will Need
Before starting, gather your supplies. A clean workspace makes the project easier, and it also reduces the chance of losing the wire cutters under a pile of ribbon, twine, and optimism.
Basic Supplies
- Small glass jar, votive holder, or clean recycled candle jar
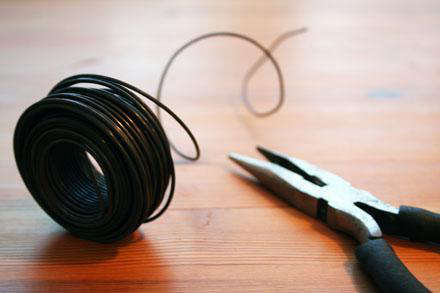
- Craft wire, floral wire, aluminum wire, copper wire, or galvanized hobby wire
- Wire cutters
- Needle-nose pliers or round-nose pliers
- Ruler or measuring tape
- Tea light candle or flameless LED tea light
- Optional: beads, charms, twine, ribbon, sea glass, sand, small stones, or faux greenery
Choosing the Right Wire
For most wired tea light holders, 18-gauge to 22-gauge wire is a good range. Thicker wire is sturdier and better for handles or hanging loops, while thinner wire is easier to wrap and shape into decorative curls. Aluminum craft wire is beginner-friendly because it bends easily. Copper wire gives a warm, elegant look. Galvanized steel wire has a clean industrial feel and can be strong enough for practical hanging designs.
If the holder will be used only as tabletop décor, you can choose wire mainly for appearance. If it will hang, choose stronger wire and test the holder carefully before adding any candle. A falling candle holder is not “rustic charm.” It is a tiny chandelier with poor life choices.
Safety First: Tea Lights Are Cute, But Fire Is Not a Craft Supply
Tea lights may look harmless, but any real candle is still an open flame. Use a sturdy, heat-safe glass holder, keep the flame away from wire decorations, ribbon, paper, dried leaves, curtains, napkins, and anything else that can burn. Place candle holders on a stable, uncluttered surface and never leave a burning candle unattended.
For hanging wired tea light holders, flameless LED tea lights are the safest choice. They provide the glow without the flame, smoke, wax mess, or dramatic “who put this near the curtains?” moment. If children, pets, wind, party guests, or holiday chaos are involved, LED tea lights are strongly recommended.
If using LED tea lights, make sure the battery compartment is secure, especially around young children. Button batteries can be dangerous if swallowed. Treat flameless candles like real household items, not toys.
Step-by-Step: How to Make a DIY Wired Tea Light Holder
Step 1: Clean and Dry the Glass Holder
Start with a small glass jar or votive holder. If you are reusing an old candle jar, remove leftover wax first. Warm water, freezing, or gentle heat can help loosen wax, depending on the jar. Wash the glass with dish soap, remove labels if desired, and dry it completely.
A clean jar lets the candlelight shine better. It also helps wire sit neatly against the glass instead of sliding over old wax residue like it is skating in a craft-store Olympics.
Step 2: Measure the Rim
Wrap a piece of wire loosely around the rim of the jar to estimate the circumference. Add several extra inches so you have room to twist and secure the ends. Cut the wire using wire cutters. Do not use kitchen scissors unless you want to turn them into sad, notched relics.
Step 3: Create the Rim Band
Wrap the wire around the jar rim once or twice. Twist the ends together tightly with pliers. This band becomes the anchor for your handle, decorative loops, or hanging structure. Keep it snug, but do not squeeze so hard that the glass feels stressed.
If your jar has a lip or threaded top, use that shape to your advantage. The wire can sit under the lip, making it less likely to slide upward. For smooth-sided votive cups, add a second wrap for grip.
Step 4: Make the Handle
Cut a longer piece of wire for the handle. A good starting length is 10 to 14 inches, depending on the size of the jar and how tall you want the arch. Attach one end of the handle wire to the rim band by looping it under the band and twisting it several times. Repeat on the opposite side.
For extra strength, double the handle wire by folding a longer piece in half and twisting it lightly before attaching it. This creates a sturdier handle and adds a handmade texture.
Step 5: Add Decorative Wire Details
Now comes the fun part. You can wrap thinner wire around the body of the jar in loose spirals, create small curls with round-nose pliers, or thread beads onto the wire before wrapping. Keep decorations away from the open top of the jar if you plan to use a real tea light.
Try one of these styles:
- Rustic: galvanized wire, twine, and a clear mason jar
- Boho: copper wire, small beads, and amber glass
- Coastal: silver wire, sea glass, sand, and white stones
- Holiday: gold wire, red ribbon, faux pine, and LED lights
- Modern: black wire with a clean geometric wrap
Step 6: Stabilize the Bottom
Add a shallow layer of sand, salt, rice, pebbles, or small glass stones inside the jar. This helps hold the tea light in place and adds visual texture. It also raises the candle slightly, which can improve the glow.
If using a real candle, avoid flammable fillers. Sand and small stones are better than dried moss, paper confetti, or anything that looks like it would lose a fight with a spark.
Step 7: Add the Tea Light
Place a tea light or LED tea light in the center of the jar. Check that the flame area is clear. If using a real candle, the wick should sit below the rim of the glass holder, not level with decorations. If using LED, turn it on and enjoy instant atmosphere without searching for matches.
Step 8: Test Before Displaying
Lift the holder gently by the handle and check for slipping, wobbling, or loose twists. If anything moves, tighten the wire with pliers. For hanging displays, test the holder over a soft surface first and use LED tea lights only.
Design Ideas for Different Spaces
For Dining Tables
Make three to five wired tea light holders in different heights and group them down the center of the table. Use matching wire for a cohesive look, but vary the jar shapes to keep the arrangement interesting. Add greenery, linen napkins, or a wood tray for a polished centerpiece.
For Outdoor Patios
Use heavier jars and LED tea lights. Add sand or pebbles inside for weight. Hang the holders from sturdy hooks, shepherd’s hooks, or tree branches only if the wire is secure and the area is protected from strong wind. A cluster of hanging jar lanterns can make a backyard feel magical, even if the lawn chair situation is less than magazine-ready.
For Weddings and Parties
Wired tea light holders make excellent budget-friendly event décor. You can customize them with ribbon colors, name tags, charms, or table numbers. They also work as party favors when paired with flameless tea lights. Guests love taking home something handmade, especially when it does not require watering, refrigeration, or assembly instructions.
For Holiday Decorating
Use gold or copper wire for Thanksgiving and Christmas, black wire for Halloween, silver wire for winter décor, or pastel wire for spring celebrations. Add seasonal fillers carefully: mini ornaments and glass beads are safer than dried leaves near real flames. For greenery, keep it outside the jar and use LED tea lights.
Common Mistakes to Avoid
The first mistake is using a jar that is too thin or not heat-safe. Decorative glass can crack if exposed to heat, so use a votive holder, mason jar, or candle-safe glass container. The second mistake is making the wire handle too loose. A loose handle may look charming until the jar tilts like it has stage fright.
Another common problem is overdecorating near the top. Wire curls, ribbons, twine, and charms should not hang over the opening when a real candle is inside. Keep the design lower on the jar or switch to LED lights. Finally, avoid sharp wire ends. Tuck them inward, flatten them with pliers, or curl them into decorative spirals.
How to Make It Look Expensive
The secret to making a DIY wired tea light holder look high-end is restraint. Choose two or three materials, not twelve. Clear glass with copper wire and white stones looks elegant. Amber glass with black wire feels modern. Frosted glass with silver wire looks wintery and calm.
Consistency also helps. If you are making several holders, repeat one design element across all of them: the same wire color, the same filler, or the same handle shape. Handmade does not have to mean mismatched chaos, unless mismatched chaos is your brand, in which case carry on confidently.
Eco-Friendly Upcycling Ideas
This project is perfect for reusing small jars. Empty jam jars, baby food jars, yogurt jars, spice jars, and old candle jars can all become tea light holders if they are clean and suitable for the purpose. Upcycling gives the project character and keeps useful glass out of the trash.
You can also reuse leftover craft materials. A short piece of ribbon, a few beads from an old bracelet, leftover floral wire, or stones from a previous centerpiece can all find a new life here. The result feels personal, not mass-produced.
of Real-World Experience: What I Learned Making Wired Tea Light Holders
The first time you make a wired tea light holder, you may expect it to take ten minutes. Technically, it can. Emotionally, it may take one cup of coffee, three wire adjustments, and a brief conversation with yourself about why the handle refuses to sit straight. That is normal. Wire has personality. Sometimes that personality is “tiny metal noodle with opinions.”
One of the biggest lessons is that softer wire is better for beginners. Thick steel wire looks sturdy, but it can be hard to shape neatly without stronger tools. Aluminum craft wire, especially in a medium gauge, is much easier to bend into curves, loops, and handles. It gives you room to experiment without making your hands feel like you wrestled a hardware store.
Another useful experience is to build the holder around the jar, not from memory. It is tempting to measure once, remove the jar, twist everything in the air, and assume it will fit. This is how you create a beautiful wire ring for a jar from an alternate universe. Keep the wire on the jar while shaping the rim band, and check the fit as you go.
The handle is where most beginners discover the difference between “decorative” and “functional.” A single thin strand may look cute, but it can sag or twist when lifted. Doubling the wire makes a big difference. Twist two strands together lightly, then attach them to opposite sides of the rim band. The holder instantly feels more intentional and less like it is being held together by hope.
Beads and charms are lovely, but less is usually better. A few beads near the handle can catch the light beautifully. Too many beads can make the holder look busy and may pull the wire out of shape. If the goal is soft candlelight, let the glow be the star. The wire should frame it, not audition for its own reality show.
Testing is also important. Before placing the holder on a table or hanging it outdoors, lift it gently and give it a small shake. If the jar shifts, tighten the rim wrap. If the handle slides, add another securing twist. If anything feels uncertain, use it as a tabletop holder instead of a hanging one.
For atmosphere, LED tea lights are surprisingly useful. Real candles have a beautiful flicker, but LED tea lights are easier for events, patios, kids’ tables, dorm rooms, and anywhere people may forget to supervise a flame. They also let you decorate more freely with ribbon, greenery, paper tags, or seasonal accents.
The best part of making wired tea light holders is how quickly the project becomes personal. One jar might look farmhouse with twine and galvanized wire. Another might look elegant with copper wire and smooth white stones. A third might become a holiday lantern with gold wire and a velvet bow. The same basic technique can create completely different moods.
And yes, your first holder may be slightly crooked. That is not failure. That is handmade charm doing a warm-up lap. By the second or third one, your wire loops will be cleaner, your handle will sit better, and you will start looking at every empty jar in the house like it has a destiny.
Conclusion
A DIY wired tea light holder is a simple, affordable, and creative project that turns basic materials into warm, glowing décor. With a small glass jar, craft wire, pliers, and a tea light, you can create a centerpiece, patio lantern, holiday accent, or handmade gift that feels thoughtful without requiring expert crafting skills.
The key is to choose safe materials, keep the design stable, and match the wire style to your space. Use LED tea lights whenever possible, especially for hanging holders, outdoor displays, events, or homes with children and pets. Once you learn the basic rim wrap and handle technique, you can customize endlessly with beads, stones, ribbon, sea glass, twine, or seasonal details.
In other words, this is the kind of DIY project that gives maximum cozy glow with minimum drama. And honestly, that is the crafting sweet spot.