VHS tapes are tiny time machines with plastic shells, magnetic ribbon, and the emotional power to make an entire family gather around a television saying, “Wait, is that Uncle Dan with hair?” But those tapes are also old. Many have spent decades in closets, basements, attics, garages, and mystery boxes labeled “IMPORTANT” in handwriting nobody admits is theirs.
If your tapes look dusty, smell musty, show mold, squeak during playback, or make your VCR spit them out like a toddler rejecting broccoli, cleaning may help. The trick is knowing what you can safely clean yourself, what belongs in professional hands, and when the best “cleaning method” is actually digitizing the tape before it deteriorates further.
This guide explains how to clean VHS tapes in three practical ways: light exterior cleaning, VCR and playback-path cleaning, and professional or controlled mold cleaning. You will also learn VHS maintenance tips, storage advice, warning signs of damage, and real-world lessons that can save your home movies from becoming magnetic confetti.
Before You Clean: Understand What a VHS Tape Really Is
A VHS cassette looks rugged, but inside it is a long strip of magnetic tape coated with particles that hold the video and audio signal. That strip is thin, delicate, and easily damaged by moisture, friction, heat, mold, dust, and careless handling. The plastic shell protects it, but it does not make the tape immortal.
Unlike a coffee mug, a VHS tape is not something you can scrub until it shines. You are not cleaning a countertop. You are stabilizing a fragile recording medium so it can play safely one more time, ideally for transfer to a digital file. Think of it less like “deep cleaning” and more like convincing a 30-year-old ribbon to survive a final public performance.
Quick Safety Rules for Cleaning VHS Tapes
Before touching any tape, follow these rules:
- Do not play a visibly moldy VHS tape in your good VCR.
- Do not wipe the exposed magnetic tape with paper towels, tissues, or household cleaning cloths.
- Do not spray water, glass cleaner, vinegar, bleach, or all-purpose cleaner into the cassette.
- Do not leave tapes inside a VCR when not in use.
- Do not store VHS tapes in hot attics, damp basements, or direct sunlight.
- Do not force a jammed cassette door open with anger and a screwdriver unless you are prepared for sadness.
If the tape contains irreplaceable footage, such as weddings, baby videos, family interviews, rare performances, or legal records, treat it as valuable. A cheap movie tape from a thrift store can be a practice patient. Your only copy of Grandma dancing at Thanksgiving is not the place to test your “I saw a guy online do this once” technique.
Signs Your VHS Tape Needs Cleaning
VHS tapes and VCRs often show distress in predictable ways. Look for these warning signs before playback:
- White, gray, or fuzzy growth on the tape reels or inside the cassette window
- Dust, crumbs, pet hair, or loose debris inside the shell
- A musty or basement-like odor
- Wrinkled, creased, curled, or uneven tape edges
- Playback with streaks, snow, rolling images, muffled sound, or tracking errors
- A VCR that repeatedly ejects the tape or makes grinding sounds
Important distinction: playback problems are not always caused by the tape. A dirty VCR can make a clean tape look terrible. A damaged tape can make a clean VCR miserable. And a moldy tape can contaminate the machine, turning your VCR into a tiny spore distribution center with buttons.
Supplies You May Need
For basic VHS tape maintenance, keep the toolkit simple:
- Clean microfiber cloths
- Soft anti-static brush
- Compressed air or manual air blower
- Cotton swabs for cleaning the VCR exterior and non-tape parts
- High-purity isopropyl alcohol for VCR parts, not for casually wiping tape
- Nitrile gloves if handling dirty or mold-suspect tapes
- Plastic replacement cases for storage
- Labels or a numbering system for organizing tapes
For moldy tapes, the best supplies are often not household supplies at all. Mold removal from magnetic tape is delicate and may require a dedicated tape-cleaning machine, controlled airflow, careful reel handling, and proper containment.
Way 1: Light Exterior Cleaning for Dusty VHS Tapes
This is the safest DIY cleaning method and the best place to start. Use it for tapes that are dusty on the outside but show no visible mold, no sticky residue, and no signs of severe damage.
Step 1: Inspect the cassette in good light
Hold the VHS tape under bright light and look through the clear window. Check both reels. A little dust on the outside of the shell is normal. White fuzzy patches on the tape pack are not normal. If you see mold, stop and skip to the mold section.
Step 2: Clean the plastic shell
Use a dry microfiber cloth to wipe the outside of the cassette. Pay attention to the top edge, corners, label area, and the sliding front flap. If grime is stubborn, lightly dampen the cloth with water, then wipe only the plastic shell. Do not let moisture run into the cassette.
Step 3: Remove loose dust gently
Use a soft brush or gentle air blower around the shell seams and cassette window. Avoid blasting compressed air directly into the tape pack at close range. High pressure can drive debris deeper into the cassette or disturb the tape wind.
Step 4: Check the reel movement
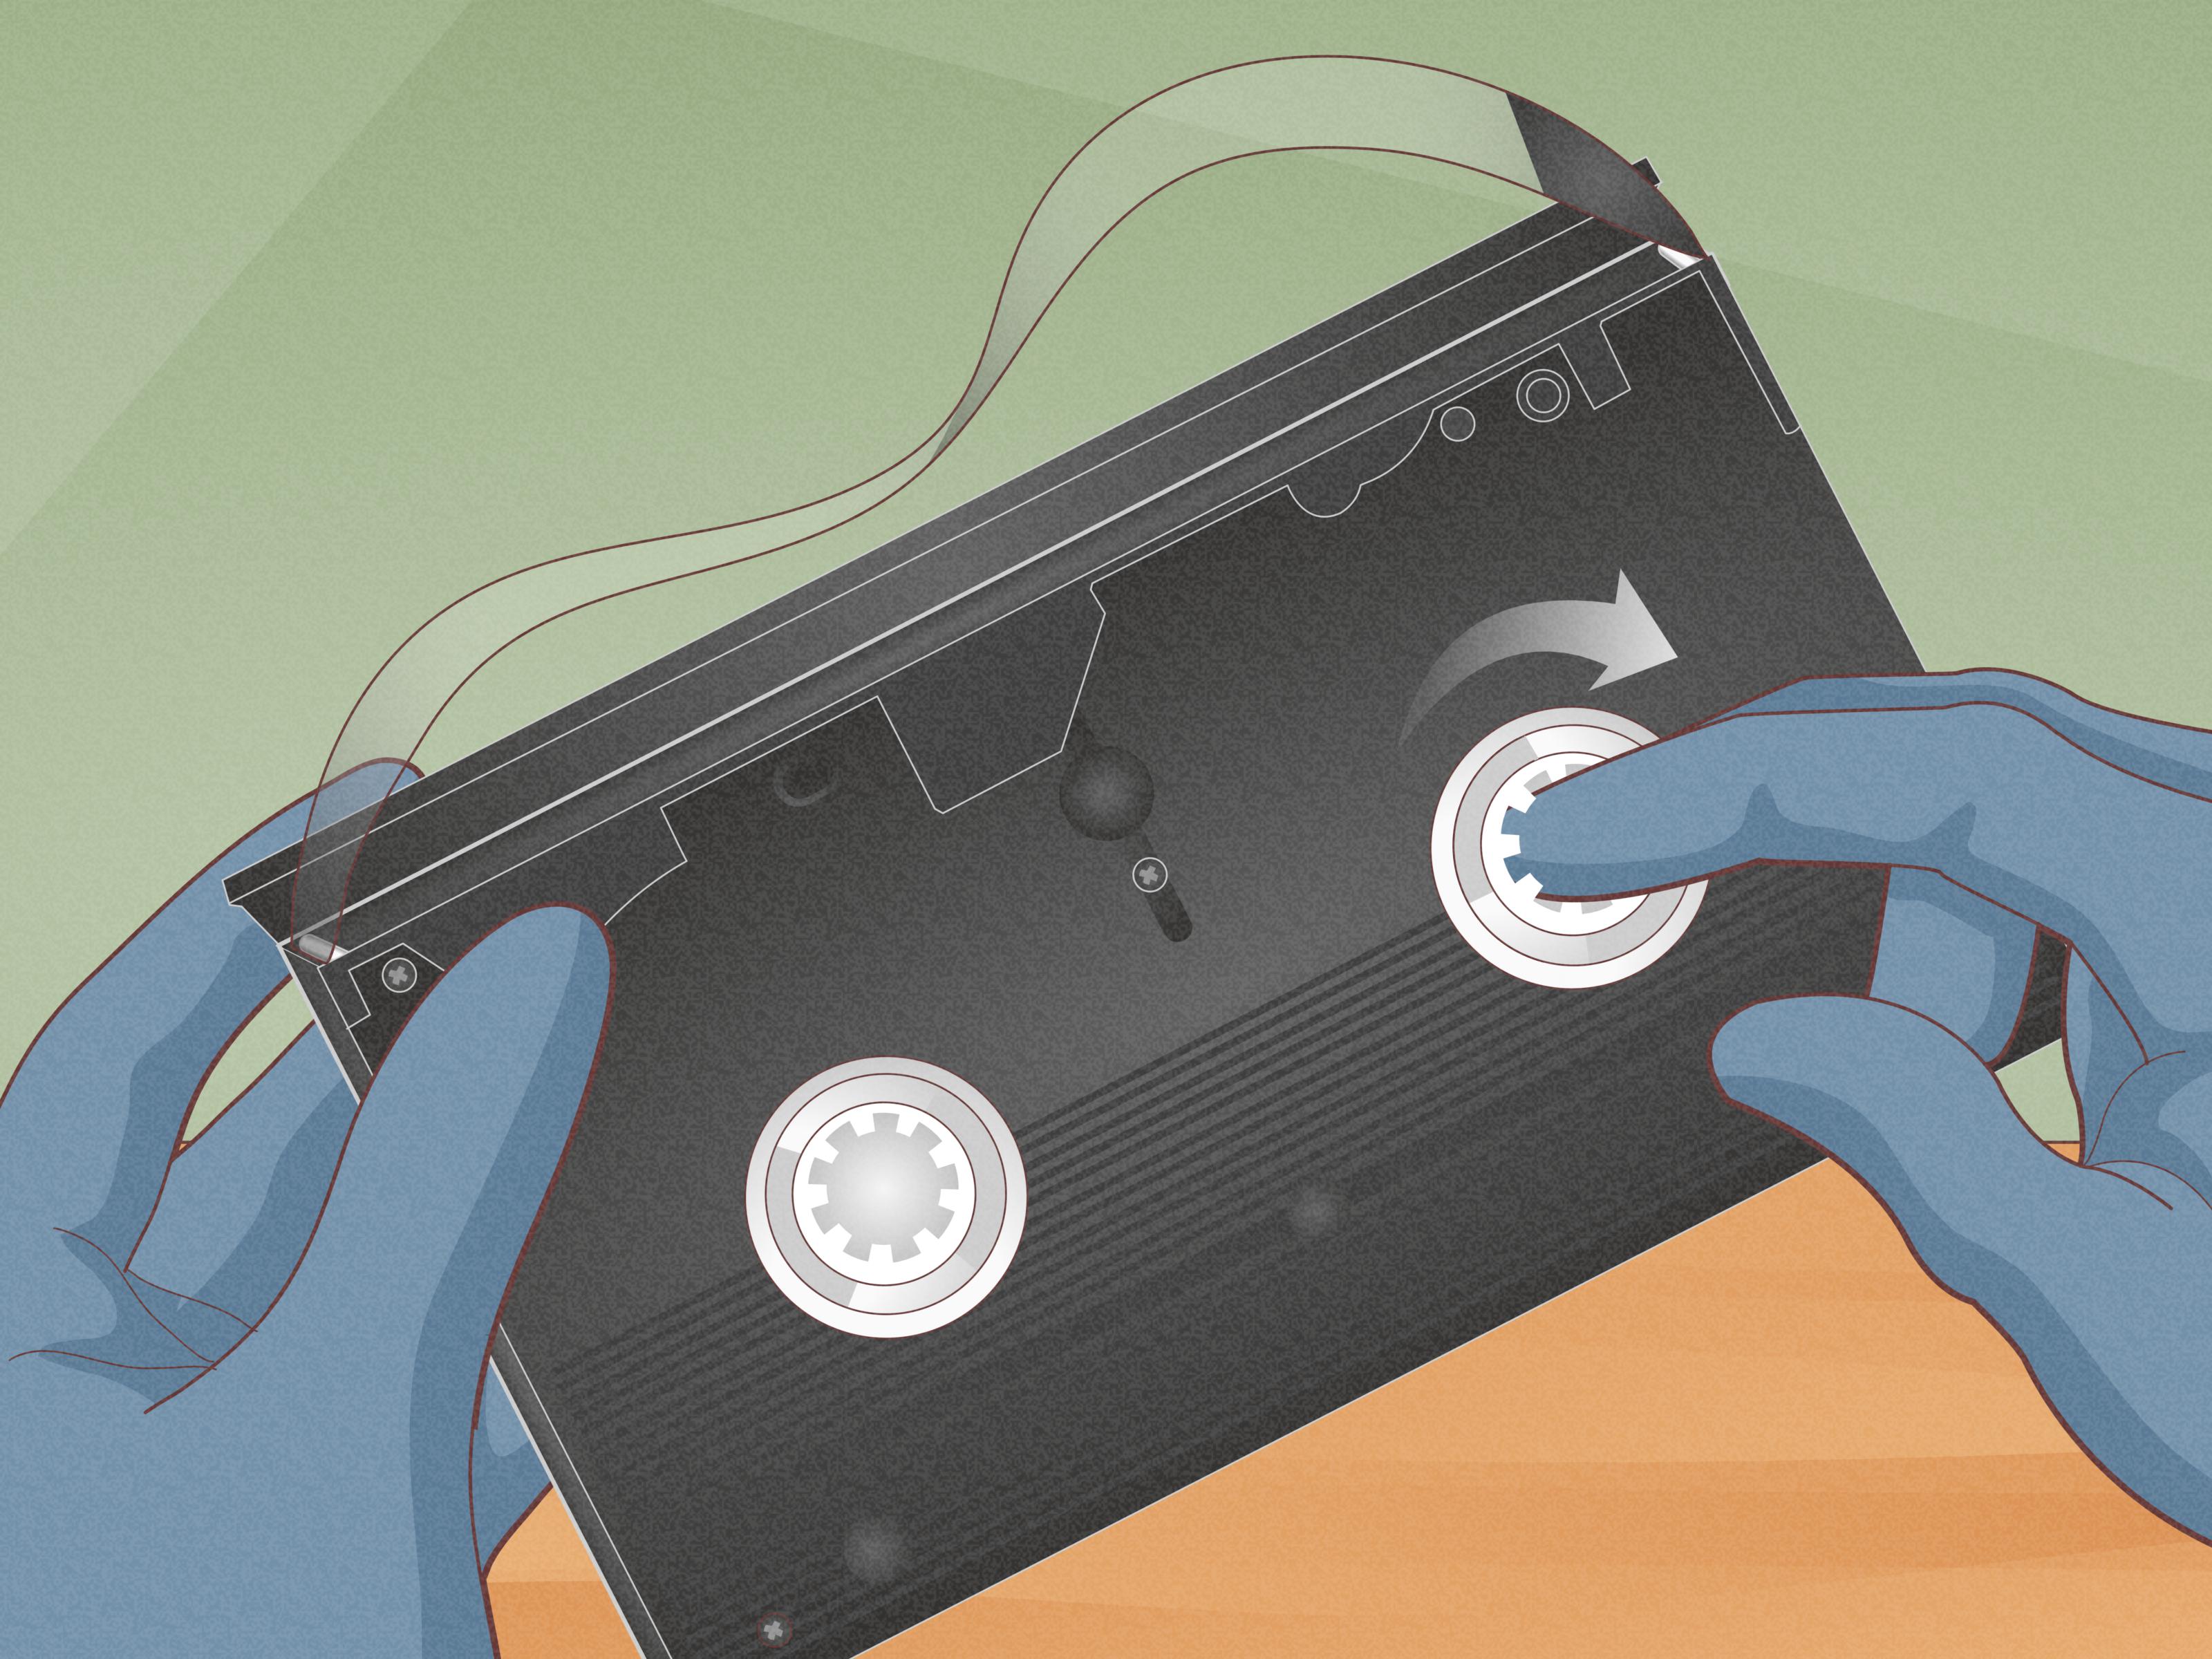
Press the small release button on the side or underside of the cassette only if you know how to handle the mechanism gently. The reels should not be loose, tangled, or jammed. If the tape looks slack, twisted, or bunched up, do not play it. A VCR may chew it like bubblegum with a tragic soundtrack.
Step 5: Test with caution
If the tape appears clean and dry, test it in a known-good VCR. Start with a less important tape first to confirm the machine behaves properly. If playback shows heavy streaks, dropouts, squealing, or repeated tracking problems, stop. The issue may be dirty heads, deteriorating tape, or mechanical trouble.
Way 2: Clean the VCR Before Blaming the Tape
Many people ask how to clean VHS tapes when the real villain is the VCR. A dirty playback machine can create snowy images, audio dropouts, horizontal lines, and tracking errors. Cleaning the VCR is often safer than touching the magnetic tape itself.
Why VCR cleaning matters
Inside a VCR, the tape passes across heads, rollers, guides, capstans, and other moving parts. Dust and oxide residue can collect on these surfaces. If the machine is dirty, every tape you play may suffer. Worse, a contaminated VCR can spread debris from one tape to another.
Basic VCR cleaning steps
First, unplug the VCR and remove any tape. Place the unit on a stable surface. Remove the top cover if you are comfortable doing so and if the unit is out of warranty, which, given that we are talking about VHS, is probably not your biggest concern.
Use compressed air carefully to remove loose dust from the chassis. Avoid spinning parts aggressively with air. For the video head drum, use proper cleaning swabs and high-purity isopropyl alcohol. Hold the swab gently against the drum and rotate the drum by hand. Do not scrub up and down. The tiny head tips are delicate, and breaking them is a fast way to turn a VCR into decorative furniture.
Clean the audio/control head, capstan, tape guides, and accessible rollers with fresh swabs. Use minimal liquid. Let everything dry fully before reconnecting the machine. Then test playback with a nonessential tape.
Should you use a VHS head-cleaning cassette?
Head-cleaning cassettes can sometimes help with mild dirt, but they are not magic. Some abrasive dry cleaning tapes may wear heads if overused. Wet cleaning tapes vary in quality. Manual cleaning, done carefully, is usually more thorough, but it requires patience and a steady hand. If you are nervous, choose a repair shop or a transfer service instead.
Way 3: Moldy VHS Tape Cleaning
Mold is the big one. It is also where casual DIY advice gets dangerous. If you see white, powdery, fuzzy, or spotted growth inside the cassette, do not play the tape in your main VCR. Mold can spread through the tape path and contaminate the machine. Once that happens, every clean tape you insert may be at risk.
How VHS mold happens
Mold usually appears after tapes are stored in damp, humid, poorly ventilated areas. Basements, garages, storage sheds, flood-prone closets, and cardboard boxes near concrete floors are common trouble spots. Heat and humidity accelerate deterioration, while dust gives mold more material to enjoy. Mold is basically the uninvited roommate of neglected media collections.
Can you clean mold from VHS tapes yourself?
Sometimes, but only with the right expectations. Light edge mold on a low-value tape may be handled by experienced hobbyists using a dedicated cleaning setup or a sacrificial VCR modified for cleaning. However, this is risky. The tape can scratch, stretch, shed oxide, or break. The machine can become contaminated. Mold particles can become airborne.
For important tapes, professional cleaning is the safest route. A specialist may open the cassette, remove the reels, clean the tape using controlled tension and appropriate pads, replace damaged shells if needed, and transfer the content soon afterward. The goal is not to make the tape look new. The goal is to make it playable long enough to capture the video.
What not to do with moldy VHS tapes
- Do not wipe the tape surface with household cleaners.
- Do not run the moldy tape through your favorite VCR.
- Do not blow mold around with compressed air indoors.
- Do not store moldy tapes with clean tapes.
- Do not assume a tape is safe because only one edge looks affected.
If you must isolate moldy tapes, place them in separate clean plastic bags or containers, label them clearly, and keep them away from the rest of the collection. Handle them with gloves and wash your hands afterward.
When Cleaning Is Not Enough
Cleaning helps with dust, debris, and some mold situations. It does not reverse every kind of VHS damage. A tape may be beyond simple cleaning if it has severe binder breakdown, sticky residue, flaking magnetic material, creases, snapped tape, warped reels, water damage, or a strong chemical smell.
One especially frustrating issue is sticky-shed-like deterioration, where tape deposits residue on playback equipment. When that happens, playing the tape can damage both the recording and the machine. Another common issue is poor tape pack, where the wound reel looks uneven, ridged, or wavy. Fast-forwarding and rewinding may sometimes improve pack tension, but it can also worsen a fragile tape. When in doubt, stop and ask a preservation or digitization professional.
VHS Maintenance Tips to Keep Tapes Playable Longer
Good storage is the cheapest cleaning method because it prevents problems before they become expensive. VHS tapes age even in perfect conditions, but bad storage makes them age like milk in a hot car.
Store tapes upright
Store VHS tapes vertically in their cases, like books on a shelf. Do not stack them flat in heavy piles. Uneven pressure can stress the cassette shell and tape pack over time.
Use proper cases
Plastic cases protect tapes from dust, bumps, and moisture better than loose cardboard sleeves. Replace broken, dirty, or moldy cases. If original paper inserts are valuable, keep them separately in clean archival folders and note which tape they belong to.
Avoid heat and humidity
Choose a cool, dry, stable location. Avoid attics, garages, sheds, cars, damp basements, laundry rooms, and anywhere near water pipes. Heat can warp plastic and accelerate chemical decay. Humidity invites mold to move in and redecorate.
Keep tapes away from magnets
VHS is magnetic media. Keep tapes away from strong magnetic fields, including large speakers, motors, transformers, and some electrical equipment. Casual household exposure is not always catastrophic, but there is no benefit to testing fate.
Do not leave tapes in the VCR
When you finish watching or transferring a tape, eject it and return it to its case. Leaving a tape loaded in the machine can expose it to tension, dust, mechanical stress, and accidental damage.
Acclimate before playback
If a tape has been stored in a cool room, let it adjust to normal room temperature before playing. Sudden temperature changes can cause condensation, and moisture plus magnetic tape is not a romantic pairing.
Digitize important tapes
Cleaning and storage can buy time, but they do not make VHS permanent. If the content matters, digitize it. A digital file is easier to back up, share, copy, and preserve. Ideally, keep at least two digital backups in different places. Your future self will appreciate not having to hunt for a working VCR in the year 2036.
How Often Should You Clean VHS Tapes?
Clean the exterior of a VHS tape when it is visibly dusty, before shipping it for digitization, or before playback after long storage. Do not repeatedly open, wipe, or manipulate tapes just because they are old. Excess handling creates risk.
Clean the VCR when playback quality drops, after playing a questionable tape, or before beginning a major digitization project. If you plan to transfer a box of family tapes, start with a clean VCR, test with a low-value tape, and inspect each cassette before inserting it.
Common Mistakes That Ruin VHS Tapes
The biggest mistake is playing a moldy or damaged tape “just to see what’s on it.” That curiosity can contaminate a VCR or destroy the tape before transfer. The second mistake is using liquid cleaners on the magnetic tape surface. The third is assuming that rewind, fast-forward, and play are harmless. On a healthy tape, they are normal. On a fragile tape, they can be the final boss battle.
Another mistake is waiting too long. VHS tapes are already aging. Even if they look fine today, the signal may weaken, the tape may shed, and working playback equipment will become harder to find. Cleaning is useful. Preservation is better. Digitization is the escape hatch.
Experience-Based Notes: What Cleaning VHS Tapes Teaches You
Anyone who has sorted through a family box of VHS tapes learns quickly that every cassette tells two stories. One story is on the tape: birthdays, holidays, school plays, weddings, news broadcasts, old sitcom recordings, and a surprising number of shaky camcorder shots of someone’s shoes. The other story is on the outside: where the tape has lived, how it was stored, and whether time has been kind or deeply petty.
A common experience is opening a box and finding that the best-labeled tapes are not always the safest ones. A cassette marked “Christmas 1994” may look perfect, while an unlabeled tape in a cracked sleeve may contain the only surviving footage of a grandparent. That is why organization matters before cleaning begins. Number the tapes, photograph labels, and create a simple spreadsheet or notebook list. Even basic notes like “dusty shell,” “possible mold,” “plays with lines,” or “do not play” can prevent costly mistakes later.
Another lesson is that patience beats bravery. The person who rushes usually ends up feeding a questionable cassette into the nearest VCR and hoping for the best. The patient person inspects first, cleans the shell, checks the VCR, and tests with a less important tape. This slower approach feels less exciting, but VHS preservation is not a sport where points are awarded for dramatic entrances.
People also discover that a clean VCR can make a dramatic difference. A tape that looks snowy and unstable may improve after the playback heads and tape path are cleaned. This does not mean every bad picture is the VCR’s fault, but the machine is part of the system. Old tapes and old players age together, like a cranky married couple. If one is dirty, the other complains.
Mold teaches the hardest lesson. It is tempting to think, “I’ll just wipe that off.” Unfortunately, mold on VHS is not like dust on a bookshelf. It can sit along the tape edges, spread inside the pack, and contaminate playback equipment. The safest experience-based rule is simple: isolate moldy tapes and do not play them in your good machine. If the recording matters, professional cleaning and digitization are worth considering.
Storage habits also become obvious after handling many tapes. Tapes kept upright in plastic cases in a climate-stable room usually look better than tapes stored loose in cardboard boxes in a basement. Labels stay cleaner. Shells crack less often. The reels look more even. The tapes smell less like an abandoned cabin in a thunderstorm. Good storage is not glamorous, but neither is explaining why the wedding video now has fungus.
Finally, cleaning VHS tapes reminds you that the real goal is access. The point is not to keep plastic rectangles forever. The point is to rescue the images and sounds before the format becomes harder to play. Clean carefully, maintain the VCR, transfer important footage, and back up the files. That way, the memories survive even after the last family VCR retires to the electronics drawer in the sky.
Conclusion
Cleaning VHS tapes is less about scrubbing and more about careful preservation. Start with a gentle exterior cleaning for dusty tapes, clean the VCR so it does not sabotage playback, and treat mold as a serious problem that may require professional help. Store tapes upright, cool, dry, and protected from dust, heat, humidity, and magnetic fields. Most importantly, digitize valuable footage while the tape and equipment still cooperate.
A VHS cassette may look like a stubborn plastic brick from another century, but inside it could be the only copy of a voice, a face, a laugh, or a moment nobody can recreate. Handle it gently. Clean it wisely. And please, do not attack it with window cleaner. The 1990s have suffered enough.