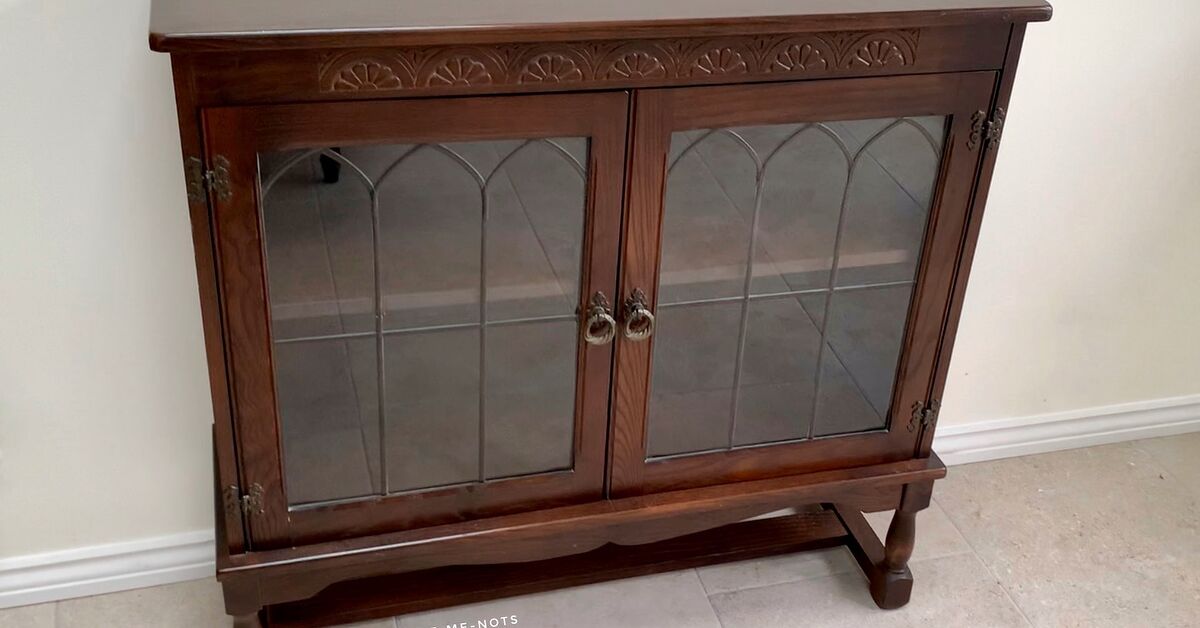
Black-painted furniture can make a thrift-store dresser look tailored, give a plain bookshelf architectural weight, and help mismatched pieces feel intentional. Black is dramatic without being fussy and neutral without being dull. It is not, however, forgiving of careless preparation. A dark finish can spotlight dents, brush marks, dust, and every crumb that enters the room at precisely the wrong moment.
Learning how to paint wood furniture black is mainly about following the right sequence: evaluate, clean, repair, sand, prime, paint, and cure. Do those steps well, and an old table can gain years of useful life. Skip them, and the paint may chip before the new hardware has finished admiring itself.
Why Black Works So Well on Wood Furniture
Black creates contrast and makes furniture feel visually substantial. On traditional pieces, it emphasizes molding, turned legs, and carved details. On modern furniture, it simplifies the silhouette. It also coordinates easily with brass, nickel, wood, ceramic, leather, and nearly every wall color.
The color is particularly useful in rooms containing several wood tones. One black piece gives the eye a resting point while allowing natural wood to remain prominent. A black dresser against a pale wall looks crisp, while a black dining table can anchor an open room without requiring a complete decorating revolution.
Choose the Right Black and Sheen
Some blacks have cool blue undertones; others lean warm, brown, or charcoal. Cool blacks suit white, gray, chrome, and contemporary interiors. Warmer blacks feel softer beside cream, walnut, brass, and natural textiles. Test a sample in daylight and evening light. A sophisticated charcoal at noon can become “bottom of a cave” after sunset.
Matte finishes hide minor defects but mark more easily. Satin is a dependable middle ground: refined, washable, and less revealing than gloss. Semi-gloss suits high-touch pieces, while high gloss can be spectacular only when the surface is exceptionally smooth.
Decide Whether the Furniture Should Be Painted
Pause before covering valuable antiques, collectible midcentury designs, rare veneers, signed pieces, or exceptional original finishes. Paint can reduce value, and removing it later may damage delicate surfaces. Research the maker and construction when a piece may be important.
Identify the material as well. Solid wood, veneer, laminate, particleboard, and MDF require different preparation. Veneer needs gentle sanding, laminate needs a bonding primer, and porous MDF edges may need sealing before they become smooth.
Tools and Materials
- Drop cloths, screwdrivers, and labeled bags for hardware
- Degreasing cleaner, clean cloths, and a vacuum
- Wood filler, putty knife, sanding sponges, and fine sandpaper
- Bonding or stain-blocking primer suited to the surface
- Furniture, cabinet, trim, acrylic enamel, alkyd, chalk-style, or milk-style paint
- A quality synthetic brush, fine-finish mini roller, or sprayer
- An optional compatible clear topcoat
- Gloves, eye protection, and suitable respiratory protection
Read every label. Primer, paint, and clear finish must be compatible, and manufacturer recoat and cure directions take priority over general advice.
How to Paint Wood Furniture Black Step by Step
1. Prepare a Safe Work Area
Choose a ventilated, dust-controlled area with room to walk around the furniture. Protect floors and nearby objects. Avoid strong drafts while paint is wet because moving air carries debris into the finish.
Use extra caution with old painted furniture. Sanding or scraping lead-containing coatings can create hazardous dust. The U.S. Environmental Protection Agency recommends lead-safe practices for questionable surfaces, especially those associated with pre-1978 buildings. Test when appropriate and use proper containment and cleanup rather than dry-sanding first.
2. Remove Hardware and Detachable Parts
Take off knobs, pulls, hinges, doors, drawers, and shelves. Photograph complicated assemblies and label parts. Painting around hardware creates ridges and missed spots; removal produces cleaner edges and allows hardware to be polished or replaced.
3. Clean Before Sanding
Furniture collects wax, polish, grease, hand oils, smoke residue, and cleaning products. Sanding first can grind contamination into the finish and weaken adhesion. Clean with an appropriate degreaser or mild detergent, remove residue as directed, and let the piece dry completely. Do not soak veneer, particleboard, or MDF.
4. Repair Damage
Tighten loose joints before cosmetic work. Fill dents, unwanted holes, deep scratches, and missing veneer with a paint-compatible repair product. Let it harden and sand it flush. Black hides color variation but can emphasize changes in shape and shadow.
5. Sand for Adhesion
Most sound finishes do not need stripping to bare wood. The goal is to remove loose coating, smooth defects, and dull gloss so primer can grip. Use medium grit for rough areas and fine grit for scuffing and final smoothing. Sand with the grain on real wood and use light pressure on veneer.
Hand-sand profiles and edges where power tools can cut through quickly. Vacuum the entire piece, including seams and drawer cavities, then wipe with a lint-free cloth. Black paint remembers every dust particle you forget.
6. Prime for the Surface
Primer improves adhesion, evens absorption, and can block stains or tannins. Use bonding primer on glossy, laminate, or difficult factory finishes. Use a stain-blocking primer on knots, mahogany, cedar, smoke-stained pieces, reddish finishes, or surfaces with unexplained discoloration.
A gray or dark-tinted primer may improve black coverage, but adhesion and stain control matter more than color. Apply a thin coat, let it dry as directed, then inspect it. Spot-prime bleed-through and lightly sand roughness before removing all dust.
7. Apply Thin Coats of Black Paint
Stir the paint thoroughly without whipping in bubbles. Paint details and corners first, then finish broad surfaces while maintaining a wet edge. A synthetic brush handles profiles, a fine-finish mini roller gives even coverage on flat panels, and a properly adjusted sprayer works well on chairs or spindles.
Two thin coats are generally better than one heavy coat. Thick paint can sag, wrinkle, trap brush marks, or remain soft. Follow the label’s recoat time; dry to the touch does not mean ready for another coat, and neither condition means fully cured.
8. Sand Between Coats When Necessary
After the first coat has dried enough to sand, glide fine abrasive over dust nibs, raised fibers, and minor ridges. Avoid cutting through corners and edges. Remove the powder completely before recoating. This brief step often makes the difference between “painted” and “professionally refinished.”
9. Protect High-Use Surfaces
Some cabinet and furniture enamels need no clear coat. Decorative matte paints may benefit from compatible wax or a water-clear topcoat, especially on desks, tabletops, shelves, and nightstands. Test first because a clear finish can change sheen or color; some oil-based products may warm the appearance of true black.
10. Allow the Finish to Cure
Reassemble only after the coating is sufficiently dry and treat it gently until fully cured. Avoid stacking objects, sliding lamps, closing tight drawers, or placing rubber feet on fresh paint. Tighten hardware snugly rather than crushing the new finish.
Common Problems and Practical Fixes
Brush Marks
Use a quality brush, thinner coats, and fewer passes. Stop brushing once paint begins to set. Sand dried marks lightly before recoating or use a fine-finish roller on large flat areas.
Chipping Paint
Chipping usually signals contamination, insufficient sanding, omitted primer, incompatible products, or inadequate curing. Remove loose paint, feather the edges, clean, prime, and repaint. A clear coat cannot rescue paint that never bonded.
Brown or Yellow Bleed-Through
Stop adding color coats and seal the stain with an appropriate blocking primer. Repaint only after the discoloration remains contained.
Patchy Sheen or Dust Nibs
Let the finish dry, sand defects gently, clean thoroughly, and apply one consistent coat from edge to edge. Do not pick debris from partially set paint unless replacing one speck with a crater sounds appealing.
Make Black Furniture Look Intentional
Hardware defines the final personality. Brass and aged bronze feel warm and classic; chrome and nickel look contemporary; wood knobs soften the contrast; matching black hardware creates a streamlined effect. Measure existing hole spacing before buying pulls.
Black also works in two-tone designs. Preserve a walnut top, leave select drawer fronts natural, paint only a table base, or add a muted interior color to a cabinet. Fresh felt pads, polished hinges, lined drawers, and repaired feet help the makeover feel complete rather than merely coated.
Project-Tested Experiences and Lessons from Black Furniture Makeovers
The most useful furniture-painting lessons often arrive immediately after someone says, “That step probably isn’t necessary.” A glossy nightstand may appear perfectly clean and smooth. When black paint is brushed directly over it, the first coat can look surprisingly good. The disappointment comes later, when a fingernail or drawer pull lifts the paint in a neat sheet. The lesson is simple: slick finishes need deglossing and often a bonding primer. Adhesion is not always visible on day one; it reveals itself through use.
Open-grain oak teaches a different lesson. Black paint changes the color but does not automatically erase the grain. Under satin or gloss paint, pores can remain visible as tiny valleys. Some homeowners love that evidence of real wood; others expect a piano-smooth surface. For a refined natural result, clean, sand, prime, and paint without burying every pore. For a flatter contemporary look, use a grain-filling or high-build preparation system and sand it level before painting. Choosing the desired appearance early prevents a great deal of confused sanding later.
A pine bookshelf demonstrates why stain-blocking matters even beneath a dark color. Knots and resinous areas may disappear at first, then return as brown shadows. Spot-sealing visible knots before the main primer coat is easier than correcting them after the shelves are painted and reassembled. The same principle applies to furniture exposed to smoke, oily polish, or unknown finishes: when a piece has a suspicious history, use a primer capable of keeping that history underneath.
Large dresser tops reveal the importance of application technique. Brushing the perimeter and rolling the center can work beautifully, but only when the areas join while wet. Waiting too long creates a visible frame with a different texture or sheen. Working in manageable sections, maintaining a wet edge, and finishing each surface in one direction produces a unified result. On the final coat, unnecessary touch-ups are risky. Black paint rewards decisiveness.
Hardware removal is another lesson commonly learned through avoidable frustration. Painting around pulls seems faster until paint bridges the metal and wood, the edges look rough, and later removal tears the finish. Labeling screws and removing fittings produces cleaner work. A quick photograph of hinge placement can also prevent an evening spent solving a puzzle nobody requested.
Another recurring lesson involves hidden surfaces. Painting drawer sides, backs, and interiors can make a makeover feel luxurious, but extra coating may tighten clearances and cause sticking. Before painting those areas, test how the drawers fit and identify rubbing points. Often the best compromise is to paint the visible drawer fronts, seal only exposed raw edges, and leave sliding surfaces untouched. A beautiful dresser is less impressive when opening a sock drawer becomes competitive weightlifting.
Finally, cure time changes how successful the project feels. A newly painted desk may be dry enough to touch yet remain vulnerable to books, lamps, rubber feet, and enthusiastic coffee mugs. Using it too soon can leave dents or permanent impressions. Follow the product’s cure guidance and return the piece to service gradually. Patience at the end protects all the careful work performed at the beginning.
Conclusion
To paint wood furniture black successfully, treat preparation as part of the finish. Clean before sanding, repair defects, use the correct primer, apply thin coats, and allow adequate curing. Match the paint and sheen to the furniture’s use, and test unfamiliar product combinations before coating the entire piece.
Done carefully, black paint can turn worn or dated furniture into something timeless, adaptable, and surprisingly sophisticated. The transformation requires no showroom budgetonly sound materials, orderly steps, and the strength to leave the paint alone while it dries.
Editorial note: This article synthesizes practical guidance from U.S. resources including Sherwin-Williams, Benjamin Moore, Minwax, Rust-Oleum, Behr, General Finishes, the U.S. Environmental Protection Agency, This Old House, Bob Vila, The Home Depot, The Spruce, and Fine Woodworking. Follow the instructions and safety warnings for the specific products used.