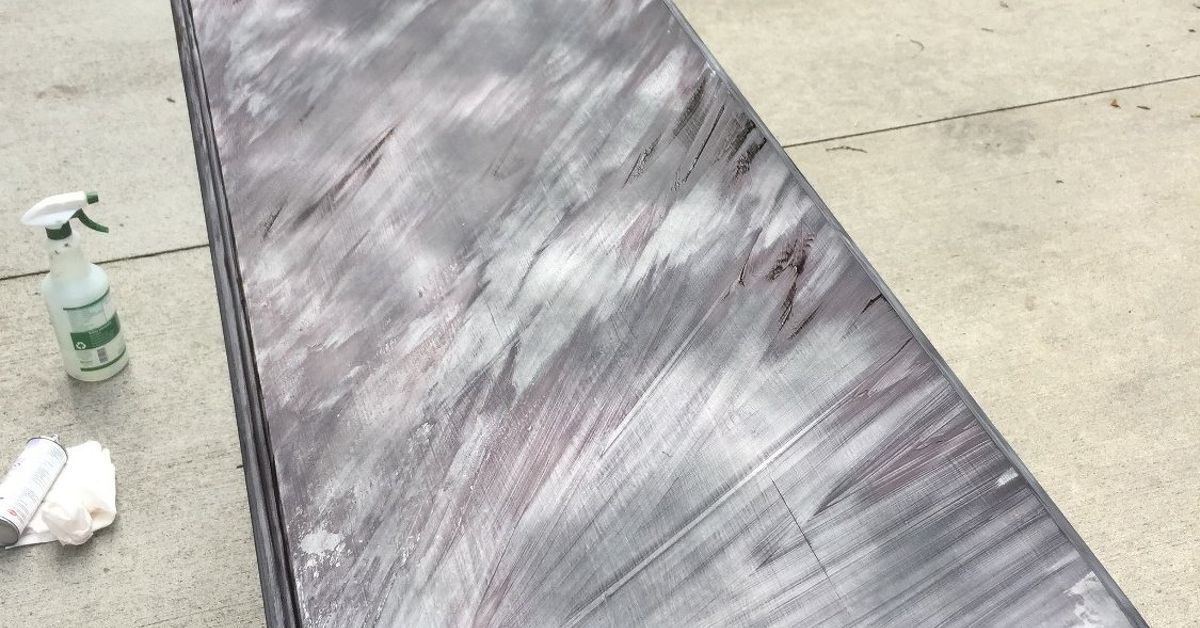
Some furniture pieces quietly ask for a makeover. Others practically throw themselves in front of your sander and yell, “Please do something about this finish.” A battered sofa table with scratches, tired stain, mystery rings, chipped edges, and the unmistakable aura of “someone left me in a garage for seven years” belongs firmly in the second category.
Fortunately, ugly furniture can make an excellent blank canvas. A sofa table rescue project using Unicorn SPiT is especially satisfying because the goal is not simply to make an old table look new again. The goal is to give it a completely different personality. Instead of hiding every imperfection beneath a predictable coat of brown stain, you can use vivid color, visible wood grain, blended tones, and a protective finish to turn a forgettable piece into a genuine focal point.
Unicorn SPiT is a concentrated decorative medium designed for uses that include staining, painting, glazing, and furniture refinishing. On bare wood, it can be diluted and worked with the grain, while water can help keep the color movable during blending. The manufacturer also recommends proper surface preparation and a compatible protective topcoat when durability and moisture resistance are important.
Here is how to take a sofa table from “curb alert” to “where did you buy that?” without turning the project into a three-week emotional crisis involving six sanders and an emergency trip to the hardware store.
Why Rescue an Old Sofa Table Instead of Replacing It?
A sofa table is one of the best candidates for a creative furniture makeover. Its long top provides room for color blending, while the legs, apron, shelf, or drawers offer smaller areas where you can introduce contrast. Unlike a dining table, it usually does not need to survive nightly encounters with spaghetti sauce, hot pans, and children experimenting with gravity.
Older furniture can also have appealing proportions, solid construction, or real wood beneath an unfortunate finish. Even an inexpensive secondhand piece may become visually interesting once the surface is cleaned, repaired, and redesigned.
The important word is inspect. Before attacking a table with 80-grit sandpaper like it personally offended you, determine whether you are dealing with solid wood, veneer, laminate, or a combination. Veneer requires a lighter touch because its decorative wood layer can be thin. Experienced refinishing guides consistently recommend careful sanding, working with the grain where appropriate, and progressing through grits instead of aggressively grinding away material.
What Makes Unicorn SPiT Different for a Furniture Makeover?
Traditional wood stain is usually chosen to make wood darker, warmer, or closer to another familiar wood tone. Unicorn SPiT opens the door to a different kind of refinishing project. Blue, teal, purple, green, red, and other saturated colors can be blended while still allowing the grain and natural variation of bare wood to contribute to the final appearance.
The product can be used more opaquely or diluted for stain-like effects. According to current manufacturer guidance, it can be applied with tools such as brushes, foam pads, cloths, and sprayers, and water can be used during certain techniques to dilute or manipulate the color. Testing the intended color mixture on a similar surface before committing to the entire project is strongly recommended.
That flexibility is exactly what makes it useful for a dramatic DIY sofa table makeover. You are not limited to one flat color. You can create:
- A blue-to-teal coastal blend
- Deep purple fading into black
- Jewel-tone layers with visible grain
- A rustic, distressed multicolor finish
- A dramatic stained top with a painted base
- A subtle wash of color rather than an opaque coating
The only dangerous part is creative confidence. You may begin with one sofa table and suddenly find yourself staring suspiciously at every end table in the house.
Supplies for the Sofa Table Rescue Project
Your exact materials will depend on the condition of the furniture and the look you want, but a practical setup may include:
- Unicorn SPiT colors of your choice
- Clean water and a fine mist spray bottle
- Lint-free cloths or shop towels
- Foam brushes, artist brushes, or staining pads
- Sandpaper in appropriate progressive grits
- A sanding block or random-orbit sander for suitable flat surfaces
- Wood filler if repairs are needed
- A scraper or chemical stripper if the old finish must be removed
- Vacuum and clean cloths for dust removal
- Gloves, eye protection, and appropriate respiratory protection for dusty work
- A compatible protective topcoat
Do not buy every refinishing product in the store “just in case.” That is how a $25 rescue table becomes a $287 table with its own supply-chain department.
Step 1: Inspect the Table Before You Change Anything
Check the Structure First
Color cannot fix a loose leg. Before cosmetic work begins, gently test the table for movement. Tighten appropriate hardware, examine joints, check drawers, and repair structural problems before applying a decorative finish.
Also look closely at the top. If it is veneered, avoid aggressive sanding. If the table is laminate or another nonporous material, the preparation and final appearance will differ from staining bare wood.
Choose What Deserves to Stay
Not every scratch needs to disappear. Minor wear can add character, especially when the final design has a rustic or artistic feel. Deep gouges, broken edges, lifting veneer, and unstable joints are different matters and should be addressed before finishing.
Step 2: Clean Like the Finish Depends on ItBecause It Does
Old furniture can carry grease, furniture polish, wax, dust, smoke residue, and substances of unknown origin. The mystery is charming only until your new finish refuses to adhere.
Clean the piece thoroughly using a method appropriate for its existing surface. Allow it to dry before sanding or refinishing. Current Unicorn SPiT preparation guidance emphasizes removing dirt, grease, grime, oils, and waxy buildup before application. Major furniture-refinishing resources likewise put cleaning near the beginning of the process rather than treating it as an optional victory lap at the end.
Step 3: Decide Whether to Strip, Sand, or Simply Scuff
This is where many furniture projects become unnecessarily complicated. You do not automatically need to sand every molecule of the table into another dimension.
If the goal is to use Unicorn SPiT as a penetrating stain on wood, the color needs access to a suitable bare, porous surface. A heavy existing sealer can block absorption. Manufacturer instructions for staining call for cleaning the surface, exposing the raw substrate, removing sanding dust, and then applying the color.
If the old coating is thick, damaged, or difficult to remove evenly, chemical stripping may be more practical than attempting to erase the entire finish with a sander. Furniture experts differ somewhat on the ideal approach because the right method depends on the piece, but reputable refinishing guidance commonly uses some combination of stripping, scraping, progressive sanding, and careful surface cleaning.
For a typical solid-wood tabletop, you might begin with a grit appropriate to the condition of the finish and then move progressively finer. Avoid skipping directly from extremely coarse paper to very fine paper because the deeper sanding scratches may remain visible after color is added.
When the surface feels smooth and the previous coating has been removed to the degree required by your planned technique, remove the dust thoroughly.
Step 4: Plan the Color Before the Bottle Takes Control
Unicorn SPiT encourages improvisation, but a little planning prevents your table from looking like a unicorn actually did spit on it during a disagreement.
Pick two to four colors that have a reason to be together. For example:
- Ocean look: navy, turquoise, teal, and a small amount of green
- Galaxy look: black, purple, blue, and restrained highlights
- Sunset look: red, orange, gold, and a darker grounding shade
- Moody jewel tones: emerald, sapphire, and deep violet
Create a sample if possible. Wood species, sanding level, dilution, application method, and the protective finish can all influence the final appearance. Manufacturer guidance specifically recommends testing mixtures and sealing samples so the finished resultnot merely the unsealed colorcan be evaluated.
Step 5: Apply and Blend the Unicorn SPiT
Work in Manageable Sections
For a multicolor stained top, lightly misting bare wood is one technique included in the manufacturer’s wood-staining guidance. Color can then be applied and blended along the grain using a brush, foam pad, cloth, or other suitable applicator.
Do not flood the table. Start with control. You can add more color more easily than you can politely ask excess pigment to leave.
Apply the first color to its intended area, then introduce the neighboring color while the surface remains workable. Use a damp brush, cloth, or controlled misting to soften harsh boundaries. Let some areas remain lighter and others more saturated. Variation creates depth.
Follow the Grain When You Want a Natural Flow
Dragging color in the direction of the wood grain usually creates a more convincing stained effect. Swirling randomly can work for abstract designs, but on a sofa table intended to show off the wood itself, long directional movement often looks more intentional.
Traditional furniture-finishing guidance also emphasizes working with the grain during sanding and many stain or finish applications, particularly when visible scratches or brush patterns would distract from the result.
Step 6: Stop Before You “Fix” the Magic
One of the hardest DIY skills is knowing when to stop.
While the surface is wet, you may see a section that appears uneven and immediately start blending it. Then you blend the next section. Then the next. Twenty minutes later, four beautiful colors have become one extremely confused brown.
Step back occasionally. Look at the table from several feet away. Strong variation at close range often becomes attractive movement when viewed in the room.
If a transition truly needs adjustment, work locally instead of reworking the entire tabletop. One advantage of a water-manipulated artistic medium is that the application process can be more forgiving while the surface is still workable. Manufacturer instructions also describe water as a tool for manipulating and correcting the medium during appropriate applications.
Step 7: Let the Color Dry Completely
Do not rush from color application directly to the protective finish. Drying time can vary significantly with technique, material, humidity, temperature, and the amount of product applied. Follow current product instructions and judge the actual condition of the surface rather than relying on impatience disguised as optimism.
Unicorn SPiT guidance notes that the unsealed surface can develop a dull or chalky appearance as it dries. The dramatic richness of the color may return when the appropriate sealer is applied.
At this stage, an optional light distressing or buffing can reveal more grain or soften selected areas, depending on the desired design. Remove all dust before sealing.
Step 8: Seal the Sofa Table for Real-World Use
A sofa table may hold lamps, books, plants, keys, drinks, picture frames, and approximately 14 objects nobody remembers putting there. A decorative surface therefore benefits from protection.
Current manufacturer instructions recommend sealing for greater durability and moisture protection and specify compatible non-water-based coating options for the original product line. Because formulations and product recommendations can change, always follow the directions for the exact Unicorn SPiT product and topcoat you are using rather than assuming that every clear finish is interchangeable.
The sheen also affects the look. A lower-sheen finish can create a quieter appearance, while a glossy finish can intensify visual depth. Whatever finish you select, apply it according to its own label instructions, observe ventilation and safety requirements, and allow sufficient drying or curing time before putting the table back into service.
General wood-finishing guidance also stresses clean surfaces, proper drying between coats, and careful sanding between finish coats when the specific coating system calls for it.
Common Mistakes That Can Turn Awesome Back Into Awful
Over-Sanding Veneer
Once you sand through veneer, the project suddenly develops what professionals call “a problem.” Begin conservatively when you are unsure about the construction.
Skipping the Test Area
The color in the bottle, the color on wet wood, the color when dry, and the color after sealing may not appear identical. A sample board or hidden area can save an entire tabletop.
Using Too Many Colors
More colors do not automatically create more beauty. A controlled palette is easier to blend and usually produces a stronger design.
Trying to Make Every Inch Perfect
Hand-finished furniture becomes interesting because of variation. A perfectly uniform multicolor surface may actually lose the energy that made the project special.
Applying a Topcoat Without Checking Compatibility
Never assume. Check the latest instructions for the decorative medium and the sealer. Test the complete finishing system before using it on an important piece.
How to Style the Finished Sofa Table
After a colorful furniture rescue, let the table be the star. You do not need to cover your newly finished top with a decorative forest.
A lamp, a small stack of books, a ceramic object, and one plant may be enough. If the tabletop has strong blue or green tones, neutral accessories can keep the room from feeling too busy. If the finish is darker and moodier, brass, glass, pale ceramics, or warm wood accessories can provide contrast.
The successful makeover should look intentional rather than apologetic. You are not trying to hide the fact that the table was rescued. You are showing what thoughtful preparation and creative refinishing can do.
Project Experience: The Lessons a Sofa Table Rescue Teaches You
The most valuable experience from a project like this is learning that furniture refinishing rarely follows the perfectly tidy sequence shown in a 30-second transformation video. Real furniture has surprises. One corner absorbs color differently. A scratch you thought was shallow turns out to have its own ZIP code. The tabletop looks fantastic, but one leg seems determined to reject your artistic vision.
That is not failure. That is the project.
The first major lesson is that preparation creates freedom. It sounds boring because nobody posts glamorous photos of themselves vacuuming sanding dust. Yet once the table is clean, stable, and properly prepared, the creative part becomes far less stressful. Instead of wondering whether the finish will stick, you can focus on color placement and blending.
The second lesson is that restraint is surprisingly difficult. When working with vivid colors, the temptation is to keep adding more. A little extra blue becomes a little extra teal. Then the purple bottle starts looking lonely. Soon the tabletop resembles a weather radar during a severe thunderstorm. The better approach is usually to establish one dominant color family and use the others to create movement and contrast.
Another useful experience is discovering how different a project can look at each stage. During sanding, the table may look worse than when you started. After the first color application, you may briefly wonder whether the entire project was an elaborate mistake. When the color dries, it may appear flatter or chalkier than expected. Then the protective finish changes the appearance again.
This teaches patience. You cannot accurately judge every stage as though it were the finished product.
Color blending also rewards working confidently without becoming reckless. Slow, nervous brushing can create fussy transitions, while aggressive overworking can muddy the colors. The sweet spot is controlled experimentation: apply color, blend the edge, step back, and give the design a chance to exist before attacking it with another brush.
One of the most satisfying moments comes when the old defects stop looking like defects. Small scratches become texture. Variations in the grain create unexpected streaks of color. Slight differences in absorption make the top look less manufactured and more like a one-of-a-kind art piece.
The project also changes how you look at secondhand furniture. After successfully rescuing one ugly sofa table, it becomes difficult to walk past a worn wooden piece without mentally refinishing it. That scratched console at the thrift store? Potential. The outdated end table at a yard sale? Potential. The strange little cabinet your relative is threatening to throw away? Unfortunately, also potential.
Perhaps the biggest lesson is that a successful furniture makeover does not require erasing the object’s history. The goal is not to make an old table pretend it just rolled out of a factory. The goal is to give it a new chapter.
A few worn edges can remain. The grain can show through. The design can have areas that are darker, lighter, bolder, or quieter. Those variations are part of what makes a rescued piece more interesting than something mass-produced.
And yes, there may be a moment when you are standing in a garage holding a damp brush, staring at a bright blue streak and questioning every decision that brought you there. Keep going. Furniture rescue is often a strange journey from confidence to panic to experimentation and, finally, to the deeply satisfying realization that the awful little table now looks genuinely awesome.
Conclusion: Give the Ugly Table a Second Chance
A sofa table rescue project using Unicorn SPiT is more than a quick coat of color. The best results come from understanding the furniture, preparing the surface carefully, testing the color plan, building the finish with restraint, and protecting the completed design with a compatible topcoat.
The transformation can be dramatic because the goal is not to recreate a standard factory finish. You can preserve visible grain while introducing blues, greens, purples, or other expressive tones that make the table completely unique.
So before sending that scratched, dated sofa table to the curb, take another look. Under the old finish may be a perfectly good piece of furniture waiting for a little repair, a little color, and possibly a product with the funniest name in the refinishing aisle.
Awful is temporary. Awesome may simply require sandpaper, patience, and a strategically deployed bottle of Unicorn SPiT.