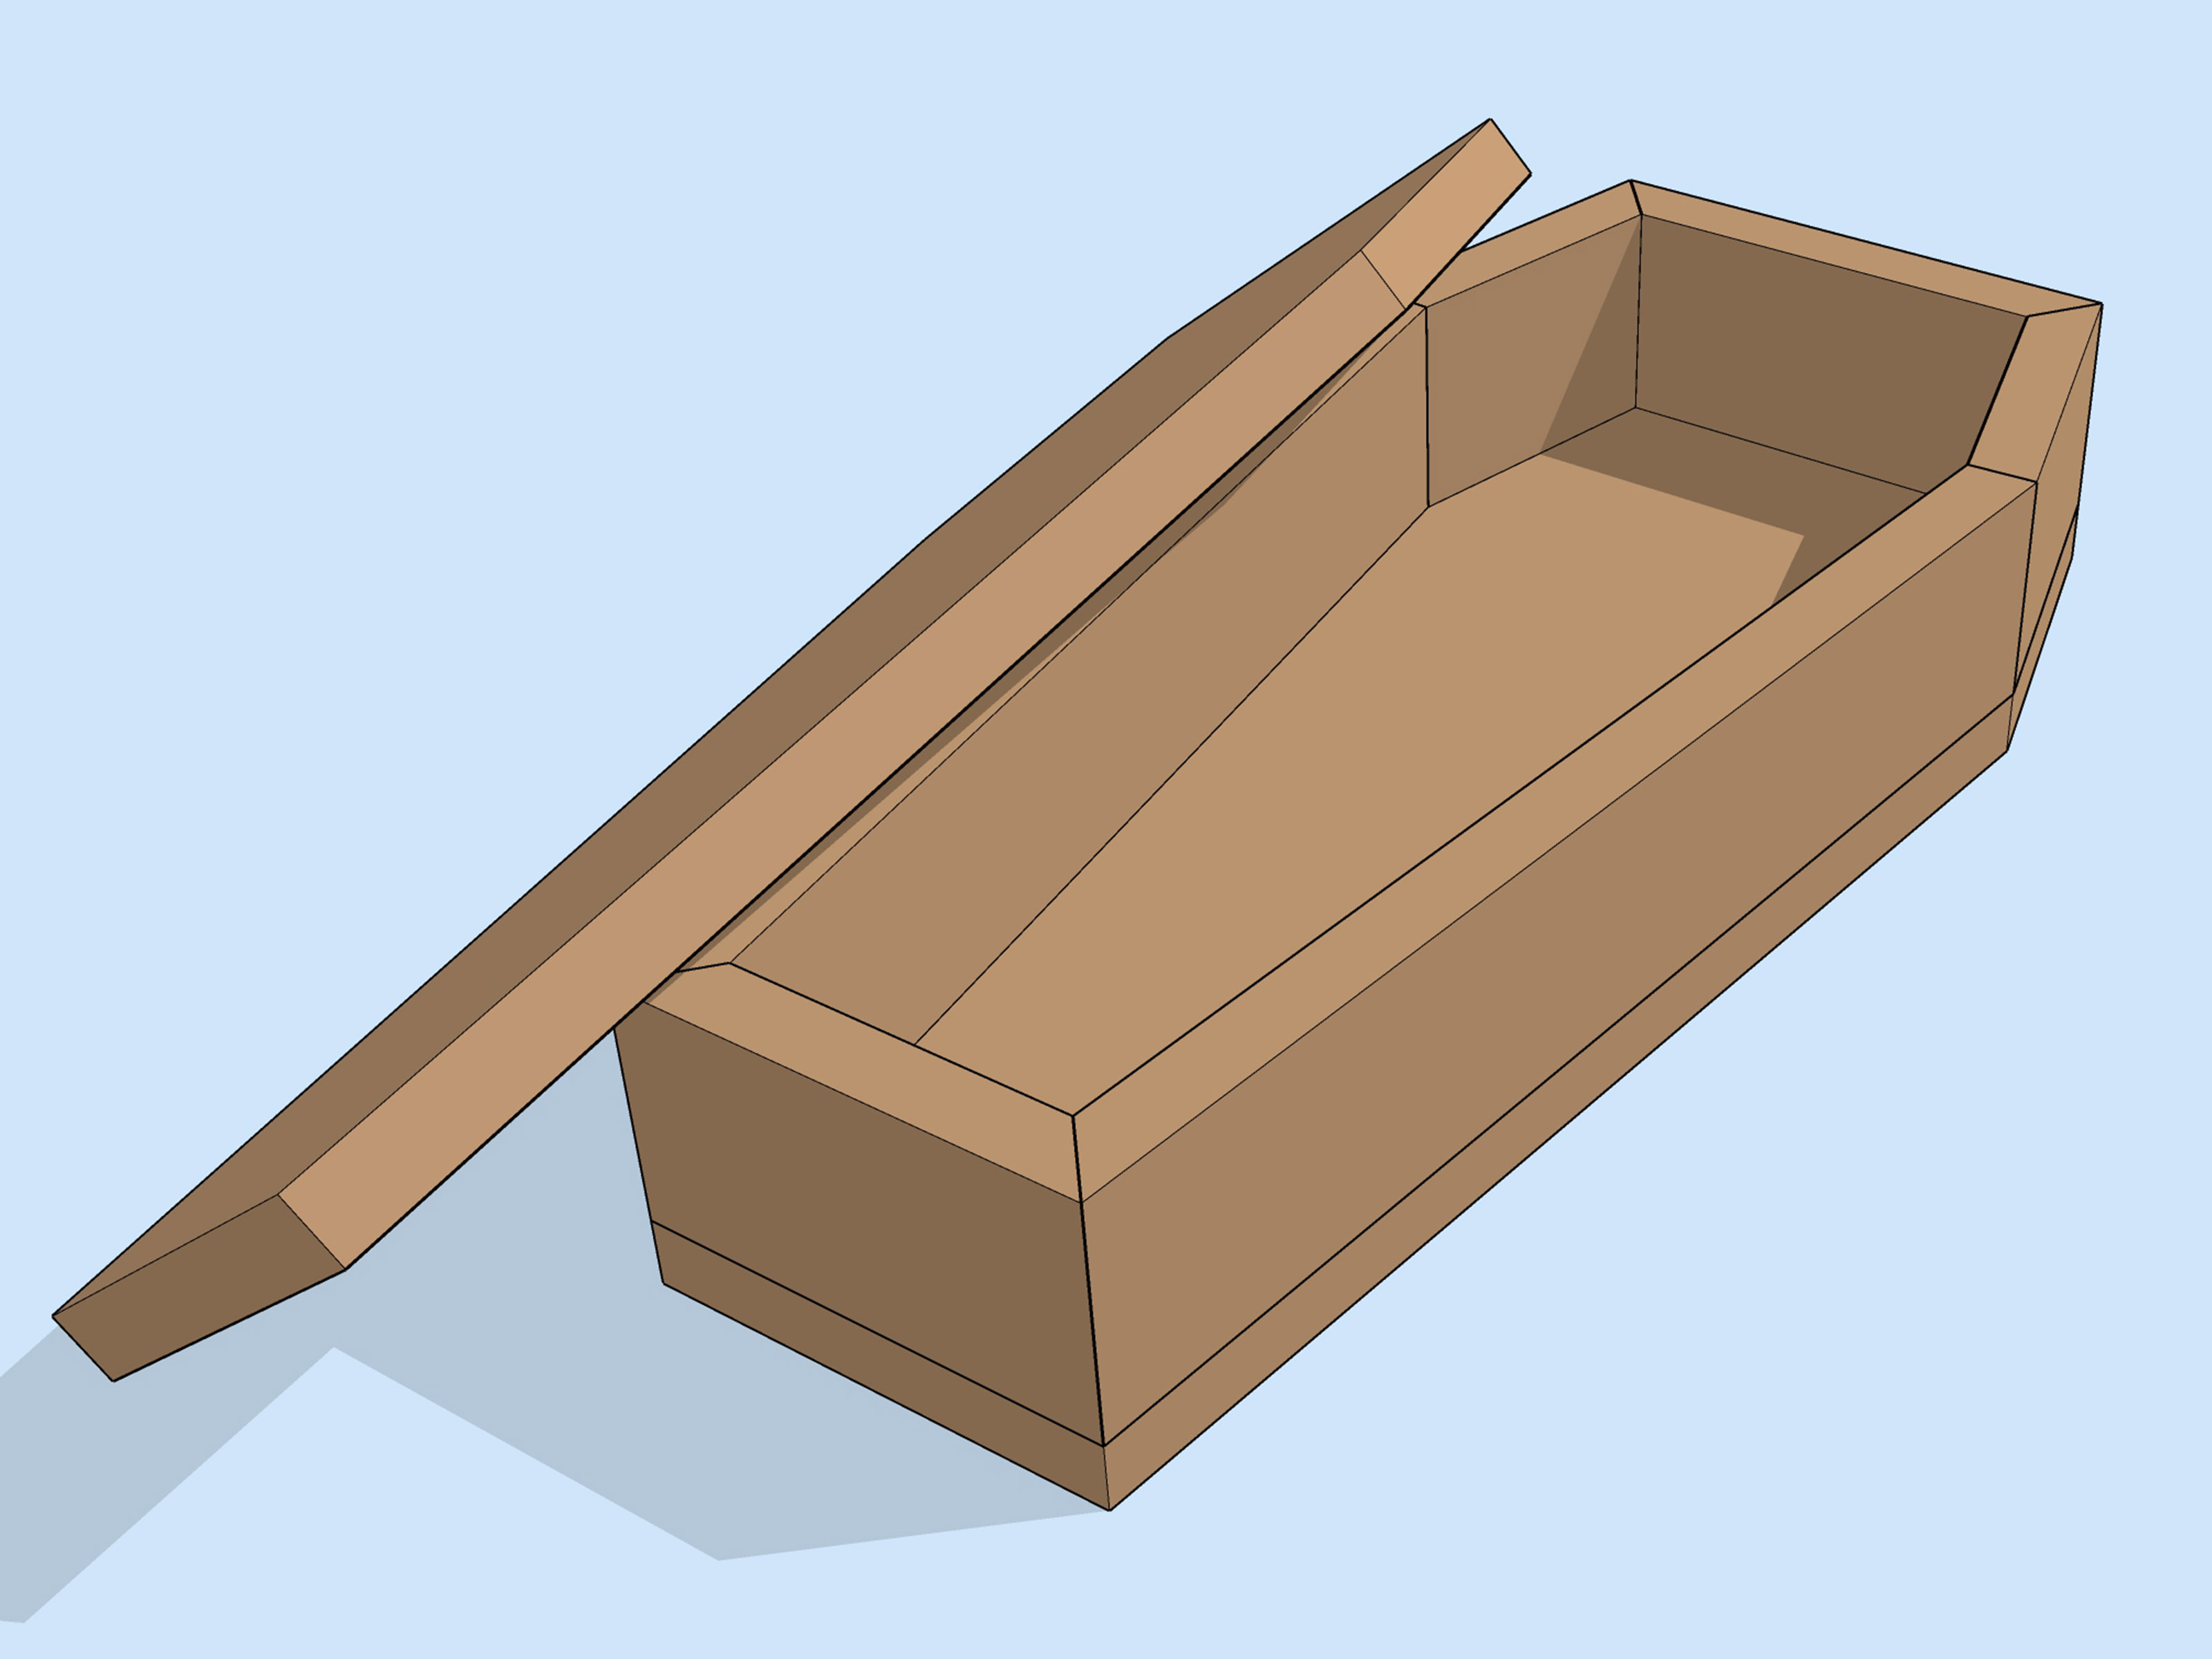
A mini coffin may sound like something a vampire keeps in the glove compartment, but this little woodworking project is surprisingly useful. It can be a Halloween candy box, a gothic jewelry case, a tabletop centerpiece, a spooky bookshelf accent, a prop for a haunted display, or simply a fun beginner woodworking challenge with more personality than another plain rectangle.
The best part? You do not need to be a master carpenter with a workshop that smells like fresh cedar and confidence. A mini coffin is basically a small angled box. If you can measure carefully, cut safely, sand patiently, and avoid gluing your sleeve to the lid, you can build one. This guide walks you through how to build a mini coffin in 14 clear steps, using common materials, simple tools, and practical techniques that make the finished piece look clean, sturdy, and intentionally spooky.
This tutorial focuses on a decorative wooden mini coffin, not a burial container for animals or humans. Keep it fun, safe, and craft-friendly. Think candy, trinkets, Halloween décor, tiny skeletons, or dramatic storage for your emergency chocolate supply.
Before You Start: What Size Should a Mini Coffin Be?
For a beginner-friendly build, a good finished size is about 12 inches long, 5 to 6 inches wide at the shoulders, 3 to 4 inches wide at the foot, and 2 to 3 inches deep. This gives you enough room to hold candy, small keepsakes, party favors, or faux bones from the craft store, while staying small enough to cut from scrap wood or a small plywood panel.
You can scale the project up or down. A 6-inch coffin works well as a favor box. A 12-inch coffin makes a strong tabletop decoration. An 18-inch version can become a dramatic centerpiece. The method stays the same: make a pattern, cut a base and lid, cut side walls, assemble the box, then sand and finish it.
Materials and Tools You Will Need
Materials
- 1/4-inch or 1/2-inch plywood, craft board, pine board, or basswood
- Wood glue
- Small brad nails, pin nails, or short wood screws
- Sandpaper in 120-grit and 220-grit
- Pencil, ruler, measuring tape, and square
- Painter’s tape or masking tape
- Wood filler, optional
- Paint, stain, polyurethane, wax, or clear craft sealer
- Small hinges and clasp, optional
- Decorative hardware, labels, fabric lining, or faux cobwebs, optional but highly encouraged by the Halloween committee
Tools
- Jigsaw, scroll saw, handsaw, or circular saw
- Drill or brad nailer, optional
- Clamps
- Sanding block or orbital sander
- Safety glasses
- Dust mask or respirator suitable for sanding dust
- Hearing protection if using power tools
If you are new to woodworking, use thin plywood or craft wood. It cuts easily, sands quickly, and forgives small mistakes. Thick hardwood looks beautiful but can turn a simple afternoon project into a tiny gothic wrestling match.
How to Build a Mini Coffin: 14 Steps
Step 1: Choose Your Wood
Select a flat piece of plywood, pine, poplar, or craft board. For a decorative mini coffin, 1/4-inch plywood is lightweight and easy to cut. For a sturdier box, use 1/2-inch material for the base and lid, then thinner pieces for the sides. Avoid warped boards because angled coffin sides already require careful alignment. A twisted board will make the project look like it crawled out of the basement during a thunderstorm.
Check the surface for deep cracks, loose knots, or splinters. A few imperfections can add rustic charm, especially for Halloween décor, but structural cracks near the edges may weaken the box.
Step 2: Decide on the Coffin Shape
A classic coffin shape has six sides: a narrow top, two angled shoulder sections, two long tapering sides, and a shorter foot end. For a 12-inch mini coffin, try these simple proportions:
- Total length: 12 inches
- Top width: 3 inches
- Shoulder width: 5 1/2 inches
- Foot width: 3 1/2 inches
- Shoulders located about 4 inches down from the top
These measurements are flexible. The main goal is symmetry. If the left side looks like a graceful gothic angle and the right side looks like it was drawn during an earthquake, your finished coffin will tell on you.
Step 3: Make a Paper Template
Draw the coffin outline on cardboard, poster board, or plain paper before marking the wood. Start with a centerline. Mark the top, shoulder, and foot widths evenly on both sides of the centerline. Connect the points with straight lines to create the coffin shape.
Cut out the template and fold it in half lengthwise. If both sides match, you are ready. If not, trim the wider side until the pattern is balanced. This small step saves wood, time, and at least three muttered comments about geometry.
Step 4: Trace the Base and Lid
Place the template on your wood and trace one coffin shape for the base. Then trace a second matching shape for the lid. Label them clearly. If your wood has a nicer face side, place that side outward for the lid.
For a decorative box with a removable lid, make the lid the same size as the base. For a hinged coffin, you can leave the lid slightly larger by about 1/16 inch around the edges, then sand it flush after assembly.
Step 5: Cut Out the Base and Lid
Secure the wood to your work surface before cutting. Use clamps, not your knee, your elbow, or the vague hope that friction will be your friend. Cut slowly along the traced line with a jigsaw, scroll saw, or handsaw. If you use a circular saw for straight sections, finish the smaller angled cuts with a jigsaw or handsaw for better control.
Do not rush the cuts. A mini coffin is small, which means tiny mistakes show up quickly. Keep your hands clear of the blade path, wear eye protection, and let the tool do the work. If the blade starts wandering, stop, back up carefully, and correct your direction.
Step 6: Cut the Side Pieces
The side walls create the depth of the coffin. For a 12-inch coffin, a side height of 2 inches is practical. Rip or cut strips of wood 2 inches wide. Then cut each wall section to match one side of the base: top, upper left angle, upper right angle, long left side, long right side, and foot end.
You can measure each section directly from the base. Hold a strip against one edge, mark the length, and cut. For cleaner joints, cut the ends at slight angles to follow the coffin shape. Perfect miters are nice, but not mandatory. Small gaps can be filled later, and Halloween projects are legally allowed to look a little haunted.
Step 7: Dry-Fit Every Piece
Before opening the glue bottle, arrange all side pieces around the base. Make sure the angles line up, the walls sit upright, and the lid still covers the shape. This is called a dry fit, and it is the difference between “I built this” and “I created a wooden mystery.”
Use painter’s tape to temporarily hold the side pieces together. Look for gaps or pieces that are too long. Trim carefully where needed. A snug fit makes the glue-up easier and gives the finished mini coffin cleaner lines.
Step 8: Glue the Side Walls to the Base
Apply a thin, even bead of wood glue along the bottom edge of one side piece. Press it into place on the base. Add the next side piece and continue around the coffin. Use clamps, tape, or small corner blocks to keep everything upright while the glue begins to set.
Do not drown the joint in glue. More glue does not mean more strength; it means more squeeze-out and more sanding. Wipe away excess glue with a damp cloth before it dries. If you plan to stain the coffin later, dried glue spots can block stain and leave pale blotches.
Step 9: Reinforce the Joints
For a display piece that will sit on a shelf, wood glue may be enough. For a box that will be opened, handled, and filled with candy by enthusiastic goblins, add reinforcement. Use small brad nails, pin nails, or short screws. Pre-drill tiny pilot holes if using screws to avoid splitting the wood.
Drive fasteners carefully and keep them centered in the thin side walls. If a nail pokes through the inside, pull it out and try again. The goal is spooky, not stabby.
Step 10: Sand the Box Smooth
Once the glue is dry enough to handle, sand the outer edges with 120-grit sandpaper. Round sharp corners slightly and smooth any rough saw marks. Follow with 220-grit sandpaper for a cleaner finish. Sand with the grain whenever possible.
If you used plywood, be gentle near the edges so you do not sand through the outer veneer. If you see small gaps, apply wood filler, let it dry, and sand again. The better the surface feels now, the better the final paint or stain will look.
Step 11: Fit the Lid
Place the lid on the coffin and check the fit. If it overhangs unevenly, mark the high spots and sand them down. If you want a simple lift-off lid, stop here. You can add a small wooden knob, metal pull, leather tab, or ribbon loop to make it easy to open.
For a hinged lid, position two small hinges along one long side. Mark the screw holes with a pencil. Pre-drill tiny holes, then attach the hinges to the lid first and the box second. Test the motion gently. Small hinges are not designed for dramatic vampire entrances, so open the lid like a civilized creature of the night.
Step 12: Add a Clasp or Magnet
If your mini coffin will travel, hold treats, or be opened often, add a small clasp, hook-and-eye latch, or tiny magnets. Magnets are clean and modern; clasps look more vintage. A small brass latch gives the box an antique apothecary feel, especially if you plan to stain the wood dark brown or paint it matte black.
Measure carefully before installing hardware. On a small project, even a slightly crooked latch can look obvious. Then again, if your theme is “haunted attic discovery,” crooked hardware may be considered character development.
Step 13: Paint, Stain, or Seal the Coffin
Now comes the personality. For a classic Halloween mini coffin, paint it black and dry-brush gray over the edges to create a weathered look. For a rustic style, use dark walnut stain and a clear topcoat. For a gothic jewelry box, try satin black paint, red velvet lining, and antique gold hardware. For a kid-friendly craft, use purple, orange, silver, or glow-in-the-dark paint.
Sand lightly between coats if the finish feels rough. Let each coat dry according to the product instructions. Work in a ventilated area, especially when using stains, spray paints, or sealers. A beautiful finish is not worth a room full of fumes.
Step 14: Decorate and Use Your Mini Coffin
Once the finish is fully dry, add final details. Line the inside with felt, velvet, scrapbook paper, or painted stars. Attach a tiny nameplate, faux hinges, skull charms, lace, ribbon, spiderwebs, or miniature bones. You can stencil words like “Treats,” “RIP,” “Candy Emergency,” or “Do Not Open Until October.”
Your mini coffin is now ready for Halloween parties, gothic home décor, craft fairs, tabletop displays, or storing small treasures. It also makes a memorable handmade gift for anyone whose decorating style falls somewhere between “cozy cottage” and “Victorian ghost with excellent taste.”
Safety Tips for Building a Mini Coffin
Even a small woodworking project deserves real safety habits. Wear safety glasses when cutting, drilling, sanding, or nailing. Wood chips and dust have a terrible sense of direction and will absolutely aim for your eyes. Use hearing protection with loud tools, and wear a dust mask or respirator when sanding, especially if you are working with plywood, MDF, or reclaimed wood.
Clamp your material before cutting. Keep your fingers away from blades and drill bits. Read the manual for any power tool you use. If a cut feels awkward, stop and reposition the workpiece. Awkward cuts are where mistakes like to hide. Also, keep your workspace clean. A small offcut on the floor can become a tiny wooden banana peel at exactly the wrong moment.
Common Mistakes to Avoid
Skipping the Template
A coffin shape depends on symmetry. Drawing directly on wood without a pattern can work, but a paper template makes the process easier and more accurate. It also lets you adjust the shape before committing to the cut.
Using Too Much Glue
A thin, even layer is enough for most small joints. Excess glue squeezes out, dries hard, and makes finishing more difficult. Wipe it while wet.
Forgetting the Lid Before Decorating
Always test the lid before adding paint, hinges, fabric, or trim. A lid that does not fit after decorating is like a vampire without a cape: technically functional, but disappointing.
Rushing the Finish
Paint and stain need drying time. If you handle the coffin too early, fingerprints, smudges, and stuck-on dust can ruin the surface. Let the finish cure fully before adding decorations or putting items inside.
Design Ideas for Your Mini Coffin
A mini coffin can be spooky, elegant, silly, rustic, or surprisingly cute. For a haunted-house look, use black paint, gray dry brushing, and fake cobwebs. For a pirate theme, stain the wood dark brown and add metal corner brackets. For a vampire theme, line the inside with red velvet and add a small brass clasp. For a candy box, paint the exterior orange and black, then add a removable label.
You can also turn the coffin into wall décor by attaching a sawtooth hanger to the back. Add shelves inside and it becomes a tiny coffin display case for crystals, figurines, makeup, pins, or miniature oddities. If you make several, stack them at different angles for a dramatic Halloween mantel display.
Experienced Tips From Building Mini Coffins
The first mini coffin you build teaches you more than the plan itself. On paper, the project looks simple: draw shape, cut wood, glue sides, look impressive. In real life, the little details matter. The angles have to meet, the lid has to fit, and the finish has to hide the parts where your saw briefly pursued its own artistic career.
One useful experience is to make the first version from cardboard or scrap wood. This test build reveals whether the proportions look right. Sometimes a coffin that seems perfect in measurements looks too narrow once assembled. Other times the shoulder section appears too wide, giving the box the silhouette of a tiny wooden bodybuilder. A quick mock-up solves that before you use your nicer wood.
Another lesson is that small boxes need lighter pressure. When clamping a mini coffin, do not squeeze the pieces like you are trying to extract juice from them. Thin walls can shift, bow, or slide out of alignment when too much pressure is applied. Painter’s tape is often enough to hold small side pieces while the glue sets. A few light clamps help, but gentle control beats brute force.
Sanding also matters more than beginners expect. The difference between “homemade” and “handmade” is often ten extra minutes with 220-grit sandpaper. Slightly rounding the edges makes the mini coffin feel finished instead of sharp and splintery. If you plan to paint the coffin black, sanding is still important. Dark paint hides color flaws but highlights bumps, drips, and rough corners when light hits the surface.
For finishing, test your paint or stain on a scrap piece from the same board. Plywood edges absorb stain differently than face grain, and craft wood can turn blotchy if stained too heavily. If you want an aged effect, start lighter than you think. You can always add more dark glaze, gray dry brushing, or distress marks. Removing an overenthusiastic black stain is much less fun.
Hardware installation is another place where patience pays off. Tiny hinges look adorable until the screws split the side wall. Pre-drill pilot holes with a small bit, and do not overtighten screws. If the wood is very thin, consider using glue-on hinges for decorative projects or skip hinges entirely and make a lift-off lid. A lift-off lid is easier, stronger, and less likely to make you question your life choices at 11:47 p.m.
If you are making mini coffins for a party, craft fair, or Halloween display, batch the work. Trace all the templates first, cut all the bases and lids next, then sand everything together. Assembly-line building saves time and keeps the sizes consistent. It also lets you experiment with different finishes: one rustic, one glossy black, one vampire-red inside, and one that looks like it was discovered behind a cursed bookcase.
The most satisfying part of building a mini coffin is how customizable it becomes. A simple wooden box can turn into a candy holder, a gothic ring box, a spooky invitation container, a tabletop prop, or a tiny shelf. The project is small enough for beginners but detailed enough to teach real skills: measuring, cutting, fitting, gluing, sanding, finishing, and problem-solving. That is a lot of woodworking education from something that looks like it belongs in a haunted dollhouse.
Conclusion
Building a mini coffin is a fun, affordable woodworking project with just the right amount of spooky charm. With a paper template, careful cuts, properly fitted side walls, a smooth sanding job, and a finish that matches your style, you can create a decorative box that looks far more impressive than the materials suggest. Whether you use it for Halloween candy, gothic décor, keepsakes, party favors, or a tiny dramatic storage solution, the process is approachable for beginners and enjoyable for experienced DIYers.
The secret is patience. Measure twice, dry-fit before gluing, sand until the edges feel clean, and let the finish dry completely. Do that, and your mini coffin will look less like a rushed craft project and more like a handcrafted piece with personality. Creepy personality, perhaps, but personality nonetheless.