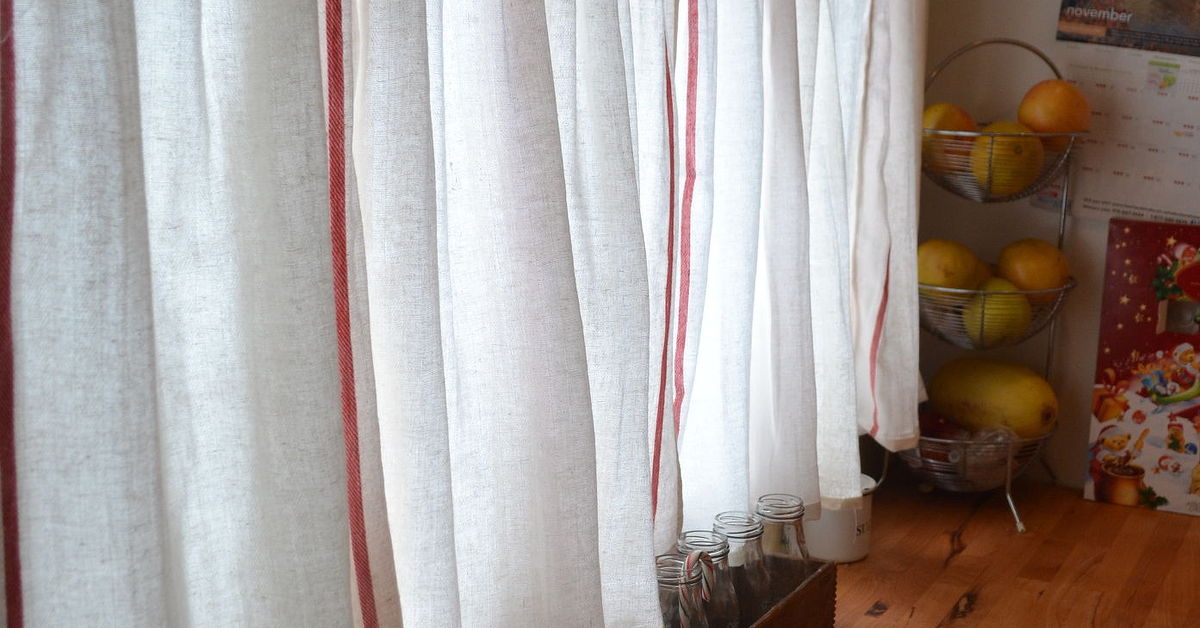
Cafe curtains are the window-treatment equivalent of a good diner mug: simple, charming, and somehow they make everything look more put-together. They cover the lower half of a window (hello, privacy), while still letting daylight pour in (hello, “I’m thriving” energy). And yesyou can make them for under $5 if you play it smart: use what you already have, shop small yardage/remnants, or repurpose textiles that were never meant to become curtains… until today.
This guide walks you through three under-$5 methods (including a no-sew option), shows you how to measure so your curtains don’t end up looking like fabric eyebrows, and includes real-world tips from what DIYers learn after their first “why is this crooked?” moment.
What Are Cafe Curtains (and Why Everyone Suddenly Loves Them Again)?
Cafe curtains are shorter panels that usually hang around the middle of the window or just above the sill. They’re a favorite for kitchens, bathrooms, breakfast nooks, and anywhere you want light without giving the neighborhood a free tour. They also play nicely with layered looksadd a valance, a second tier, or leave them solo for that clean, European-casual vibe.
How to Keep This Project Under $5 (Without Summoning the Craft Store Gremlins)
The secret isn’t magicit’s strategy. You’re staying under $5 by doing at least one of these:
- Repurpose fabric you already own (pillowcases, flat sheets, tablecloths, tea towels, bandanas).
- Use a tension rod (often the cheapest “hardware” option, and renter-friendly).
- Choose a no-sew finish (hem tape or fabric fuse) so you don’t need extra supplies.
- Go small: cafe curtains require far less fabric than full-length drapes.
Three realistic under-$5 budget examples
- $0–$3: Old pillowcase/flat sheet (free) + small tension rod (budget bin/discount store).
- $3–$5: Two thrifted tea towels + basic rod/tension rod.
- $4–$5: Two bandanas + tension rod (best for tiny windows or a single panel look).
Note: Prices vary by store and location. “Under $5” is very doable when you repurpose fabric or shop thrift/dollar/clearance sections.
Measure First: The 5-Minute Step That Saves You 50 Minutes of Rage-Ironing
1) Decide your curtain height
Most cafe curtains cover the lower portion of the window. For a classic look, aim to have the bottom edge land just above the sill (or wherever you want the visual “stop” line).
2) Decide your rod placement
Common placements include:
- Mid-window for traditional cafe style (great privacy + lots of light).
- Aligned with a window muntin/rail if your window has a natural horizontal divider (it looks intentional, not accidental).
- Slightly higher if you want the window to feel taller and airier.
3) Calculate fabric width (aka “fullness”)
Curtains look best with some gather. A good rule is to make the total curtain width about 1.5 to 2 times the width you’re covering. For cafe curtains, 1.5x often looks pleasantly full without getting bulky.
Quick example
Window width: 24 inches
Target fullness: 1.5x
Total fabric width needed: 36 inches
If using two panels: about 18 inches wide each (plus seam/hem allowances).
Tools & Supplies (Choose Your Adventure)
Basic tools
- Measuring tape or ruler
- Scissors
- Iron (or a hair straightener in a pinch for tiny hemscarefully!)
- Optional: straight pins or clothespins
Supplies (pick one method)
- No-sew: hem tape/fusible web + a tension rod or small cafe rod
- Sew: thread + a simple rod pocket or clip-top approach
- Ultra-budget: safety pins or clip rings you already own (not as polished, but very functional)
Method 1: No-Sew Tea Towel Cafe Curtains (Fastest + Cutest)
This is the “I have 10 minutes and ambition” method. Tea towels make excellent mini panels because they’re already hemmed on all sides. You’re basically adding a way to hang themrod pocket or clip-topand calling it a day.
Best for
- Small windows (kitchen, bathroom, laundry)
- Renters
- Anyone who wants “handmade” without the hand-sewing part
Steps (rod-pocket version with hem tape)
- Wash and dry the towels first (pre-shrinking prevents “surprise short curtains” later).
- Press flat. Ironing first makes hemming tape bond cleaner and straighter.
- Create a top pocket: Fold down the top edge 1.5–2.5 inches, depending on your rod thickness.
- Insert hem tape inside the fold. Press with an iron, lifting and pressing (not sliding) section by section.
- Repeat for a second towel if you want two panels.
- Hang on a tension rod or cafe rod, then adjust the gathers so it looks evenly “fluffy.”
Style upgrades that cost $0
- Alternate patterns (stripe + solid) for a playful look.
- Hang the rod aligned with a window divider for an instantly “designer” feel.
- Use mismatched-but-coordinated towels for cozy, collected charm.
Method 2: Pillowcase Cafe Curtains (The “Why Didn’t I Think of That?” Hack)
Pillowcases are basically pre-made fabric tubes with finished edgesmeaning one side is often already perfect for a rod pocket. If you have spare pillowcases, this can be the cheapest path to a clean, tailored cafe curtain.
Best for
- Anyone with extra linens
- Solid colors or subtle patterns
- Windows where you want a smoother, less textured fabric than towels
Steps
- Choose your orientation: Often the pillowcase opening can slide onto a rod like a ready-made pocket.
- Set your length: If the pillowcase is too long, fold up the bottom to the desired length.
- Hem the bottom: Use hem tape (no-sew) or stitch a simple hem if you sew.
- Hang and adjust: Add soft gathers, and make sure the bottom edge is level.
Quick example
A standard pillowcase can work as one panel for a narrow window. For wider windows, use two pillowcasesone on each side and you’ll get that classic cafe split.
Method 3: Flat Sheet or Remnant Fabric Cafe Curtains (Most Customizable)
Want a specific color, print, or “this looks expensive” drape? A flat sheet (thrifted or already in your closet) or a remnant cut gives you the most control over size and stylestill on a tiny budget.
Best for
- Odd-size windows
- Matching your decor
- Creating a two-tier look later
Cutting math (simple version)
- Finished width: window width × 1.5 (or × 2 for extra fullness)
- Add side hems: + 1 inch on each side (2 inches total) for a simple double-fold hem
- Add top pocket: + 3–4 inches (varies by rod size and how deep you want the pocket)
- Add bottom hem: + 3 inches for a neat, weighted look
No-sew steps (hem tape finish)
- Wash/dry and press your fabric.
- Cut your panel(s) using the measurements above.
- Side hems: Fold each side 1/2 inch, press, fold again 1/2 inch, press, then bond with hem tape.
- Bottom hem: Fold 1.5 inches, press, fold again 1.5 inches, press, bond.
- Rod pocket: Fold the top edge down 2–3 inches, bond, leaving enough room for the rod to slide through easily.
- Hang and distribute gathers evenly.
Sewing option (still beginner-friendly)
If you sew, this is a straight-line dream. Sew side hems, then bottom hem, then fold and stitch a rod pocket. Curtains are basically rectangles with confidence.
Hanging Tips That Make Them Look “Custom,” Not “Craft Day at My House”
Extend the rod (when possible)
If you’re using brackets and a standard rod, extending it a bit past the window frame can make the window look larger and helps panels stack to the side. With cafe curtains and tiny rods, you may not always have roombut when you do, it’s a nice upgrade.
Account for the hanging method
- Rod pocket: more gathered, casual, hides the rod.
- Clip rings: easier to adjust, adds height, but changes your length measurement.
- Tabs/ties: cute and cottage-y, but require extra fabric.
Make it level
Old houses love a crooked window frame. Before you commit, measure from the rod to the sill in a few spots. If the sill slopes, you can “cheat” by making the curtain look level to the eye, not necessarily perfectly equal in measurement.
Common Mistakes (So You Can Skip the “Take Two” Version)
- Too narrow: If it looks stretched, add width or reduce the span you’re covering.
- Rod pocket too tight: Leave breathing room so the rod slides easily.
- Skipping pre-wash: Cotton shrinks. Your curtain will not apologize.
- Ironing shortcuts: Hem tape bonds better when the fold is pressed crisp first.
- Overthinking it: Rectangles are allowed to be rectangles. That’s the whole point.
Design Ideas That Don’t Cost Extra
Make it look intentional with one small detail
- Trim illusion: Fold a contrasting band at the bottom (using fabric already on hand) and bond it.
- Soft filtering: Use a thinner pillowcase or a lightweight sheet for a breezy look.
- Pattern mixing: Keep the same color family, vary the prints.
- Double-tier later: Start with one cafe tier now; add a top tier later if you want more coverage.
FAQ
How long should cafe curtains be?
Many cafe curtains fall in the neighborhood of 24–36 inches, but the best length is the one that fits your window and privacy needs. For a classic look, aim for the bottom edge to land just above the sill.
Do I need a sewing machine?
Nope. Hem tape/fusible web plus an iron can create strong, clean hems and rod pockets. Sewing just makes it more permanent (and more washable over the long haul).
What’s the easiest fabric to use?
Tea towels, pillowcases, and sheets are beginner-friendly because they’re already hemmed or easy to press and fold.
Real-World Experiences & Lessons (The Extra You’ll Be Glad You Read)
DIYers who try cafe curtains for the first time often discover something delightful: this project is less about “perfect sewing” and more about smart measuring and calm folding. People tend to assume curtains are advancedlike you need a studio, a dress form, and a dramatic scarf. In reality, cafe curtains are one of the most forgiving home projects because they’re short, lightweight, and meant to look a little relaxed. That slightly casual drape is part of the charm, not a sign of failure.
One common theme you’ll hear from budget makers is that fabric choice does most of the decorating for you. A striped towel instantly reads “French cafe.” A soft, worn-in sheet gives cozy cottage vibes. A crisp white pillowcase feels clean and modern. When your budget is under $5, you’re not buying fancy hardware or designer trimsso you lean on texture and pattern. That’s why repurposed textiles work so well: they already have personality and often come pre-hemmed, which is basically free labor.
Another repeated lesson: the iron is the hero. People who skip pressing tend to fight wavy edges, crooked pockets, and hems that slowly peel like a sad sticker. But when you press folds first, even a no-sew hem looks surprisingly “store-bought.” And if you’re using fusible tape, DIYers often find that pressing in short sectionslift, press, movegives a stronger bond than sliding the iron around. It’s less “fast fashion factory,” more “patient pastry chef,” and the results look cleaner.
Hanging is where the “experience” really shows up. Many folks start by putting the rod exactly in the middle of the window, then realize the curtain blocks more view than expectedor doesn’t give enough privacy at night when lights are on inside. The workaround is simple: treat the rod height as adjustable. You can align it with a window’s horizontal divider for a built-in, architectural look, or nudge it slightly higher so the curtain header sits where it feels balanced. DIYers also learn to measure from the rod to the sill in a few places, especially in older homes where “level” is more of a suggestion than a fact.
Finally, there’s the confidence boost. People often start this project because they want something charming without spending much, but they finish with a bigger win: the realization that home upgrades don’t have to be expensive to look intentional. After cafe curtains, DIYers frequently move on to matching cupboard curtains, a second window, or a top tierbecause once you’ve made one neat rectangle, you suddenly trust yourself with two. And that’s the quiet magic of a under-$5 project: it doesn’t just change a window, it changes what you believe you can do with a measuring tape, an iron, and a stubborn little dream.
Conclusion
If you want a quick refresh that adds privacy and charm without killing your budget, cafe curtains are a smart bet. Keep the cost low by repurposing towels, pillowcases, or sheets; measure for a little fullness; and let your iron do the heavy lifting. Whether you go no-sew or stitched, you’ll end up with a window that looks softer, warmer, and more “finished”for about the price of a fancy coffee. Which is perfect, because now your kitchen looks like it serves fancy coffee.