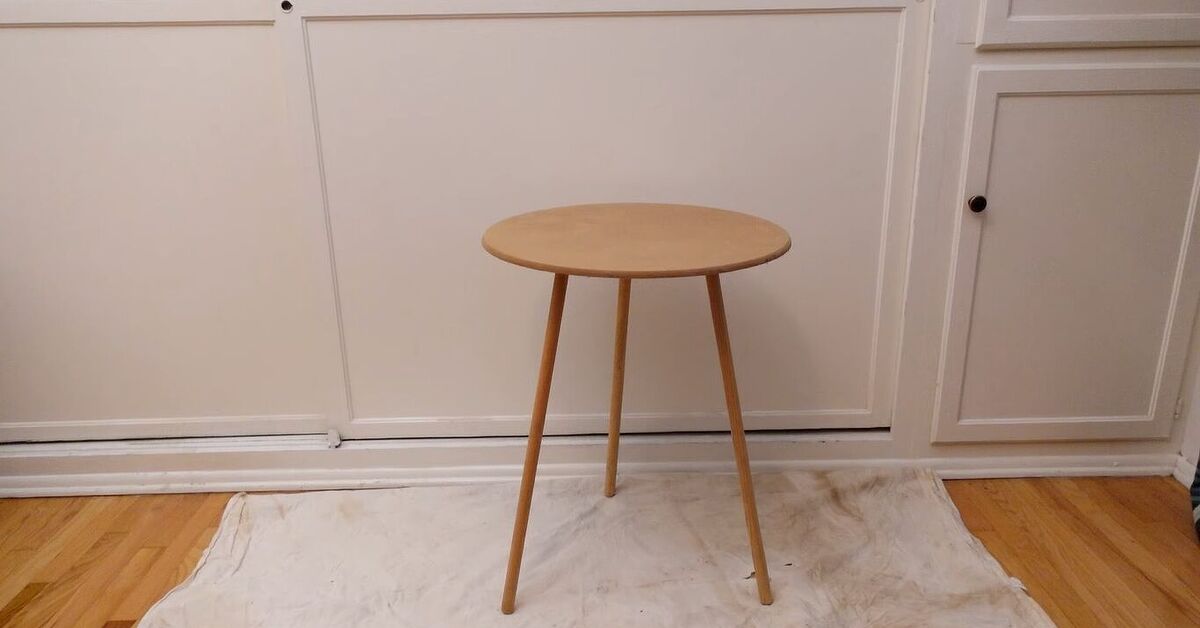
A tired side table is the perfect candidate for a colorful makeover. It is small enough tofort, and inexpensive enough that a minor mistake will not require an emergency meeting with your bank.
With thoughtful preparation, the right furniture paint, and a little patience between coats, you can transform a scratched thrift-store table or outdated nightstand into a cheerful accent piece. This beginner-friendly guide explains how to paint a side table, choose a memorable color scheme, prevent peeling and brush marks, and protect the finished surface.
Why a Side Table Is an Ideal Beginner Paint Project
Large furniture can be intimidating. A dining table has acres of surface area, a dresser has enough drawers to test your emotional stability, and kitchen cabinets require organization on the level of a military campaign.
A side table, however, is manageable. Most pieces have only a top, several legs, and perhaps one drawer or shelf. You can experiment with bright furniture paint, geometric patterns, color blocking, or contrasting hardware without committing to a room-size renovation.
A painted side table can also solve several decorating problems. It can introduce color into a neutral living room, coordinate mismatched bedroom furniture, turn a thrifted find into a custom piece, or give an awkward corner a clear purpose.
Inspect the Table Before You Start
Before choosing a delicious shade of raspberry pink, inspect the table’s condition and identify its surface material. Preparation varies depending on whether the piece is solid wood, veneer, laminate, medium-density fiberboard, or metal.
Check for Structural Problems
Place the table on a level floor and gently rock it. Tighten loose screws, brackets, bolts, and leg connections. Apply wood glue to loose wooden joints if necessary, then clamp them until the glue cures according to its instructions.
Fill deep scratches, chipped corners, old hardware holes, and dents with a paintable wood filler. Allow the filler to dry completely before sanding it flush with the surrounding surface. Paint can disguise color, but it cannot magically flatten a crater.
Identify the Existing Finish
A glossy factory finish usually needs to be cleaned, lightly sanded, and coated with a bonding primer. Laminate and slick veneer require especially careful preparation because ordinary paint may struggle to grip the surface.
Raw wood absorbs coatings unevenly and generally benefits from primer. Previously painted furniture may only need light sanding if the existing finish is stable, but flaking or cracked paint should be addressed before another layer is added.
Safety warning: If a vintage table has an unknown painted finish, particularly one that may date from before 1978, do not immediately begin dry sanding. Disturbing lead-based paint can create hazardous dust. Test the coating or consult a qualified lead-safe professional before proceeding.
Supplies for an Easy Side Table Makeover
Gathering everything in advance prevents the classic DIY experience of discovering that your only clean brush is currently fossilized inside an old can of beige paint.
- Drop cloth, cardboard, or plastic sheeting
- Screwdriver and small container for hardware
- Mild dish soap, warm water, and lint-free cloths
- Paintable wood filler and putty knife, if repairs are needed
- Medium- and fine-grit sandpaper or sanding sponges
- Vacuum, tack cloth, or microfiber cloth
- Primer suitable for the table’s surface
- Furniture paint, cabinet enamel, acrylic paint, or chalk-style paint
- Quality synthetic-bristle brush
- Small foam or microfiber roller
- Painter’s tape for patterns or color blocking
- Clear protective topcoat, if appropriate
- Protective eyewear, gloves, and a suitable dust mask or respirator
How to Choose Colorful Paint for a Side Table
The best color is not necessarily the loudest color in the store. It is the one that looks intentional in the room while still giving the table enough personality to earn its makeover.
Borrow a Color from the Room
Look at your rug, curtains, artwork, pillows, books, and decorative objects. Choose a less dominant shade from one of those items and repeat it on the table. A small accent color in a patterned rug, for example, can become a rich teal or mustard-painted side table.
Use One Bold Color
Painting the entire table one saturated color is the easiest option. Cobalt blue, coral, leafy green, sunny yellow, and deep plum can turn a plain silhouette into a focal point. A single-color treatment is especially effective on tables with curved legs, carved details, or an unusual shape.
Try a Two-Tone Combination
For a more customized side table makeover, paint the top one color and the base another. Consider navy with warm coral, forest green with pale pink, terracotta with cream, or turquoise with muted gold hardware.
You can also keep the body relatively calm and paint the inside of a drawer, lower shelf, or leg tips in a surprising contrasting shade. It is a controlled burst of color rather than a full-room circus.
Test Before Committing
Paint a sample board or a concealed part of the table and view it throughout the day. Artificial light can make a cheerful yellow look acidic, while a sophisticated blue may become nearly black after sunset. Testing is much easier than repainting the entire piece while muttering personal insults at a paint can.
Step-by-Step Side Table Makeover
Step 1: Create a Safe Work Area
Work in a clean, well-ventilated area with adequate lighting. Protect the floor with a drop cloth and leave enough room to walk around the table. If you are using spray products, follow the manufacturer’s ventilation, temperature, and protective-equipment instructions.
Elevate the table on small blocks if possible. This makes it easier to reach the bottoms of the legs without dragging wet paint across the floor covering.
Step 2: Remove Hardware and Detachable Parts
Take out drawers and remove knobs, pulls, hinges, or decorative hardware. Store screws and small parts in a labeled cup or resealable bag. Removing hardware produces cleaner edges and prevents accidental paint buildup around handles.
If you plan to reuse the hardware, clean it while the table is being prepared. Replacing an ordinary knob with a ceramic, brass, wooden, or glass version can make the makeover look considerably more expensive.
Step 3: Clean the Table Thoroughly
Wash the table with mild soap and warm water to remove dust, hand oils, food residue, polish, and general furniture history. Pay attention to drawer fronts, edges, corners, and areas around handles.
Use only enough moisture to clean the surface, especially when working with veneer or fiberboard. Wipe away the soap residue and let the table dry completely. Sanding grime into the finish does not count as cleaning; it merely relocates the problem.
Step 4: Make Necessary Repairs
Tighten loose connections and apply paintable filler to dents or unwanted holes. Let each repair dry for the time stated on the product label. Sand the repaired area until it feels level when you run your fingers across it.
If the top is severely damaged, consider making the flaws part of the design. A painted checkerboard, wide stripes, stencil, or color-blocked pattern can visually disguise repaired areas while adding character.
Step 5: Lightly Sand the Surface
For most sound, previously finished wooden tables, the goal is to dull the sheen rather than remove every trace of the old finish. Use approximately 150- to 220-grit sandpaper, depending on the condition of the surface and the coating manufacturer’s directions.
Sand in the direction of the wood grain when it is visible. Use a sanding sponge around legs, curved edges, and decorative details. Avoid aggressive sanding on thin veneer, since it is possible to cut through the attractive surface layer with impressive speed.
After sanding, vacuum the table and surrounding work area. Wipe the piece with a tack cloth or clean microfiber cloth so dust does not become a permanent ingredient in your paint finish.
Step 6: Apply the Correct Primer
Primer improves adhesion, creates a more uniform base, helps block stains, and reduces the number of expensive color coats required. Use a bonding primer for laminate or glossy surfaces, a suitable wood primer for bare wood, and a rust-inhibiting metal primer for steel furniture when needed.
Apply primer in a thin, even layer. Use a brush for corners and detailed areas, followed by a small roller on broad, flat surfaces. Watch for drips beneath the tabletop and around the legs.
Allow the primer to dry according to its label. For an extra-smooth finish, lightly sand the dry primer with fine-grit sandpaper and remove all dust before painting.
Step 7: Apply the First Color Coat
Stir the paint thoroughly without whipping air into it. Begin with detailed sections, corners, and edges using a quality brush. Then use a small foam or fine-finish roller on the tabletop, shelf, and drawer front.
Apply a thin coat rather than trying to achieve perfect coverage immediately. Heavy paint is more likely to sag, pool around corners, remain soft, and preserve every enthusiastic brushstroke for future generations.
On wooden surfaces, brush in the direction of the grain. Maintain a wet edge and avoid repeatedly brushing paint that has already started to set.
Step 8: Add a Second Coat
Allow the first coat to dry for the full recommended recoat time. Dry-to-the-touch and ready-for-another-coat are not always the same thing.
If the surface feels rough, lightly sand it with very fine sandpaper, then remove the dust. Apply a second thin coat using the same method. Bright reds, yellows, pale colors over dark finishes, and highly contrasting makeovers may require a third coat.
Step 9: Create a Colorful Pattern
For stripes, blocks, or geometric shapes, let the base color dry thoroughly before applying painter’s tape. Press the tape firmly along the edges. For especially crisp lines, brush a small amount of the base color over the tape edge first. This seals tiny gaps so the contrasting color is less likely to bleed underneath.
Apply the accent color in thin coats and remove the tape while the final coat is still slightly wet, unless the product instructions recommend otherwise. Pull the tape back slowly at an angle.
Easy pattern ideas include diagonal corner blocks, painted leg tips, a checkerboard tabletop, a single racing stripe, scalloped edges, or an ombré progression using several shades from the same color family.
Step 10: Protect the Finish
Some furniture and cabinet paints are designed to cure into a durable finish without an additional sealer. Chalk-style, craft, or decorative paints may need wax or a compatible clear topcoat. Always check the paint manufacturer’s recommendation because incompatible coatings can yellow, cloud, wrinkle, or reduce adhesion.
A side table that regularly holds drinks, lamps, keys, or enthusiastic houseplants benefits from additional protection. Apply water-based polyurethane or another compatible clear finish in thin coats, following the label for application and drying times.
Step 11: Let the Paint Cure
Paint may feel dry within hours but remain vulnerable while it cures. Avoid placing heavy lamps, books, trays, or beverages on the table too soon. Do not drag objects across the fresh surface, and use coasters or felt pads once the table returns to service.
Reattach the hardware carefully after the coating has hardened enough to resist impressions. Complete curing can take days or longer depending on the product, coat thickness, temperature, and humidity.
Common Side Table Painting Mistakes
Skipping the Cleaning Stage
Furniture polish, grease, and invisible hand oils can interfere with paint adhesion. Even products advertised as requiring minimal preparation generally perform better on a clean, dry surface.
Using the Wrong Primer
A general-purpose primer may work well on wood but struggle on slick laminate or metal. Match the primer to both the surface and the chosen topcoat.
Applying Thick Paint Coats
Thick coats do not necessarily save time. They dry slowly, encourage runs, and can leave the finish soft. Two or three thin coats usually look cleaner and last longer.
Rushing the Drying and Curing Process
Setting a lamp on fresh paint can leave a permanent circular souvenir. Respect the product’s recoat and cure instructions, even when the table looks finished.
Painting a Valuable Antique Without Research
Paint is excellent for ordinary secondhand furniture, but it may reduce the value of a rare, historically significant, or collectible piece. Research labels, stamps, construction details, and provenance before covering original wood or finishes.
Easy Colorful Side Table Design Ideas
- Modern color block: Paint the tabletop cobalt blue and the legs warm white.
- Playful checkerboard: Use cream and coral squares across a flat tabletop.
- Hidden surprise: Paint the exterior deep green and the drawer interior bright orange.
- Ombré effect: Blend dark teal at the bottom into pale aqua near the top.
- Paint-dipped legs: Keep most of the table natural and paint the lower six inches of each leg.
- Botanical accent: Add simple painted leaves over a muted pink or blue base.
- Retro palette: Combine mustard yellow, avocado green, and rust in restrained geometric sections.
My Experience with Colorful Side Table Makeovers
The first lesson I learned from painting small furniture is that the project is rarely difficult, but it is remarkably good at exposing impatience. My earliest side table makeover began with a dark brown thrift-store piece that looked as though it had spent twenty years holding a rotary telephone and disapproving of modern society.
I planned to paint it a bright blue in one afternoon. I cleaned it quickly, gave the top a few casual swipes with sandpaper, and began brushing on paint. The first coat looked wonderful from six feet away. From six inches away, it resembled blue frosting applied during an earthquake.
The glossy original finish had not been dulled evenly, so the paint separated in several areas. I also continued brushing after the coating had started to set, leaving visible ridges. Instead of saving time, my rushed preparation created another evening of sanding and repainting.
On the second attempt, I cleaned the table carefully, sanded every glossy area, removed the dust, and applied bonding primer. I used an angled brush for the corners and a small foam roller for the top. The difference was immediate. The color looked more even, the paint gripped the surface, and the roller produced a finish that appeared far more professional.
I also learned that color should be tested in the actual room. The blue I selected looked energetic beneath store lighting but appeared much darker beside my sofa. Adding a narrow coral stripe around the tabletop changed everything. The coral connected the table to a patterned pillow and made the blue feel deliberate rather than accidental.
Another useful experience involved a laminate nightstand. I assumed that an all-purpose paint-and-primer product would eliminate preparation. After several days, the coating could still be scratched with a fingernail. I removed the failed finish, lightly sanded the laminate, used a primer designed for difficult glossy surfaces, and repainted it. That version survived daily use because the coating system matched the material.
Hardware has repeatedly proved to be the easiest finishing upgrade. A plain painted drawer can look homemade in the less flattering sense of the word, but a well-chosen knob gives it polish. On one green side table, replacing a scratched wooden pull with a small brass knob made the entire piece look sharper and more intentional.
I now allow significantly more drying time than my optimistic project schedule suggests. I paint one thin coat, inspect for drips under the edges, and walk away. The temptation to keep “fixing” wet paint is strong, but fresh paint usually levels better when left alone. Many brush marks are created not by the first stroke, but by the seventh unnecessary stroke.
For beginners, I recommend starting with one bold base color and one small accent. Paint the full table teal, for example, then add yellow leg tips or a pink drawer interior. This creates a custom result without requiring complicated masking or advanced blending.
The most satisfying part of a side table makeover is seeing how much visual impact can come from such a small piece. A table that once looked disposable can become the object that ties together an entire corner of a room. More importantly, every project teaches practical skills that transfer to dressers, desks, cabinets, and other painted furniture.
The secret is not an exotic paint or a mysterious professional trick. It is a simple sequence: repair, clean, sand appropriately, prime when needed, apply thin coats, and let them cure. The colorful part gets the compliments, but the preparation is what keeps those compliments from peeling off six weeks later.
Final Thoughts
An easy side table makeover does not require advanced woodworking skills or a room full of specialized equipment. Careful cleaning, light sanding, compatible primer, colorful furniture paint, and adequate curing time can turn an overlooked table into a durable accent piece.
Choose a color that connects with something already in the room, keep each coat thin, and use a small decorative detail to make the design personal. Whether you select joyful coral, sophisticated teal, sunny yellow, or a two-tone combination, the result should feel like a piece you chosenot one you were simply too guilty to throw away.