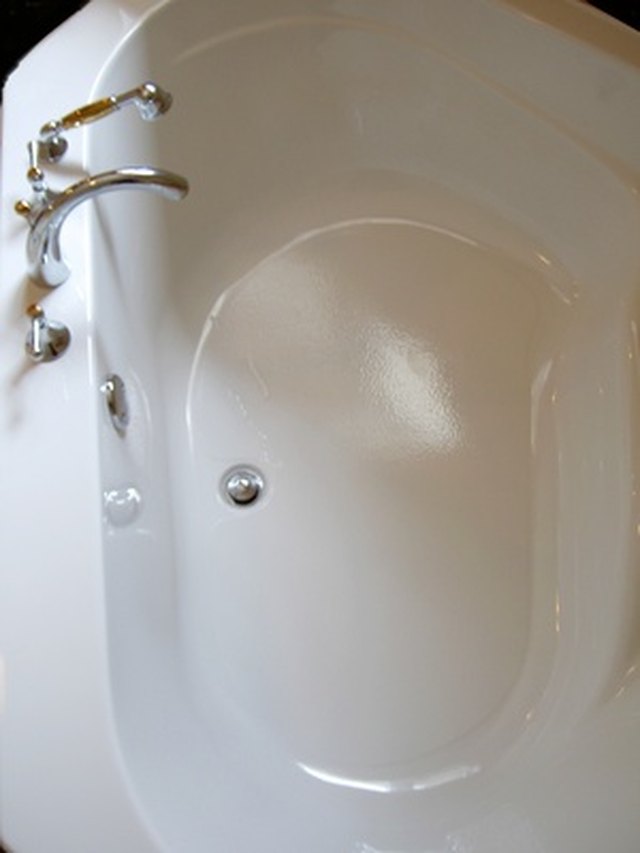
An Americast tub is a little like the dependable friend who looks polished at brunch but is secretly built like a tank. It has a glossy porcelain enamel surface, a steel layer for strength, and a molded composite backing that helps with insulation, sound control, and durability. In other words, it is not just “a bathtub.” It is a carefully layered bathroom workhorse.
Still, life happens. A shampoo bottle slips. A metal drain snake scrapes where it should not. A cleaning pad labeled “heavy duty” goes full villain mode. Suddenly, your smooth white tub has a gray line, dull streak, chip, or scratch staring back at you like it owns the bathroom. The good news: many scratches on Americast tub surfaces can be improved or repaired at home. The not-so-fun news: the wrong repair method can make the mark worse, void a warranty, or turn a tiny scratch into a weekend-long regret.
This guide explains how to fix scratches on Americast tub surfaces safely, how to tell the difference between a surface mark and real enamel damage, what products to use, what to avoid, and when to call a professional refinisher instead of channeling your inner DIY superhero.
What Makes Americast Tub Surfaces Different?
Before you grab sandpaper, epoxy, or the mysterious bottle under the sink, it helps to understand what you are repairing. Americast is American Standard’s engineered bathtub material. It typically combines a porcelain enamel top surface, an enameling-grade steel center, and a structural composite backing. That glossy top layer is the part you see, clean, and occasionally panic over when it gets scratched.
The porcelain enamel finish is nonporous, smooth, and durable, but it is not indestructible. A surface scuff may sit on top of the enamel and come off with gentle cleaning. A true scratch cuts into the finish. A chip may expose darker material or even steel beneath the enamel. Each type of damage needs a different approach.
Surface Mark vs. Scratch vs. Chip
Many “scratches” are not scratches at all. A gray line may be a metal transfer mark from a shower caddy, razor, tool, drain cover, or bath toy with a metal part. These marks often look dramatic but may not have cut into the enamel.
A real scratch usually has a texture you can feel with a fingernail. If your nail lightly catches, the enamel surface has likely been disturbed. A chip is deeper and may have a missing flake, pit, or rough edge. If you see dark metal, rust, or an open crater, treat the area quickly because moisture can creep into damaged enamel and create bigger problems.
First Rule: Do Not Attack the Scratch
The fastest way to make an Americast scratch worse is to scrub it with steel wool, scouring pads, abrasive powders, or aggressive bathroom cleaners. This is the bathroom equivalent of using a chainsaw to trim bangs. Technically, something will happen. It just may not be what you wanted.
For regular Americast cleaning, use hot soapy water, liquid dish detergent, soft cloths, or soft sponges. Gentle cleaner-polish products approved for porcelain enamel can also help restore shine. Avoid harsh abrasives, Brillo-type pads, steel wool, scouring powders, and stiff scratchy scrubbers. Even when a product says “bathroom cleaner,” it may be too aggressive for a glossy enamel finish if used with force or the wrong pad.
Tools and Materials You May Need
You may not need every item below, but gathering the right supplies keeps the repair calm and controlled:
- Liquid dish soap
- Warm water
- Soft microfiber cloths
- Soft sponge
- Painter’s tape
- Rubbing alcohol, denatured alcohol, or acetone for final prep
- Cotton swabs or cotton balls
- Color-matched American Standard Americast touch-up paint or porcelain repair glaze
- Small artist brush or included brush applicator
- Plastic putty knife for deeper chips
- Ultra-fine wet/dry sandpaper, only if the repair product allows it
- Disposable gloves
- Ventilation fan or open window
For best results, use a repair product made for porcelain enamel, enameled steel, or Americast surfaces. Color matching matters. American Standard whites, linen, bone, biscuit, and other fixture colors can look similar in the bottle but different on the tub. When possible, match the repair kit to your tub model and finish.
Step-by-Step: How to Fix Light Scratches on Americast Tub Surfaces
Step 1: Clean the Area Gently
Start with the least dramatic option. Wash the scratched area with warm water and a few drops of liquid dish soap. Use a soft sponge or microfiber cloth, then rinse thoroughly. Dry the spot completely.
This removes soap scum, body oils, mineral film, and cleaner residue that may be making the scratch look worse than it is. Sometimes the “scratch” disappears at this stage, which is the DIY equivalent of finding twenty dollars in an old coat pocket.
Step 2: Check Whether It Is a Metal Mark
If the mark is gray, silver, or pencil-like, it may be metal transfer rather than a scratch. Try gently rubbing with an approved nonabrasive cleaner-polish and a soft cloth. Work slowly in small circles. Do not use steel wool or a green scouring pad.
If the mark lightens, keep going gently. If nothing changes and your fingernail catches in the line, stop polishing and move to touch-up repair.
Step 3: Prepare the Scratch for Touch-Up
For a shallow scratch that remains visible after cleaning, dry the surface completely. Mask around the damaged area with painter’s tape, leaving just enough space to apply the repair glaze. Wipe the scratch with rubbing alcohol, denatured alcohol, or acetone using a cotton swab. Let it evaporate fully.
This step is boring but important. Touch-up products do not bond well to soap film, oils, bath product residue, or moisture. If you skip prep, the repair may peel faster than a bargain sticker on a coffee mug.
Step 4: Apply Thin Coats of Touch-Up Paint
Shake or mix the touch-up product exactly as directed. With the small brush, apply a very thin coat along the scratch. Do not blob it on. A thin layer blends better and dries more evenly. For deeper scratches, two or three light coats usually look better than one thick coat.
Let each coat dry according to the product instructions before adding the next. If the repair compound calls for 10 minutes between coats, respect the timing. If it says 24 hours before water exposure, keep the tub dry. Your future self will appreciate the patience.
Step 5: Let the Repair Cure
Dry and cured are not always the same thing. A touch-up may feel dry to the finger but still be soft underneath. Avoid using the tub until the repair has cured for the full recommended time. Many touch-up paints and epoxy-acrylic products need at least 24 hours before exposure to water, and some repairs require longer in cool or humid bathrooms.
How to Repair Deeper Scratches or Small Chips
If the scratch is deep enough to expose a dark line, rough crater, or steel, treat it as a small chip rather than a cosmetic scuff. The goal is not only to hide the damage but also to seal the area against water.
Step 1: Remove Loose Material Only
Wear gloves and inspect the damaged area. If tiny flakes of loose enamel are lifting, remove only the loose pieces with a plastic putty knife or another gentle tool. Do not dig into solid enamel. The mission is cleanup, not excavation.
Step 2: Clean and Degrease
Wash with dish soap and water, rinse, and dry. Then wipe the damaged spot with acetone or alcohol and allow it to dry fully. Good adhesion starts with a clean, dry surface.
Step 3: Fill the Low Spot
If your repair kit includes filler, apply a small amount with a plastic putty knife. Press it into the chip or deep scratch, slightly overfilling if the instructions recommend sanding later. Keep the repair as neat as possible. The cleaner the application, the less finishing work you will need.
Step 4: Add the Glaze or Color Coat
Once the filler has dried as directed, apply the color-matched glaze or enamel touch-up in light coats. Build the repair slowly. Deep damage may require several applications to blend with the surrounding porcelain enamel.
Step 5: Finish Carefully
Some kits include finishing paper or recommend wet sanding with very fine grit after curing. Follow the product instructions closely. Do not aggressively sand the surrounding Americast surface. The goal is to feather the repair, not dull the entire tub floor.
When You Should Not DIY the Repair
DIY repair works best for small scratches, light chips, and isolated cosmetic damage. Call a professional refinisher or contact the manufacturer if:
- The damaged area is larger than a quarter.
- The tub has multiple chips across the floor.
- The surface is peeling, bubbling, or flaking widely.
- You see rust returning after repair.
- The damaged area flexes when you stand near it.
- The tub is still under warranty and the damage may relate to a defect.
- The scratch is on a textured slip-resistant surface and you are unsure how to preserve traction.
Large repairs can look patchy when done with small touch-up bottles. A professional may be able to spot-repair, reglaze, or refinish the surface more evenly. If the problem is structural, refinishing alone will not solve it.
How to Prevent New Scratches on an Americast Tub
Once the repair is done, prevention becomes the real money-saver. Americast tubs are durable, but glossy enamel surfaces appreciate gentle habits.
Use the Right Cleaning Routine
Clean weekly with hot soapy water and a soft cloth or sponge. Rinse thoroughly so cleaner residue does not dry into a dull film. Drying the tub after use can reduce mineral spots, especially in hard-water areas.
Avoid Abrasive Cleaners and Tools
Skip steel wool, scouring pads, harsh powders, and abrasive bathroom pastes unless the tub manufacturer specifically approves the product for your surface. Even then, use a soft sponge and light pressure. The pad often causes more damage than the cleaner itself.
Be Careful With Metal Objects
Metal shower caddies, shaving tools, drain snakes, pet grooming tools, and loose hardware can leave marks. Use rubber feet on organizers, avoid dragging tools across the tub, and place a towel down if you must work inside the tub during a plumbing or tile project.
Do Not Leave Bottles Sitting Forever
Shampoo bottles, bath oils, hair dye, and colored bath products can create stains or rings. Rinse the ledge and tub floor after showers. It takes ten seconds and saves future scrubbing drama.
Common Mistakes That Make Scratches Worse
The most common mistake is starting too aggressively. People see a scratch, panic, and reach for sandpaper, powdered cleanser, or a magic sponge used with too much pressure. On glossy enamel, that can turn one scratch into a dull patch.
Another mistake is applying thick touch-up paint. Thick coats may wrinkle, drip, cure unevenly, or sit above the surface like a tiny speed bump. Thin coats are slower but neater.
A third mistake is using the tub too soon. Water, soap, and steam can weaken a repair before it has cured. If the product says to wait, wait. Put a sticky note on the faucet if necessary. “Do not shower unless you enjoy redoing things” usually gets the message across.
Real-World Experience: What Actually Works Best
In real homes, Americast scratches often fall into three everyday categories: mystery gray marks, contractor mishaps, and dropped-object chips. Each one teaches a slightly different lesson.
The mystery gray mark is the easiest to misread. A homeowner may notice a long silver line after cleaning the bathroom and assume the enamel is ruined. Often, the culprit is a metal shower caddy, razor handle, or drain tool that rubbed against the porcelain enamel. In this case, gentle cleaning and polishing usually works better than repair paint. The key is patience. A soft cloth, mild cleaner, and small circular motions can gradually reduce the mark. Scrubbing harder rarely helps. It only makes your arm tired and your tub nervous.
Contractor mishaps are trickier. During remodeling, an Americast tub may become a temporary storage shelf for tile spacers, grout tools, screws, utility knives, and other objects that have no business lounging in a bathtub. Even a careful worker can drag a bucket or tool across the floor and leave a visible line. The best experience-based advice is to protect the tub before work begins. A clean moving blanket, cardboard layer, or tub protector can prevent scratches. If damage already happened, document it with photos before attempting repair. If a contractor caused the damage, ask whether they will cover professional spot repair. Do not let someone “buff it out” with a random abrasive pad unless they know the specific surface.
Dropped-object chips are the repairs where touch-up kits shine. A heavy shampoo bottle, handheld showerhead, or ceramic soap dish can create a small pit. If the chip is smaller than a pea or dime, a color-matched porcelain enamel repair product can often make it much less noticeable. The best-looking repairs usually come from careful prep, tiny amounts of filler, and multiple thin coats. People who rush tend to get a repair that looks like white nail polish sitting on top of the tub. People who slow down usually get a smoother result.
Another real-world lesson: color matching is both science and comedy. “White” is not always white. Some tubs are bright white, some are warm white, some lean biscuit, linen, or bone. Lighting changes everything too. A repair that disappears under a warm vanity bulb may look slightly different in daylight. If appearance matters greatly, test the product in a hidden area or confirm the finish color from the tub model before applying it to the most visible spot.
Finally, repaired areas need gentler care than untouched enamel. After a scratch repair, avoid harsh cleaners, bath oils, and heavy scrubbing for several days. Clean with dish soap and a soft sponge. Check the repair after a week, then again after a month. If it remains smooth, sealed, and stable, you have likely won the battle. Celebrate responsibly. Preferably not by dropping another bottle in the tub.
Conclusion
Fixing scratches on Americast tub surfaces starts with diagnosis. If the mark is only metal transfer or surface scuffing, gentle cleaning and polishing may solve the problem. If the enamel is scratched or chipped, use a color-matched Americast, porcelain enamel, or enameled-steel repair product and apply it in thin, patient layers. For deep, spreading, rusting, or textured-surface damage, professional help is usually the smarter choice.
The big takeaway is simple: be gentle first. Americast tubs are strong, but the glossy surface still deserves the right tools, soft cloths, mild cleaners, and careful touch-up work. Treat the tub like a durable fixture, not a garage floor, and it can stay smooth, shiny, and bath-ready for years.