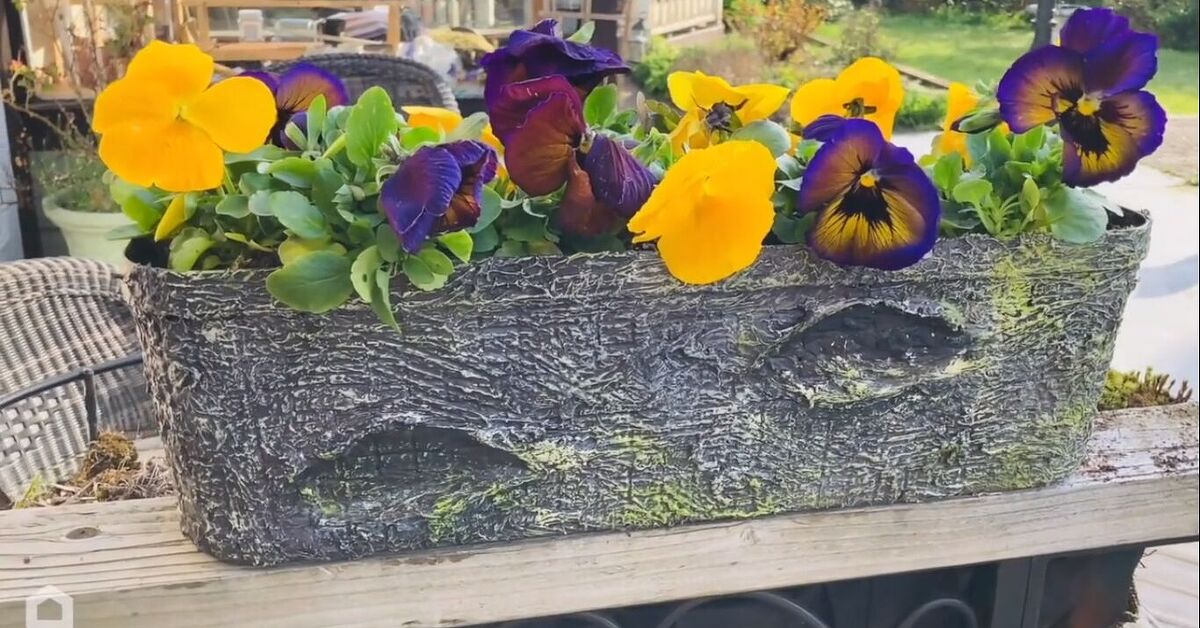
A window box is the home improvement equivalent of putting a good hat on your house. Suddenly the facade looks friendlier, the windows look dressed, and your neighbors start wondering whether you secretly hired a landscape designer. The trick, of course, is making sure the box stays on the wall instead of making a dramatic escape during the first thunderstorm.
Learning how to hang window boxes on vinyl, wood, stucco, and brick is mostly about matching the right mounting method to the exterior surface. Vinyl siding flexes. Wood can rot if water gets trapped. Stucco can crack if you attack it like a demolition crew. Brick is strong, but only when you drill in the right place. In other words, the flowers are the fun part, but the hardware is the hero.
This guide walks you through the tools, measurements, brackets, anchors, and installation details that help a window planter box look polished and stay secure. Whether you are adding petunias to a cottage, herbs outside a kitchen window, or a full “look at me, I garden now” display, these steps will help you mount your box safely and neatly.
Before You Start: Know What a Window Box Must Support
An empty window box may feel light when you carry it out of the garage, but that is not the weight your wall will actually carry. Once you add potting mix, plants, water, and maybe a few decorative overachievers like trailing vines, the load becomes much heavier. Wet potting mix is especially important to consider because rain and watering can turn a cute box into a soggy dumbbell.
For most full-size boxes, plan on using sturdy metal brackets, lag screws, masonry screws, or anchors rated for exterior use. Do not rely on trim, thin siding, or decorative surfaces alone. The fasteners should reach solid framing, such as wall studs, or bite securely into masonry. The goal is simple: the wall structure carries the weight, not the pretty outer layer.
Choose the Right Box Size
A window box usually looks best when it is about the same width as the window or extends a few inches beyond the casing on each side. If the box is too short, it can look like it shrank in the dryer. If it is far too long, it may overwhelm the window and require more support than expected.
Depth matters too. A deeper box holds more potting mix, which helps plants stay moist longer during hot weather. However, deeper boxes are heavier, so they need stronger brackets and better fasteners. For annual flowers and herbs, a box around 8 to 10 inches deep often works well. Larger plants or small shrubs may need more depth and more support.
Gather Tools and Materials
- Window box and matching brackets
- Tape measure and pencil
- Two-foot level or laser level
- Stud finder for vinyl and wood siding
- Drill and exterior-rated bits
- Masonry bit or hammer drill for brick and some stucco installations
- Exterior screws, lag bolts, masonry screws, or anchors
- Washers, spacers, or standoff blocks when needed
- Exterior-grade silicone caulk or sealant
- Safety glasses and work gloves
- Lightweight potting mix and plants
General Steps for Hanging Any Window Box
No matter what your exterior is made of, the basic process is similar: measure carefully, find solid backing, drill correctly, seal the holes, install the brackets, and test the box before filling it. That last step matters. It is much easier to adjust an empty window box than one full of soil, flowers, and regret.
Step 1: Mark the Center and Height
Start by finding the center of the window and the center of the box. Align those marks so the box sits visually balanced beneath the window. Many homeowners place the top of the box several inches below the sill so plants have room to grow without blocking the window or trapping water against trim.
Hold the box in position and mark the ends lightly on the wall. Then mark where each bracket will go. For shorter boxes, two brackets may be enough. For longer or heavier boxes, use three or more. Brackets should be spaced evenly, but structural support matters more than perfect symmetry. A slightly shifted bracket anchored into a stud is better than a perfectly placed bracket attached to nothing but wishful thinking.
Step 2: Locate Studs or Solid Masonry
For vinyl and wood siding, use a stud finder from inside the house if the exterior surface makes readings unreliable. Studs are often located at the sides of windows and then at regular intervals across the wall. For brick, concrete, or masonry surfaces, the masonry itself can support the box when you use the correct anchors or masonry screws.
Step 3: Drill Pilot Holes
Pilot holes reduce splitting in wood, help screws drive straight, and prevent unnecessary damage. For masonry, pilot holes must match the fastener manufacturer’s requirements. If the hole is too small, the screw may not drive properly. If it is too large, the fastener may not hold. This is one place where “close enough” can become “why is the planter on the ground?”
Step 4: Seal Every Penetration
Before installing screws or anchors, add exterior-grade silicone or sealant around the holes. This helps keep water from entering the wall assembly. Window boxes live in a wet neighborhood: watering cans, rain, runoff, and damp potting mix are all part of the deal. Sealing holes is not optional if you want the installation to last.
Step 5: Install Brackets and Test the Fit
Attach the brackets firmly, then check them with a level. Set the empty window box on the brackets and confirm that it sits flat. If the box rocks, slopes, or pulls away from the wall, fix the problem before planting. Some boxes should also be screwed to the brackets from below or through the back to prevent wind from lifting or shifting them.
How to Hang Window Boxes on Vinyl Siding
Vinyl siding is not structural. It is a protective and decorative skin, not a weightlifting champion. A full window box should not hang from vinyl panels alone. Instead, fasteners must pass through the siding and into wall studs or solid framing behind it.
Because vinyl expands and contracts with temperature changes, avoid crushing it with overtightened screws. Use washers, spacers, or mounting blocks where needed to create a firm surface without pinching the siding. Tighten the hardware enough to hold the bracket securely, but not so much that the panel buckles.
Vinyl Installation Tips
- Locate studs before drilling.
- Use exterior-rated screws or lag bolts long enough to reach solid framing.
- Seal holes with exterior silicone before driving fasteners.
- Use spacers or mounting blocks to prevent bending the siding.
- Keep the box slightly away from the wall so water can drain and air can circulate.
No-drill vinyl siding hooks can be useful for very small, lightweight planters or temporary seasonal decor, but they are not the best choice for large window boxes filled with wet soil. Always check the hook’s weight rating and remember that water changes everything. A box that weighs 12 pounds today may weigh much more after a long rain.
How to Hang Window Boxes on Wood Siding
Wood siding is one of the most straightforward surfaces for window box installation, but it still needs respect. The main concerns are strength and moisture. Screws should go through the siding and into studs or a solid backing board, not just into thin clapboards or shingles.
For a clean and sturdy installation, many homeowners attach a painted or sealed wood backer board to the studs first, then mount brackets to the board. This spreads the load, makes bracket placement easier, and can create a small standoff so water does not sit directly against the siding.
Wood Installation Tips
- Pre-drill pilot holes to reduce splitting.
- Use stainless steel, coated, or galvanized exterior fasteners.
- Seal holes and exposed wood edges.
- Leave a small gap behind the box for drainage and airflow.
- Repaint or reseal mounting boards as part of regular exterior maintenance.
Wood siding and constant moisture are not best friends. If your box sits flush against the wall and water drips behind it, paint can blister and wood can soften over time. A small gap, paired with good drainage holes in the box, helps protect the siding and keeps the whole display healthier.
How to Hang Window Boxes on Stucco
Stucco can look solid, but it is often a finish layer over framing, sheathing, or masonry. That means the correct fastener depends on what is behind it. Traditional stucco over wood framing usually needs screws that reach the studs. Stucco over masonry may require masonry anchors. Synthetic stucco or EIFS systems need extra caution because improper drilling can lead to water problems and hidden damage.
Drill slowly, use the right bit, and avoid forcing the tool. Stucco can crack if the bit wanders or the drill vibrates too aggressively. Once the pilot hole is ready, seal it carefully before installing the fastener. If the stucco is old, brittle, or already cracked, consider having a contractor evaluate the location before adding a heavy planter.
Stucco Installation Tips
- Identify whether the wall is framed stucco, masonry-backed stucco, or synthetic stucco.
- Anchor into studs whenever possible on framed walls.
- Use a masonry bit for stucco surfaces and drill at a controlled speed.
- Seal holes thoroughly to prevent water intrusion.
- Avoid hanging very heavy boxes from stucco alone.
If you are unsure what type of stucco you have, pause before drilling. That pause is cheaper than repairing a moisture problem later. For renters, condos, or historic homes, get written approval before making holes in exterior stucco.
How to Hang Window Boxes on Brick
Brick is strong, attractive, and very capable of holding a window box when installed correctly. The key is drilling into the brick face rather than the mortar joints. Mortar is softer and can crumble, especially in older homes. Brick provides a more reliable bite for masonry screws or anchors.
Use a masonry bit sized for your fastener. A hammer drill can make the job faster, but it should be handled carefully so you do not chip the brick. After drilling, clear dust from the hole, apply sealant if appropriate, and install masonry screws or anchors according to the hardware instructions. Mount brackets level, then set the box in place and secure it if the bracket system allows.
Brick Installation Tips
- Drill into brick, not mortar.
- Use masonry screws, sleeve anchors, or lag shields rated for the load.
- Match the pilot hole size exactly to the fastener.
- Do not place brackets where they block drainage holes.
- Use at least two brackets, and add a center bracket for longer boxes.
Brick installations often look especially polished because the brackets can sit directly against a flat, solid surface. Still, take your time with layout. Once holes are drilled in brick, moving a bracket half an inch to the left is not exactly invisible. Measure twice, drill once, and save the dramatic sighing for assembling patio furniture.
Drainage and Planting After Installation
A securely mounted box is only half the project. Your plants need drainage, airflow, and the right growing medium. Use lightweight potting mix rather than heavy garden soil. Potting mix drains better, weighs less, and gives roots a healthier environment.
Make sure the box has drainage holes before planting. If it does not, drill several holes in the bottom. Do not place brackets directly beneath drainage holes because trapped water can stain the wall, rust hardware, or keep moisture where you do not want it. For wood boxes, consider using a liner that protects the wood while still allowing water to escape.
Choose plants based on sunlight. Full-sun windows can handle petunias, geraniums, calibrachoa, verbena, herbs, and trailing sweet potato vine. Shadier windows may be better for impatiens, begonias, ferns, coleus, ivy, and heuchera. A classic design uses “thrillers” for height, “fillers” for fullness, and “spillers” to trail over the edge. It sounds like a movie genre, but it works beautifully in a planter.
Common Mistakes to Avoid
- Mounting into siding only: Siding is not meant to carry a full planter box.
- Skipping sealant: Unsealed holes invite water into the wall.
- Ignoring loaded weight: Wet soil can make a box much heavier than expected.
- Forgetting drainage: Plants dislike sitting in swampy soil.
- Using indoor fasteners: Exterior moisture can quickly rust the wrong hardware.
- Installing crooked brackets: A sloped box looks awkward and may drain poorly.
- Blocking window operation: Leave room for windows, shutters, screens, and maintenance.
Seasonal Maintenance Checklist
Check your window boxes at least twice a year: once before planting season and once before winter. Tighten loose screws, inspect brackets for rust, refresh sealant if it has cracked, and look for stains or soft spots on the siding. If you live where winters are harsh, consider removing lightweight plastic or wooden boxes during freezing weather unless they are designed to stay outdoors year-round.
During the growing season, water consistently and fertilize as needed. Window boxes dry faster than in-ground beds because they are exposed to sun, wind, and heat from the house wall. In hot climates, morning watering is often best. If you travel often, a self-watering box or small drip irrigation line can save your plants from the dreaded crispy-leaf vacation souvenir.
Real-World Experience: What Actually Makes the Job Go Smoothly
The most useful lesson from hanging window boxes is that the measuring stage takes longer than expected, and that is a good thing. The installation itself may be quick, but the layout determines whether the finished box looks custom or slightly confused. Centering the box under the window, checking the sill height, and stepping back from the house before drilling can prevent a lot of “why does that look weird?” moments.
On vinyl siding, the biggest surprise for many homeowners is how much the siding moves. It may look firm from the sidewalk, but when you press a bracket against it, you can feel the flex. That is why spacers, mounting blocks, or careful bracket placement matter. The box should feel connected to the house framing, not clamped onto a plastic shell. Tightening the screws slowly helps too. Once the bracket stops moving, stop turning. Vinyl does not reward enthusiasm.
Wood siding is friendlier, but it tells on you later if you ignore water. A small air gap behind the box can make a major difference. So can sealing pilot holes and touching up paint where brackets meet the siding. In practice, a simple painted backer board can be the neatest solution. It gives the brackets a flat place to sit, spreads the load, and creates a more intentional look, almost like the window box was part of the original trim plan.
Stucco requires the calmest hands. The best approach is to mark carefully, drill slowly, and avoid treating the wall like concrete unless you know what is behind it. Hairline cracks can appear if the drill chatters or if the anchor expands too aggressively. When the installation feels uncertain, it is worth asking a contractor or experienced handyman to identify the wall type. That small bit of advice can prevent a big patching job.
Brick feels satisfying because the brackets lock in firmly when the right masonry screws are used. The catch is that brick is unforgiving. If the bracket is crooked, the holes remain as a permanent reminder of your optimism. A level, painter’s tape, and a pencil are your best friends here. Mark the bracket holes, step back, check the spacing, and only then drill. Also, clear masonry dust from each hole before driving screws. Dust can stop fasteners from seating properly.
The best installations share three habits: they respect the wall material, they keep water moving away from the house, and they make future maintenance easy. A beautiful window box should not become a yearly repair project. When brackets are level, fasteners are structural, holes are sealed, and drainage is open, the box becomes what it should be: a cheerful, low-drama upgrade that makes the whole house look happier.
Conclusion
Hanging window boxes on vinyl, wood, stucco, and brick is not difficult, but it does require the right method for each surface. Vinyl needs fasteners into studs, not siding alone. Wood needs strong screws, pilot holes, and moisture protection. Stucco needs careful drilling and proper anchors. Brick needs masonry hardware installed into the brick face rather than weak mortar joints.
Once the box is secure, focus on drainage, lightweight potting mix, and plant choices that match the sunlight. Do that, and your window boxes will bring color, charm, and curb appeal without giving gravity a chance to join the project.