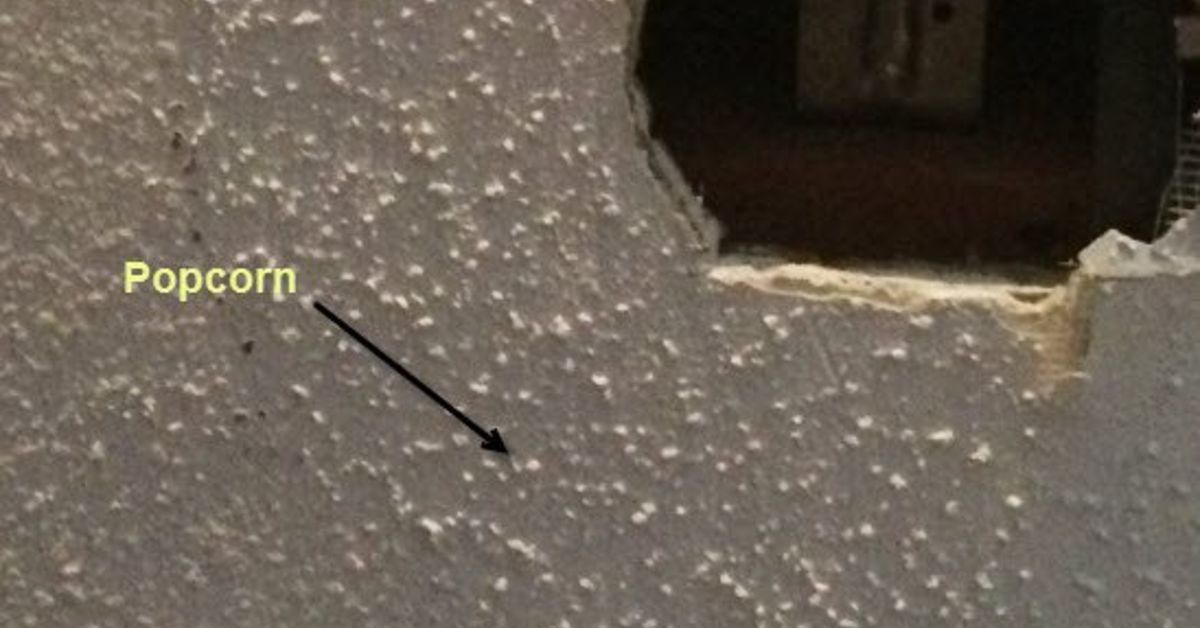
Note: Before you grab a scraper and declare war on the ceiling, remember this: popcorn ceiling removal is simple in theory, messy in practice, and potentially unsafe in older homes. If your ceiling may contain asbestos or lead-based paint, stop and test first. A smooth ceiling is lovely; mystery dust in your lungs is not part of the dream remodel.
Why Homeowners Want to Remove Popcorn Ceilings
Popcorn ceilings, also called acoustic ceilings, textured ceilings, or cottage cheese ceilings by people who have stared at them too long, were once the hero of fast homebuilding. They hid drywall seams, softened sound, and made ceilings easier to finish without expensive skim coating. Builders loved them. Homeowners tolerated them. Dust absolutely moved in and signed a long-term lease.
Today, many homeowners remove popcorn ceiling texture because it can make a room feel dated, dark, and harder to clean. The bumps catch cobwebs, trap dust, and turn ceiling repairs into a tiny mountain range of mismatched texture. Removing it can modernize a room, brighten the space, and make future painting easier. In many homes, a smooth ceiling also gives the room a cleaner, more updated look that appeals to buyers.
The good news: if the ceiling is safe to disturb, popcorn ceiling removal can be a manageable DIY project. The honest news: it is wet, tiring, and spectacularly messy. Imagine peeling oatmeal off the sky while standing on a ladder. That is the vibe.
First: Test for Asbestos and Lead
The most important step in learning how to remove popcorn ceiling is not scraping. It is testing. Older textured ceilings may contain asbestos, especially if the material was applied before the late 1970s or early 1980s. Asbestos was used in some textured paints, patching compounds, and building materials because it resisted heat and added strength. The danger begins when asbestos-containing material is disturbed and fibers become airborne.
If your home was built before 1980, do not assume the ceiling is safe just because it “looks fine.” You cannot identify asbestos by sight. Use an asbestos test kit that sends samples to a certified lab, or hire an asbestos inspector. If asbestos is present, hire a licensed asbestos abatement professional. Do not scrape it, sand it, vacuum it with a regular vacuum, or try to be brave with a bandana. A bandana is for cowboys, not hazardous material control.
Lead is another concern in older homes. If your home was built before 1978, painted surfaces may contain lead-based paint. Even if the popcorn texture itself is asbestos-free, disturbing layers of old paint can create lead dust. For pre-1978 homes, consider professional lead testing and use lead-safe renovation practices. If you hire someone, choose a contractor certified for lead-safe work when required.
Tools and Materials You Will Need
Once testing confirms the ceiling is safe for DIY removal, gather your supplies before turning the room into a construction snow globe. Preparation saves time, cleanup, and at least one dramatic sigh.
Basic Tools
- Plastic sheeting for floors and walls
- Painter’s tape
- Drop cloths or rosin paper for extra floor protection
- Garden pump sprayer filled with warm water
- Wide drywall taping knife or popcorn ceiling scraper
- Putty knife for edges and corners
- Ladder or work platform
- Joint compound
- Drywall sanding sponge or pole sander
- Primer and ceiling paint
- Trash bags or contractor bags
Safety Gear
- Safety goggles
- Dust mask or respirator suitable for nuisance dust
- Gloves
- Long sleeves and a hat
- Work shoes with good grip
For painted popcorn ceilings, you may also need a stronger approach, such as repeated soaking, a texture-removal product, or skim coating instead of scraping. Painted texture resists water, which means the ceiling may look at your garden sprayer and say, “Cute.”
Step-by-Step: How to Remove Popcorn Ceiling
Step 1: Empty and Protect the Room
Remove as much furniture as possible. Anything left behind should be covered completely with plastic. Do not rely on a cute little bedsheet. Wet popcorn texture has the enthusiasm of pancake batter and the loyalty of glitter. It finds everything.
Cover the entire floor with plastic sheeting, then tape the seams. Run plastic up the walls if you want easier cleanup. Use painter’s tape around trim, doorways, vents, and built-ins. If you are working in a room with carpet, be extra careful. Wet drywall texture in carpet is not a “quick vacuum later” situation.
Step 2: Turn Off Power and Remove Fixtures
Because you will be spraying water overhead, turn off power to the room at the breaker. Remove ceiling fans, light fixtures, smoke detectors, and vent covers if possible. Cover electrical boxes with painter’s tape or plastic, but do not trap moisture inside them. When in doubt, call an electrician.
This step also makes scraping easier. Trying to work around a ceiling fan is like trying to mow the lawn around a flamingo statue collection. Possible? Yes. Elegant? Absolutely not.
Step 3: Test a Small Area
Before soaking the whole ceiling, test a small section in a corner. Spray warm water over a two- to four-square-foot area and let it sit for 10 to 15 minutes. Then gently scrape with a drywall knife held at a shallow angle.
If the texture comes off easily, congratulations. Your ceiling is cooperative. If it turns gummy, smears, or refuses to budge, it may have been painted. Painted popcorn ceiling removal is slower because water cannot easily penetrate the paint film. In that case, you may need to scrape the tops lightly, apply more water, work in smaller sections, or consider skim coating over the texture instead.
Step 4: Wet the Ceiling in Small Sections
Use a garden sprayer to mist a section of ceiling with warm water. The goal is to dampen the texture, not flood the drywall. Too little water creates dust and extra effort. Too much water can damage the drywall paper underneath. Think “soft rain,” not “indoor monsoon.”
Work in sections about four feet by four feet. Let the water soak in for several minutes. If the surface still feels hard, mist it again and wait. Patience here saves your shoulders later.
Step 5: Scrape the Popcorn Texture
Hold a wide drywall taping knife or ceiling scraper at a low angle and push gently. The texture should peel or flake away. Keep the blade as flat as possible so you remove the popcorn without gouging the drywall. If you hit resistance, stop and add more water. Forcing the scraper is how ceilings get scars and homeowners learn new vocabulary.
A popcorn ceiling scraper with a bag attachment can help catch falling debris, but it will not catch everything. Accept that some mess is part of the ritual. Empty collection bags often so they do not become heavy and awkward overhead.
Step 6: Handle Edges and Corners Carefully
Edges near crown molding, walls, and light boxes often require a smaller putty knife. Work slowly in these areas. If you plan to repaint the walls, minor wall scuffs are not the end of the world. If your walls are already beautifully finished, protect them like they are museum art.
Do not scrape aggressively around electrical boxes. Make sure power is off, keep water away from wiring, and use light pressure.
Step 7: Let the Ceiling Dry
After scraping, let the ceiling dry completely. This may take several hours or overnight depending on ventilation, humidity, and how much water you used. Open windows if weather allows, run fans, or use the HVAC system after the wet work is complete and vents are uncovered.
Do not rush into sanding while the drywall is damp. Wet drywall paper tears easily, and torn paper creates more repair work. Your future self would prefer that you wait.
Step 8: Repair Gouges, Seams, and Damage
Once the ceiling is dry, inspect it under bright light. Popcorn texture often hides uneven drywall, taped seams, old nail pops, water stains, and mysterious bumps that look like the house had secrets. Use joint compound to fill gouges, smooth seams, and patch damaged areas.
Apply thin coats rather than one thick blob. Let each coat dry, then sand lightly. A smooth ceiling depends on good surface prep. Paint will not hide bad patching; it will politely introduce it to every guest who looks up.
Step 9: Sand the Ceiling Smooth
Use a sanding sponge or pole sander to feather repaired areas. Wear eye protection and a dust mask. If you have a drywall sander with dust collection, this is the moment it earns its garage storage space. Keep the sanding gentle, especially if the drywall paper is exposed.
For a truly smooth finish, some ceilings need a skim coat. Skim coating means applying a thin layer of joint compound over the entire ceiling, then sanding it smooth. It is more work, but it can transform a rough, patchy surface into a clean modern ceiling.
Step 10: Prime Before Painting
Primer is not optional if you want an even finish. Bare drywall, old stains, joint compound, and previously painted areas absorb paint differently. A quality primer seals the surface and helps the ceiling paint look consistent.
If the ceiling has water stains, smoke stains, or discoloration, use a stain-blocking primer. If the ceiling is new or heavily patched drywall, a drywall primer or PVA primer may be appropriate. Let the primer dry according to the product instructions.
Step 11: Paint the Ceiling
Use flat ceiling paint for the most forgiving finish. Flat paint helps hide small imperfections because it reflects less light than satin or semi-gloss. Apply paint with a roller on an extension pole, working in manageable sections. Keep a wet edge to reduce lap marks.
One coat may work over good primer, but two coats often look better. When the paint dries, reinstall fixtures, remove plastic carefully, and enjoy the strange luxury of a ceiling that no longer resembles breakfast cereal.
What If the Popcorn Ceiling Has Been Painted?
Painted popcorn ceilings are more difficult to remove because paint seals the texture and blocks water absorption. You can still try wet scraping, but expect slower progress. Start by scraping the high points lightly to break the paint surface, then mist with warm water and wait longer than usual.
If the ceiling was painted with a glossy or oil-based paint, scraping may be frustrating. In that case, compare your options: hire a professional, skim coat over the texture, install new drywall over the ceiling, or cover it with ceiling planks or panels. Sometimes the smartest DIY move is knowing when the ceiling has won round one.
Should You Remove, Cover, or Skim Coat?
Removing popcorn ceiling is popular, but it is not the only option. The best choice depends on safety, budget, ceiling condition, and how smooth you want the final result.
Remove It
Removal is best when the ceiling is asbestos-free, unpainted or lightly painted, and the drywall underneath is in decent shape. It is usually the most direct route to a smooth ceiling, but it creates the most mess.
Skim Coat It
Skim coating works well when the texture is painted, difficult to scrape, or mildly uneven. Instead of removing the texture, you flatten the surface with joint compound. This takes skill and patience, but it can produce excellent results.
Cover It
Covering the ceiling with new drywall, beadboard, planks, or decorative panels is useful when removal is unsafe, the texture is stubborn, or the ceiling underneath is badly damaged. This option adds material cost and may slightly reduce ceiling height, but it avoids scraping.
How Much Does Popcorn Ceiling Removal Cost?
DIY popcorn ceiling removal can be inexpensive if the ceiling is safe and you already own basic tools. You may spend money on plastic sheeting, tape, scraper blades, joint compound, primer, paint, and protective gear. For one average room, DIY materials may cost far less than hiring a crew.
Professional popcorn ceiling removal usually costs more because it includes labor, setup, scraping, cleanup, repairs, and finishing. Costs vary by region, ceiling height, room size, texture condition, whether the ceiling is painted, and whether asbestos testing or abatement is required. Asbestos abatement can raise the price significantly and should be handled by licensed professionals.
For budgeting, remember that scraping is only one part of the project. The final ceiling may need patching, sanding, priming, and painting. A low quote that only covers “removal” may not include the smooth finish you actually want.
Common Mistakes to Avoid
Skipping the Asbestos Test
This is the biggest mistake. If the ceiling is old, test before disturbing it. A clean-looking ceiling can still contain hazardous material.
Using Too Much Water
Water helps soften texture, but soaking the ceiling can damage drywall. Mist, wait, scrape, and repeat as needed.
Scraping Too Aggressively
A steep scraper angle gouges drywall. Keep the blade low and let moisture do most of the work.
Forgetting About Cleanup
Popcorn ceiling removal creates heavy wet debris. Plan cleanup before you begin. Tape plastic seams, use contractor bags, and remove waste carefully.
Painting Without Primer
Primer gives the ceiling an even surface and helps prevent flashing, stains, and uneven sheen. Skipping it is a shortcut with a high chance of regret.
Safety Tips for a Better DIY Project
Work with a helper if possible. One person can scrape while the other moves the ladder, manages debris, or reminds you not to make “just one more section” at midnight. Keep the floor clear so you do not slip on wet texture. Use a stable ladder or platform, not a wobbly chair with emotional support.
Keep children and pets out of the work area. Seal doorways with plastic if dust is likely. Wear eye protection because ceiling debris has an impressive ability to aim directly for your face. If you feel unsure about hazardous materials, wiring, water damage, or structural issues, hire a professional.
Experience Notes: Real-World Lessons From Removing Popcorn Ceiling
Popcorn ceiling removal looks easy in short videos because the internet has a talent for skipping the part where your shoulders start negotiating for a new career. In real life, the project is less about brute strength and more about rhythm. The best results usually come from working in small sections, using enough water, and resisting the urge to rush.
One practical lesson is to start in a closet or less visible corner if possible. That first section teaches you how your ceiling behaves. Some textures fall off in satisfying sheets. Others cling like they have abandonment issues. A test area helps you figure out how long to let the water soak, how much pressure to use, and whether the ceiling underneath will need a light patch or a full skim coat.
Another experience-based tip: do not underestimate lighting. A ceiling can look smooth in soft afternoon light and then reveal every ridge, seam, and scraper mark when a bright fixture goes back up. Use a work light held at an angle across the ceiling after scraping and again after patching. This side lighting makes flaws easier to see before primer and paint lock them into the story forever.
Cleanup is also a bigger deal than most people expect. Wet popcorn texture is heavier than dry dust and can tear thin plastic if you drag it carelessly. Use thicker plastic on the floor, overlap seams, and roll the mess inward when you are done. Keep a separate trash bag nearby for tape, used blades, gloves, and small debris. If you have to carry bags through the house, do not overfill them. A bag splitting in the hallway is the kind of home improvement memory that becomes family folklore.
Painted ceilings deserve special patience. If water beads up and the scraper only shaves off tiny crumbs, the texture may be sealed under paint. In that situation, many homeowners waste hours fighting the ceiling when skim coating or hiring a finisher would produce a better result. There is no shame in changing the plan. The goal is a clean ceiling, not proving dominance over drywall texture.
Finally, expect the room to feel dramatically different after the project. Smooth ceilings reflect light more evenly and make walls, trim, and fixtures look fresher. The upgrade is subtle but powerful, like the room got a good haircut. Popcorn ceiling removal is messy, yes, but when done safely and finished properly, it can be one of the most satisfying cosmetic improvements in an older home.
Conclusion
Learning how to remove popcorn ceiling is mostly about preparation, safety, and patience. Test first, especially in homes built before 1980 for asbestos and before 1978 for lead-based paint. Protect the room thoroughly, wet the texture in small sections, scrape gently, repair the drywall, prime the surface, and finish with flat ceiling paint. If the texture is painted, damaged, or hazardous, consider professional removal, skim coating, or covering the ceiling instead.
A smooth ceiling can make a room feel brighter, cleaner, and more current. Just remember: the best popcorn ceiling removal project is not the fastest one. It is the one that leaves your home safer, your ceiling better, and your sanity mostly intact.