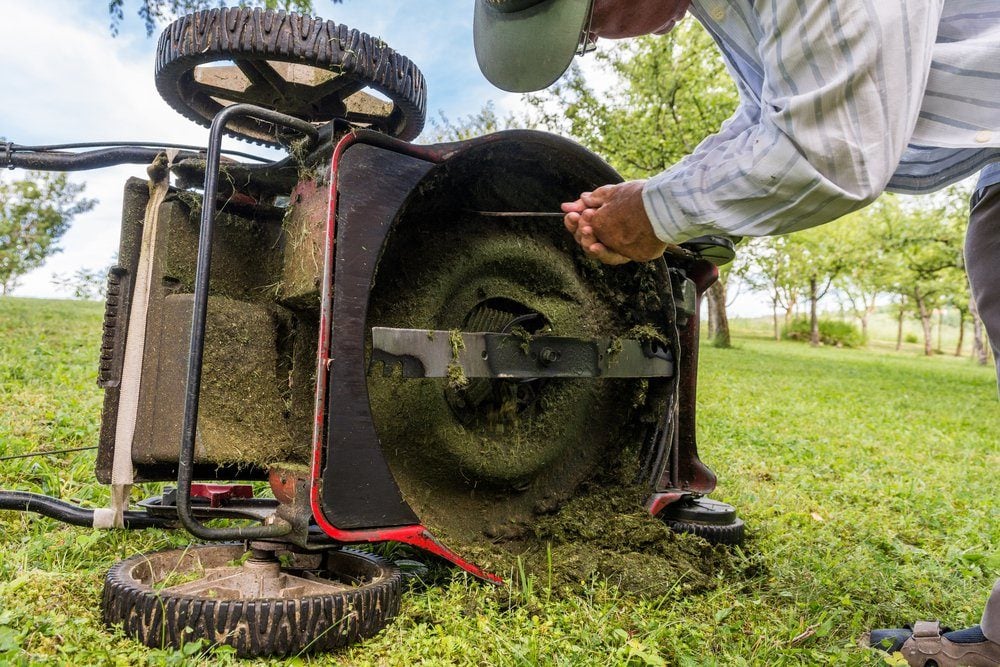
A sharp lawn mower blade is the tiny backyard hero nobody talks about. It does not wear a cape, it does not ask for applause, and it spends most of its life hidden under a deck covered in grass confetti. But when it is sharp, your lawn looks cleaner, healthier, and greener. When it is dull, your mower stops cutting and starts chewing, which is rude behavior from a machine you trusted with curb appeal.
Learning how to sharpen lawn mower blades is one of the most useful DIY lawn care skills a homeowner can learn. It saves money, improves mowing performance, reduces ragged brown grass tips, and helps your mower work with less strain. The job is not complicated, but it does require patience, safety steps, and a little respect for the fact that mower blades are still blades, even when they look like they lost a fight with a gravel driveway.
This guide explains how to remove, clean, sharpen, balance, and reinstall a lawn mower blade using common tools such as a metal file, angle grinder, bench grinder, or drill-powered blade sharpener. You will also learn when to sharpen, when to replace, and what mistakes to avoid so your DIY project does not turn into a “why is my mower vibrating like a washing machine full of bricks?” situation.
Why Sharp Lawn Mower Blades Matter
Grass is a living plant, not green outdoor carpet. When a sharp blade cuts grass, the cut is cleaner and the leaf tissue heals faster. When a dull mower blade hits grass, it tears and shreds the leaf tips. Those torn edges often turn brown or whitish after mowing, making the whole lawn look thirsty, stressed, and slightly offended.
Dull blades can also increase stress on turfgrass. Ragged cuts create larger wounds, and those wounds may make grass more vulnerable to disease, heat stress, and moisture loss. In simple backyard language: a dull blade gives your lawn a bad haircut and then asks it to recover during summer heat. That is not teamwork.
Sharp blades also help the mower do its job more efficiently. A clean cutting edge requires less effort than a blunt, rounded one. That may reduce vibration, improve the quality of cut, and help avoid unnecessary strain on the engine or motor. If your mower leaves uneven patches, clumps, torn tips, or a fuzzy finish, blade sharpness should be one of the first things you check.
How Often Should You Sharpen Lawn Mower Blades?
Most homeowners should sharpen lawn mower blades at least once or twice per mowing season. If you mow frequently, have a large yard, cut tough grass, or regularly hit sand, sticks, small stones, pinecones, or mystery objects left by children and squirrels, you may need to sharpen more often.
A practical rule is to inspect the grass after mowing. If the tips look cleanly sliced, your blade is probably fine. If the tips look ripped, frayed, brown, or stringy, it is time to sharpen. You can also inspect the blade itself. Nicks, rounded edges, dents, or a visibly dull bevel are all signs that sharpening is overdue.
Many homeowners sharpen in early spring before the first major mowing and again in midseason. Another smart approach is to sharpen before winter storage so the mower is ready when spring grass begins growing like it has a personal goal to embarrass your weekend schedule.
Tools and Supplies You Will Need
Basic Safety Gear
Before touching the blade, gather safety glasses, thick work gloves, and hearing protection if you will use a grinder. Metal filings and sparks are not decorative. They are tiny reminders that eyes are not replaceable.
Blade Removal Tools
You will usually need a socket wrench or box wrench that fits the blade bolt. A breaker bar can help with stubborn bolts. A block of wood is useful for wedging the blade so it cannot spin while you loosen the bolt. Penetrating oil may help if the bolt is rusty or stuck.
Sharpening Tools
You can sharpen a lawn mower blade with a 10-inch metal file, a drill-powered sharpening stone, an angle grinder, or a bench grinder. A hand file is slower but gives excellent control and is less likely to overheat the blade. A grinder is faster, especially for blades with heavier wear, but it requires a lighter touch.
Balancing and Finishing Tools
A blade balancer is inexpensive and very helpful. You can also use a nail in a wall as a simple balance check, although a dedicated cone-style balancer is more precise. You may also want a wire brush, rag, scraper, torque wrench, marker, and your mower owner’s manual.
Step-by-Step: How to Sharpen Lawn Mower Blades
Step 1: Make the Mower Safe
Start with the mower turned off on a flat surface. For a gas mower, disconnect the spark plug wire and move it away from the plug so the engine cannot accidentally start. For a battery-powered mower, remove the battery. For a corded electric mower, unplug it completely. This is the part where you tell the mower, politely but firmly, “You are not participating right now.”
If you are working on a gas mower, consult the manual before tipping it. Many walk-behind mowers should be tilted with the air filter and carburetor facing upward to reduce the chance of fuel or oil leaking into places they do not belong. If the fuel tank is full, consider running it low before service or follow the manufacturer’s instructions for safe handling.
Step 2: Mark the Blade Position
Before removing the blade, mark the side facing downward with paint, chalk, tape, or a marker. This simple step prevents reinstalling the blade upside down. Yes, it can happen. No, the mower will not cut well. It may simply slap the grass around like it is trying to make a salad.
Step 3: Remove the Blade
Wedge a block of wood between the blade and the mower deck to stop the blade from rotating. Use the correct socket or wrench to loosen the blade bolt. Some bolts are tight because they are designed to stay tight during high-speed rotation, so use steady pressure rather than wild heroic yanking.
Once the bolt is removed, take off the blade and any washers or hardware. Keep the parts in order so reassembly is easy. If the blade is packed with grass, mud, or rust, clean it before sharpening. A wire brush and scraper usually work well.
Step 4: Inspect the Blade Carefully
Sharpening is not always the right answer. Replace the blade if it is cracked, bent, deeply gouged, severely worn, or missing chunks of metal. A damaged blade can be dangerous and may cause vibration, poor cutting, or mower damage. If the blade looks like it was used to fight a mailbox, buy a new one.
Also inspect the center hole and mounting area. If the hole is worn or distorted, replacement is safer than sharpening. A blade must mount securely and spin evenly.
Step 5: Secure the Blade in a Vise
Clamp the blade firmly in a bench vise with one cutting edge facing upward. Do not hold the blade in your hand while sharpening. The blade needs to stay stable so you can maintain the bevel angle and avoid slips.
Step 6: Follow the Original Bevel
Lawn mower blades are not meant to be razor sharp. The goal is a clean, durable cutting edge, not a sushi knife. Follow the original bevel angle already ground into the blade, which is commonly around 30 to 45 degrees depending on the blade design. The existing angle is your guide.
Sharpen only the top side of the cutting edge unless your specific blade design says otherwise. Remove metal evenly from both ends of the blade. Try to take off only enough material to restore a clean edge. Grinding away half the blade may feel productive, but so does eating an entire pizza while reorganizing the garage; not every energetic decision is wise.
Step 7: Sharpen With a File
For a hand file, push the file along the cutting edge in one direction, following the bevel. Do not saw back and forth. Use smooth, consistent strokes from the inner part of the cutting edge toward the outer tip. Count your strokes if that helps you remove a similar amount of metal from each end.
A file is ideal for routine maintenance and minor dullness. It produces less heat, gives better control, and is beginner-friendly. The downside is speed. If your blade has large nicks, a file may turn the job into an upper-body workout you did not request.
Step 8: Sharpen With an Angle Grinder or Bench Grinder
If you use an angle grinder or bench grinder, wear eye protection, gloves, and hearing protection. Keep the grinder moving and avoid holding it in one spot too long. Excessive heat can weaken the metal edge. If the blade starts turning blue from heat, you are grinding too aggressively.
Use light passes and follow the original bevel. Do not try to create a thin razor edge. A mower blade needs a sturdy cutting edge that can survive grass, dust, and the occasional twig. Think “butter knife with ambition,” not “barber’s straight razor.”
Step 9: Remove Burrs
After sharpening, lightly remove any burr from the back side of the blade with a file or stone. Do not grind a second bevel unless the blade is designed for it. The goal is simply to clean up the edge so it cuts smoothly.
Step 10: Balance the Blade
Balancing the blade is not optional. An unbalanced mower blade can cause vibration, uneven cutting, and extra strain on the mower. Place the blade on a blade balancer. If one side dips lower, that side is heavier. Remove a small amount of metal from the heavier end, usually from the back side or cutting area, then check again.
If you do not have a blade balancer, hang the blade from its center hole on a nail. The blade should sit level. This method is not perfect, but it is better than guessing. A mower blade spins at high speed, and “close enough” can become “why is my mower trying to leave the yard?” very quickly.
Step 11: Reinstall the Blade Correctly
Reinstall the blade in the same orientation it had before removal. The marked side should face the correct direction, and the cutting edge should be positioned to cut as the blade rotates. Install washers and hardware in the proper order.
Tighten the blade bolt securely according to the torque specification in your mower owner’s manual. If you do not know the specification, look it up for your exact model. A loose blade is dangerous, while overtightening can damage threads or hardware.
Step 12: Test the Mower
Reconnect the spark plug wire, reinstall the battery, or plug in the mower only after everything is back together. Start the mower in a safe open area. Listen for unusual vibration, rattling, scraping, or wobbling. If something feels wrong, shut the mower off immediately and inspect your work.
Common Mistakes to Avoid
Sharpening the Blade While It Is Still on the Mower
Some people sharpen blades without removing them, but removing the blade is safer, cleaner, and makes balancing possible. For most DIY homeowners, removal is the better method.
Making the Blade Too Sharp
A razor-thin edge may sound impressive, but it dulls quickly and can chip. A mower blade should have a firm, clean edge that can handle yard debris. Sharp enough to cut grass cleanly is the target.
Ignoring Blade Balance
Skipping the balance check is one of the biggest DIY mistakes. If you remove more metal from one side than the other, the blade may vibrate. That vibration can stress the mower and make your cut uneven.
Reinstalling the Blade Upside Down
This classic mistake usually leads to terrible cutting performance. Marking the blade before removal saves you from this awkward moment.
Using a Damaged Blade
If the blade is bent, cracked, badly worn, or deeply damaged, replace it. Sharpening cannot fix structural damage. A new blade is cheaper than a damaged mower and much cheaper than a trip to urgent care.
Should You Sharpen or Replace the Blade?
Sharpen the blade if it is dull, lightly nicked, or slightly worn but still straight and solid. Replace it if it is cracked, bent, heavily pitted, thin from repeated sharpening, or has deep chunks missing from the cutting edge.
For many homeowners, keeping a spare blade is a smart move. You can install the sharp spare immediately and sharpen the dull blade later. This is especially helpful during fast-growing seasons when the grass waits for no one, not even a person with a socket wrench and good intentions.
DIY Sharpening Methods Compared
Metal File
A metal file is inexpensive, controlled, and excellent for beginners. It is slower than power tools but safer and less likely to overheat the blade. It works best for blades that are dull but not badly damaged.
Drill-Powered Blade Sharpener
A drill-powered sharpening stone is convenient and often includes a guide to help maintain the angle. It is faster than filing and easier than freehand grinding. It works well for routine sharpening, but it may not handle major damage as efficiently as a grinder.
Angle Grinder
An angle grinder is fast and effective for nicked blades, but it requires control. It can remove too much metal quickly. Use light passes and avoid overheating.
Bench Grinder
A bench grinder is powerful and stable, especially for experienced DIYers. It can restore an edge quickly, but like an angle grinder, it can overheat or reshape the blade if used carelessly.
Extra Lawn Care Tips After Sharpening
Once your blade is sharp, make the most of it by mowing correctly. Avoid mowing wet grass because it clumps, sticks under the deck, and can lead to uneven cutting. Follow the one-third rule: never remove more than one-third of the grass blade height in a single mowing. Cutting too short stresses turf and invites weeds to move in like they found free rent.
Change mowing direction regularly to reduce soil compaction and prevent grass from leaning one way. Clean the mower deck after mowing so packed clippings do not trap moisture against the metal. A clean deck improves airflow and helps the blade cut and discharge properly.
DIY Experience: What Sharpening Lawn Mower Blades Teaches You
The first time you sharpen a lawn mower blade, the job may feel more intimidating than it really is. You tip the mower, stare at the blade, and suddenly every safety warning you have ever read appears in your brain wearing a reflective vest. That is not a bad thing. A cautious DIYer is usually a successful DIYer.
One of the biggest lessons is that preparation matters. The project goes smoothly when you have gloves, the right socket, a sturdy block of wood, a vise, and a blade balancer ready before you start. It becomes annoying when you remove the spark plug wire, crawl beside the mower, and discover your socket set is missing the one size you need because it has apparently joined a witness protection program.
Another practical lesson is to clean before you judge. A mower blade often looks worse than it is because it is coated with dried grass, dirt, and surface rust. After a few minutes with a wire brush, you can actually see the cutting edge. Sometimes the blade only needs a light touch-up. Other times, you find a bend or crack and realize replacement is the smarter call.
Using a hand file teaches patience and control. You can feel the file bite into the metal, and you quickly notice whether you are following the bevel correctly. It is slower, but it is satisfying in the way old-school tasks often are. There is no battery to charge, no sparks, no dramajust steady strokes and gradual improvement. For homeowners who sharpen once or twice a season, a file may be all they need.
Using an angle grinder feels more exciting, but it also demands restraint. The tool removes metal quickly, which is wonderful until you realize you have taken three times more off one side than the other. The best experience with a grinder comes from using short, light passes and checking your work often. The goal is not to sculpt a sword. The goal is to restore the mower blade’s original cutting edge.
Balancing is the step that surprises many beginners. It seems minor until you place the blade on a balancer and watch one side dip like it is trying to escape. Removing a little metal from the heavy side and checking again feels fussy, but it makes a real difference. A balanced blade helps the mower run smoother and gives you confidence when you start it up again.
The most satisfying part comes after the first mow. A freshly sharpened blade leaves grass tips clean instead of ragged. The lawn looks more even, the mower feels more capable, and you get that quiet DIY pride of fixing something with your own hands. It is not glamorous work, but neither is flossing, and both prevent bigger problems later.
Over time, sharpening mower blades becomes part of a simple seasonal rhythm: inspect, remove, clean, sharpen, balance, reinstall, mow. Once you learn the process, it stops feeling like a repair and starts feeling like basic lawn care. Your mower performs better, your grass looks healthier, and you become the kind of person who says, “I should check the blade,” which is how adulthood sneaks up on people.
If there is one experience-based tip worth remembering, it is this: do not wait until the lawn looks bad. Sharpen before the blade is completely dull. A quick touch-up is easier than restoring a neglected blade with deep nicks. Preventive maintenance is less dramatic, but that is exactly why it works.
Conclusion
Sharpening lawn mower blades is a practical DIY task that pays off every time you mow. A sharp, balanced blade cuts grass cleanly, supports healthier turf, improves mower performance, and helps your yard look well cared for without requiring professional service every few weeks. The process is straightforward: make the mower safe, remove the blade, clean and inspect it, sharpen along the original bevel, balance it, and reinstall it correctly.
The key is not speed. The key is doing each step carefully. Disconnect the power source, wear protective gear, avoid overheating the blade, and replace damaged blades instead of trying to rescue them. With the right tools and a little practice, sharpening mower blades becomes one of those home maintenance jobs that feels surprisingly satisfying. Your mower gets a better edge, your grass gets a cleaner cut, and your lawn gets to stop looking like it lost an argument with a weed trimmer.
Note: Always follow your mower owner’s manual for model-specific blade removal, blade orientation, and torque requirements. If a blade is bent, cracked, severely worn, or unsafe to sharpen, replace it instead of repairing it.