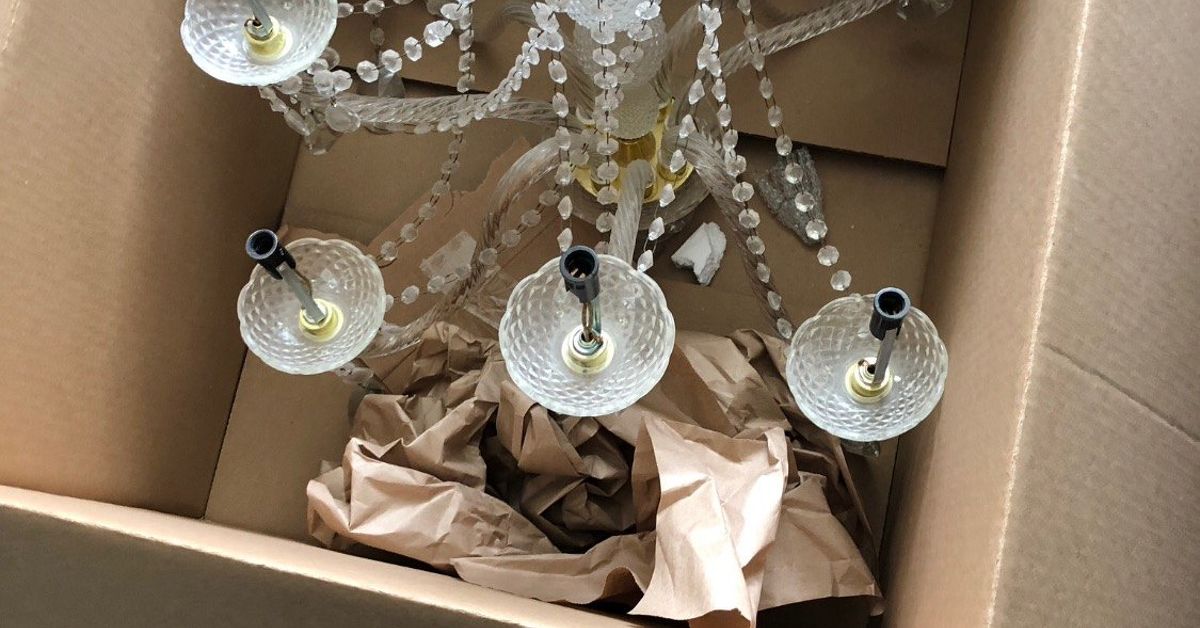
Some old chandeliers are simply too dramatic to retire quietly. They have curves, scrolls, arms, crystals, candle cups, and the kind of theatrical energy that says, “I once hung above a dining room where someone definitely owned a gravy boat.” Instead of sending that forgotten fixture to the donation pile or letting it gather dust in the garage, you can repurpose a chandelier into a serving piece that becomes the star of your buffet, dessert table, brunch bar, wedding shower, or holiday spread.
This DIY chandelier serving piece is part upcycling project, part conversation starter, and part “look what I made” victory lap. With a little cleaning, planning, paint, and styling, an old chandelier can become a tiered dessert stand, cupcake holder, fruit display, candle centerpiece, appetizer station, or decorative serving caddy. It is a clever way to reuse vintage lighting while adding height, charm, and personality to your table.
Before we begin, let’s clear one thing up: this project is not about putting food directly onto old metal arms, mystery paint, or adhesive surfaces. We are stylish, not reckless. The safest approach is to use the chandelier as the structure and place food on removable, washable, food-safe plates, bowls, saucers, ramekins, or trays. That way your serving piece looks fabulous and your guests do not leave with a story that begins, “Remember those cupcakes from the chandelier?”
Why Turn a Chandelier Into a Serving Piece?
A chandelier already has the bones of a display stand. It has a central stem, balanced arms, decorative details, and often small cups or platforms where bulbs once sat. In other words, it is basically auditioning for a second life as a party centerpiece. Repurposing one saves money, keeps a usable item out of the landfill, and gives you a one-of-a-kind serving piece you will not see in every big-box store aisle.
The best part is flexibility. A small brass chandelier can become a charming cupcake stand. A crystal chandelier can turn into an elegant dessert tower. A rustic iron fixture can hold small bowls of nuts, olives, berries, wrapped candies, or dips. A mini chandelier can become a tea-party centerpiece, while a larger one can anchor a wedding buffet. It is recycling with a tiara.
Best Chandelier Styles for This Project
Not every chandelier is ready for buffet-table glory. The best candidates are sturdy, balanced, and easy to clean. Look for chandeliers with strong arms, a stable center column, and enough spacing between arms to hold small plates or bowls. Candle-style chandeliers work especially well because the candle cups can often be adapted into holders for saucers, dessert plates, or ramekins.
Good options include:
- Small brass chandeliers with five or six arms
- Vintage crystal chandeliers with removable prisms
- Wrought iron chandeliers for farmhouse or rustic styling
- Candle-style fixtures with flat cups
- Mini chandeliers for tea parties, candy bars, or jewelry-style displays
Avoid fixtures that are badly rusted, cracked, wobbly, flaking heavily, or too top-heavy to stand securely. If the chandelier looks like it may collapse under the emotional weight of a macaron, keep shopping.
Safety First: What to Check Before You Start
Because old chandeliers were originally electrical fixtures, your first job is to make them safe for tabletop use. Remove all bulbs, wiring, sockets, and electrical components that are not needed for the design. If you are uncomfortable removing wiring, ask someone experienced with basic electrical work to help. You are making a serving piece, not auditioning for a surprise sparks show.
If the chandelier is vintage or painted, inspect the finish carefully. Older painted items may contain lead-based paint, especially if they have unknown origins. Do not sand, scrape, or aggressively disturb old paint unless you know it is safe. If there is peeling paint, consider using a lead test kit or choosing a newer fixture. For a serving piece, a clean, sealed, stable finish matters.
Also remember that decorative paints, glues, and sealers are not automatically food-safe. Keep food on plates, liners, bowls, or trays that are designed for serving. The chandelier itself should function as the display frame, not the dinner plate.
Materials and Tools You May Need
Your exact supply list depends on your chandelier and the serving style you want. Still, most projects use a similar set of basics.
Common supplies:
- An old chandelier
- Screwdriver and pliers
- Microfiber cloths
- Mild dish soap and warm water
- Degreaser, if the fixture is grimy
- Fine-grit sanding sponge, only if the finish is safe to scuff
- Spray primer suitable for metal
- Spray paint or brush-on paint
- Clear protective topcoat
- Small food-safe plates, saucers, bowls, or ramekins
- Strong adhesive, screws, or removable mounting putty, depending on design
- Felt pads or rubber feet for the base
For a no-permanent-commitment version, skip glue and use removable bowls or plates that sit securely in the candle cups. This makes cleaning easier and lets you change the look by season. One day it holds strawberries; the next day it holds ornaments. Personal growth, but for decor.
Step-by-Step: How to Repurpose a Chandelier Into a Serving Piece
Step 1: Choose the Right Chandelier
Start with a fixture that can sit or be mounted securely. If it has a chain, canopy, or ceiling hardware, decide whether those parts will be removed or used as decorative elements. A chandelier with a broad lower stem or center post can often be adapted to stand on a base. If the bottom is narrow, attach it to a sturdy wood round, metal plate, cake stand base, or thrifted tray.
Step 2: Remove Electrical Parts
Take out light bulbs, sleeves, wiring, and sockets. Work slowly and photograph the chandelier before disassembly so you remember how decorative pieces fit together. Keep crystals, beads, and finials in a small container. They have a magical ability to roll under furniture and reappear three years later during a sock search.
Step 3: Clean the Fixture Thoroughly
Wash the chandelier with warm water and mild dish soap. Use a soft brush or cloth to reach grooves and scrollwork. If it has kitchen grease or old dust, use a gentle degreaser, then rinse and dry completely. Moisture trapped in joints can encourage rust, so let the fixture air-dry before painting or sealing.
Step 4: Test the Balance
Place the chandelier on a flat table and check how it sits. Add empty plates or bowls to the arms and see whether the weight is balanced. If one side droops or the whole piece wobbles, fix that before decorating. A serving stand that tips over during a party is not “whimsical.” It is a cheese-cube avalanche.
Step 5: Create a Stable Base
If your chandelier will stand on a table, attach it to a base. A wood plaque, round cutting board used only as a base, metal tray, or salvaged lamp base can work. The base should be wide enough to prevent tipping. Add felt pads underneath to protect your table and help the piece sit evenly.
Step 6: Prime and Paint
If the finish is safe and stable, lightly scuff glossy metal so primer can grip. Apply a metal primer, then paint in thin coats. Popular colors include matte black, antique gold, soft white, champagne, oil-rubbed bronze, sage green, or blush pink. Choose the color based on how you plan to use it. Black feels modern and dramatic; white feels cottage and bridal; gold says, “Yes, the cookies deserve a throne.”
Step 7: Add Serving Surfaces
Now comes the fun part. Place small plates, saucers, ramekins, or bowls where the bulbs or candle cups used to be. You can use matching pieces for a polished look or mismatched thrifted china for vintage charm. If attaching them permanently, use a strong adhesive appropriate for the materials, but keep in mind that permanently attached dishes may be harder to wash. For food service, removable dishes are usually the smartest choice.
Step 8: Seal Decorative Surfaces
After painting, apply a clear topcoat to the chandelier frame. This helps protect the finish from handling, crumbs, fingerprints, and the occasional frosting incident. Let everything cure fully according to the product directions before using it near food or decor.
Step 9: Style It for the Occasion
Use your chandelier serving piece to add height to the center of a table. Place taller items in the middle and smaller treats around the arms. Wrap the center with ribbon, faux greenery, beads, or seasonal picks. Keep the decorations away from food surfaces and avoid loose glitter unless you want guests to sparkle internally and externally.
Serving Ideas for Every Occasion
A repurposed chandelier serving piece can be dressed up or down depending on the event. For brunch, fill small bowls with berries, mini muffins, sugar cubes, lemon wedges, and jam packets. For a dessert table, use it for cupcakes, truffles, macarons, petit fours, or wrapped chocolates. For a wine-and-cheese night, add olives, nuts, crackers, grapes, and small cheese cubes in separate dishes.
For holidays, the possibilities get even better. At Christmas, add greenery, ornaments, peppermint candies, and mini desserts. For Halloween, paint the chandelier black and fill the dishes with wrapped candy, plastic spiders, and orange-frosted cupcakes. For Easter, use pastel saucers, faux moss, and chocolate eggs. For a bridal shower, go with white paint, crystal drops, lace ribbon, and delicate sweets.
Food Safety Tips for a DIY Serving Piece
Because this project combines decor and food, a few simple rules keep everything safe and practical. Always serve food from clean, food-safe dishes, not directly from the painted chandelier. Wash removable bowls and plates before and after use. Avoid using porous or cracked dishes, because they can hold moisture and bacteria. For perishable foods, follow the two-hour rule: do not leave foods such as dairy, meat, seafood, eggs, cooked rice, cut fruit, or leftovers sitting at room temperature for more than two hours, or one hour in hot conditions above 90 degrees Fahrenheit.
Use liners for cupcakes and candies. Keep wet foods in bowls, not flat plates that might drip. If your chandelier has crystals or dangling pieces, make sure they do not swing into food. A crystal accent is lovely; a crystal taking a dip in ranch dressing is less elegant.
Design Variations to Try
The Cupcake Chandelier
Attach or place small dessert plates on each arm, then use the center stem for a larger cake plate or decorative topper. This version is ideal for birthdays, showers, and tea parties.
The Farmhouse Snack Stand
Use a black or aged bronze chandelier with white ramekins, small enamel bowls, or wooden-look plates. Fill it with pretzels, nuts, crackers, and wrapped treats for a casual gathering.
The Crystal Candy Display
Keep the crystals, polish the frame, and use glass bowls for wrapped candies or chocolates. This looks beautiful on a dessert buffet or holiday sideboard.
The Garden Party Centerpiece
Paint the chandelier soft green, ivory, or pale blue. Add floral saucers, faux vines, and small bowls of berries or tea sandwiches. It feels fancy without requiring anyone to pronounce “hors d’oeuvres” confidently.
Common Mistakes to Avoid
The biggest mistake is ignoring stability. A chandelier serving stand must be balanced before it is beautiful. Test it with the actual dishes you plan to use, and do not overload one side. Another mistake is choosing plates that are too large for the arms. Oversized dishes can make the piece look awkward and increase tipping risk.
Also avoid using hot foods unless your dishes and structure can handle heat safely. A chandelier serving piece is best for room-temperature snacks, wrapped treats, cupcakes, fruit, cookies, and decorative displays. Finally, do not rush the paint-curing process. Paint that feels dry to the touch may still be soft underneath. Give it time, or you may end up with fingerprints permanently pressed into your masterpiece like tiny crime-scene evidence.
Cleaning and Storage
After your event, remove all dishes and wash them separately. Wipe the chandelier frame with a damp cloth and dry it right away. Do not submerge the whole piece unless it was specifically built to handle water. Store it in a box or on a shelf where the arms will not bend. If it has crystals, wrap them loosely or remove them before storage.
For seasonal pieces, label the storage box by theme: “Halloween chandelier candy stand,” “Christmas dessert display,” or “Fancy thing that makes cupcakes look expensive.” Future you will appreciate the clarity.
Real-Life Experience: What This Project Teaches You
Repurposing a chandelier into a serving piece is one of those DIY projects that looks slightly ridiculous in the middle and surprisingly impressive at the end. At first, you may be standing in your garage holding a dusty old light fixture and wondering whether you are a creative genius or just someone who should not be left unsupervised at a thrift store. That is normal. Most good upcycling projects pass through an awkward phase.
The first practical lesson is that cleaning takes longer than expected. Chandeliers collect dust in tiny corners, especially around scrollwork, candle cups, crystals, and threaded joints. A quick wipe rarely does the job. The best approach is to take the piece apart as much as safely possible, clean each section patiently, and let it dry completely. This is not glamorous work, but it makes the finished project look intentional instead of rescued from a haunted attic.
The second lesson is that balance matters more than decoration. It is tempting to rush straight to paint colors and pretty plates, but the structure needs to be solid first. When you place bowls or saucers on each arm, test the weight. Move pieces around. Add a wider base if necessary. A serving piece should feel dependable, especially when guests will be reaching for food from different sides. Beautiful decor loses its charm quickly when it launches cookies across the table.
The third lesson is that removable dishes are worth it. Permanent plates can look seamless, but removable bowls and saucers make the piece much easier to use. You can wash them properly, change them for different events, and store the chandelier without worrying about breaking attached ceramics. This also lets you use the same frame for many moods: white dishes for a wedding shower, black bowls for Halloween, floral saucers for spring, or clear glass for holiday sparkle.
The fourth lesson is that people notice height on a buffet. Flat tables can look crowded, even when the food is delicious. A chandelier serving piece lifts treats upward and creates a visual centerpiece. It helps separate foods, adds movement, and makes even simple snacks feel special. Mini cupcakes suddenly look boutique. Wrapped candies look curated. Grapes look like they have hired a publicist.
Finally, this project teaches you to see old objects differently. A chandelier does not have to remain a ceiling fixture forever. Once you remove the wiring and rethink the shape, it becomes a sculptural frame, a party display, a seasonal centerpiece, or even a decorative organizer. That is the real charm of repurposed home decor: it gives forgotten pieces a second act. And in this case, the second act may involve brownies.
Conclusion
To repurpose a chandelier into a serving piece, focus on three things: safety, stability, and style. Start with a sturdy fixture, remove electrical parts, clean it well, create a secure base, and use food-safe removable dishes for serving. Then let your creativity do the fun part. Paint it dramatic black, romantic white, antique gold, or cheerful pastel. Add crystals, ribbons, greenery, or seasonal accents. Use it for cupcakes, candy, fruit, snacks, tea parties, showers, holidays, or any event that needs a little extra sparkle.
An old chandelier already knows how to command attention. With a smart DIY makeover, it can move from the ceiling to the table and become the serving piece everyone talks about. Not bad for something that used to hold light bulbs and dust.