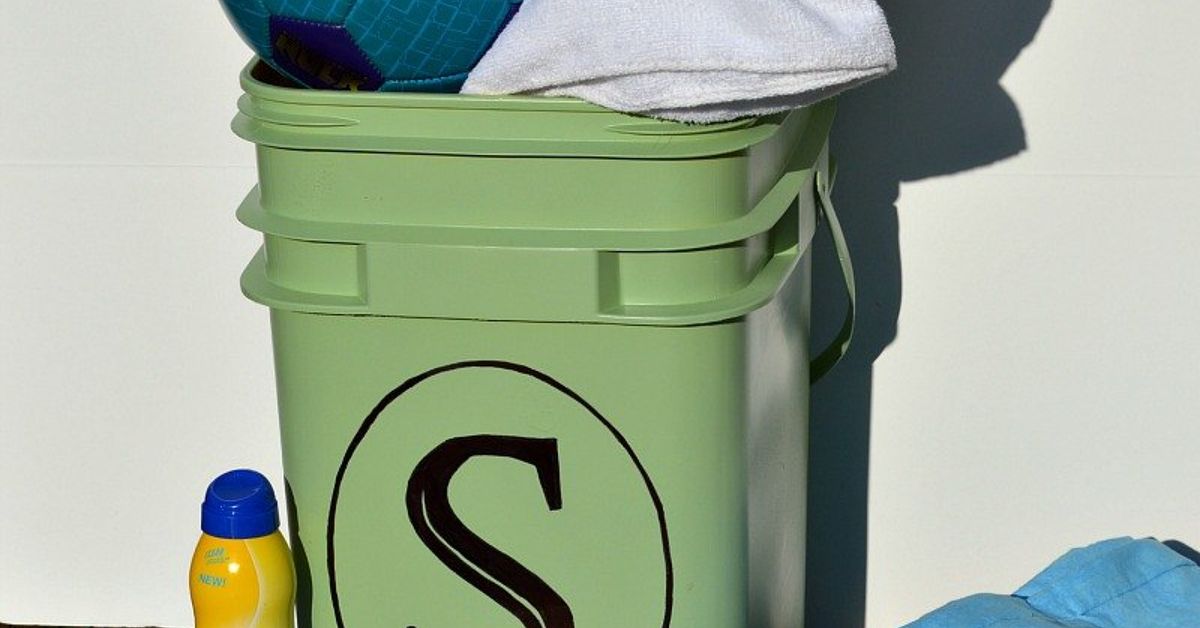
Pool toys possess a mysterious talent: no matter how neatly you arrange them, they eventually migrate across the deck like brightly colored wildlife. Noodles roll into walkways, goggles disappear beneath towels, and inflatable flamingos behave as though the backyard belongs to them.
A practical solution may already be sitting in your garage or recycling pile. With a clean, sturdy plastic container and a few inexpensive modifications, you can create convenient DIY pool storage that drains water, encourages airflow, and keeps wet gear from taking over the patio.
This project works especially well with large food-service buckets, heavy-duty storage totes, plastic laundry baskets, pet-food containers, or other rigid bins that never held hazardous substances. The finished organizer can store pool noodles, diving toys, goggles, water blasters, kickboards, and deflated floats without requiring an expensive deck box.
Why Repurpose a Plastic Container for Pool Storage?
Repurposing gives a usable container a second job before it enters the waste stream. It can also save money and produce a storage system tailored to the exact assortment of pool gear your family owns.
Plastic is particularly useful around a swimming pool because it does not rust, absorbs little water, and is generally easy to wash. A well-designed container can be rinsed with a garden hose and left to dry without demanding much maintenance.
The important phrase is well-designed. A completely sealed tote may appear ideal, but wet pool toys placed inside it can create a humid little spa for odors, slime, and mildew. Drainage and ventilation are therefore central to this project.
Advantages of a Homemade Pool Organizer
- It costs little or nothing if you already own the container.
- It keeps loose toys away from poolside walking areas.
- Drainage holes allow water to escape after swimming.
- Ventilation helps goggles, toys, and kickboards dry faster.
- Handles or wheels make seasonal storage easier.
- Paint, labels, and hooks can be customized for your household.
Choose the Right Plastic Container
The best candidate is a rigid, intact container large enough to hold your equipment without becoming impossible to move. Heavy-duty high-density polyethylene or polypropylene containers are usually more suitable than thin, brittle plastic totes.
Inspect the sides, handles, bottom, and lid. Reject any bin with sharp cracks, severe fading, warped edges, or plastic that feels chalky and snaps when flexed. Outdoor sunlight and temperature changes can weaken older plastic, particularly clear containers designed primarily for indoor closets.
Containers That Usually Work Well
- Large food-grade ingredient buckets
- Clean pet-food bins with secure lids
- Heavy-duty storage totes
- Rigid plastic laundry hampers
- Commercial snack or bulk-food containers
- Large plastic baskets with built-in ventilation
A tall container is useful for pool noodles, while a broad tote is better for kickboards and medium-size inflatables. Two smaller bins may be more manageable than one enormous container that becomes heavier than a waterlogged treasure chest.
Containers You Should Never Repurpose
Do not reuse containers that previously held pesticides, fuel, automotive fluids, paint, solvents, strong cleaning products, or pool chemicals. Residue may remain in seams and scratches even after washing. Some original labels specifically prohibit reuse, and those instructions should always be followed.
Your DIY organizer should store ordinary recreational equipment only. Pool chemicals belong in their original labeled containers, kept dry, separated as directed by the manufacturer, and secured away from children and animals. Never transfer chlorine, acid, or another chemical into a repurposed household bin.
Tools and Materials
- One clean, sturdy plastic container
- Dish soap, water, and a scrub brush
- Drill with standard or step-drill bits
- Painter’s tape and a permanent marker
- Fine sandpaper or a deburring tool
- Safety glasses and work gloves
- Optional exterior-grade paint made for plastic
- Optional plastic hooks, zip ties, rope handles, or caster dolly
- Optional mesh laundry bags for small accessories
Choose corrosion-resistant hardware if metal parts will be used outdoors. Stainless-steel fasteners generally tolerate wet environments better than ordinary untreated screws, which can quickly develop orange streaks worthy of a low-budget haunted house.
How to Turn the Container Into DIY Pool Storage
Step 1: Clean and Inspect the Container
Remove old labels and wash every surface with dish soap and warm water. Pay attention to corners, handles, lid channels, and molded seams. Rinse thoroughly and allow the container to dry completely.
Smell the empty bin after it has dried. Persistent chemical odors are a warning that it should not be used. For food or pet-food residue, additional washing may solve the problem, but a questionable container is not worth gambling on when safer options are easy to find.
Step 2: Plan the Drainage Pattern
Turn the container over and identify its lowest points. Mark several drainage holes across the bottom, keeping them away from load-bearing corners and structural ribs. More holes are not automatically better; drilling too many close together can weaken the base.
For most medium or large totes, a modest grid of holes spaced a few inches apart is sufficient. Small openings release water while reducing the chance that tiny diving toys will escape. If the bin will sit on a solid deck, elevate it slightly on plastic feet or a slatted platform so the holes are not blocked.
Step 3: Add Ventilation
Mark ventilation openings high on the sidewalls. These holes should promote crossflow without allowing every rain shower to flood the container. Positioning them beneath an overhanging lid can provide some weather protection.
If the original container already has slotted sides, you may not need additional vents. An open laundry basket is practically born for this assignment; it has been waiting its whole life to supervise pool noodles.
Step 4: Drill Safely
Place the empty container on a stable work surface and support the plastic behind the drilling area when possible. Apply painter’s tape over each mark to help reduce slipping. Wear eye protection, begin with a small pilot hole, and drill at a controlled speed.
A step bit is useful for enlarging holes cleanly in many types of thin plastic. Excessive pressure can crack the wall, while excessive speed can melt the edges. Let the tool do the work and pause if the plastic becomes hot.
Remove sharp curls and burrs with fine sandpaper or a deburring tool. Run a cloth around every opening afterward. If the fabric catches, continue smoothing the edge before storing inflatable toys.
Step 5: Decide How to Handle the Lid
A lid protects equipment from leaves and direct rain, but it can also trap moisture. If you keep the lid, add ventilation and establish a rule that dripping equipment must drain before the container is closed.
Another option is to remove the lid during swim season and reinstall it only after everything is dry. For a sheltered patio, a fitted piece of outdoor mesh can keep out larger debris while preserving airflow.
Do not leave a large, loose lid where wind can send it sailing. Attach it with suitable hinges, store it securely, or remove it from the setup entirely.
Step 6: Create Storage Zones
Place tall items such as noodles and water blasters vertically. Use washable mesh bags for goggles, dive rings, balls, and small toys. The bags can be lifted out, rinsed, and hung to dry.
Attach exterior plastic hooks for masks, swim caps, or lightweight hand paddles. Avoid sharp exposed fasteners. If a bolt passes through the wall, use a washer and cap the interior end so it cannot puncture an inflatable.
A narrow piece of perforated plastic placed inside can act as a divider. This prevents kickboards from becoming tangled with noodles and makes it easier for children to return items to the correct section.
Step 7: Add Handles or Mobility
If the original handles are sturdy, leave them alone. Replacement rope handles can be threaded through reinforced side holes, but they should not be expected to support an overloaded container.
For a large organizer, set the bin on a weather-resistant plant caddy or low rolling platform instead of attaching casters directly to thin plastic. A separate base distributes weight more evenly and can be replaced if a wheel fails.
Step 8: Finish and Label It
Clean, lightly scuff, and paint the exterior only if the coating is specifically designed to bond with plastic and tolerate outdoor use. Follow the manufacturer’s preparation, drying, and curing instructions.
Stencils, vinyl labels, or waterproof decals can turn the organizer into an attractive patio feature. Labels such as “Noodles,” “Small Toys,” and “Dry Gear” make cleanup simple enough that even reluctant helpers have fewer opportunities to develop sudden selective blindness.
Where to Put Your Pool Storage Container
Choose a level, well-drained location where the bin will not obstruct gates, ladders, rescue equipment, electrical equipment, or walkways. It should not become a climbing aid that helps a child reach an above-ground pool or cross a protective barrier.
Water-safety guidance recommends removing toys from the pool area when swimming is over because visible toys can attract children back toward the water. When practical, place the organizer outside the secured pool enclosure rather than immediately beside the water.
Keep lifesaving equipment separate, visible, and immediately accessible. A reaching pole, ring buoy, first-aid kit, or personal flotation device should never be buried beneath recreational toys.
Smart Ways to Organize Different Pool Items
Pool Noodles and Kickboards
Store noodles upright so water can run down and air can circulate. A tall ventilated barrel-style container is ideal. Place kickboards along one side or behind a divider to prevent them from bending.
Goggles and Small Toys
Small items belong in separate mesh pouches or removable baskets. This prevents an excavation project every time someone wants the one blue diving ring apparently located at the geological bottom of the bin.
Inflatable Floats
Allow floats to dry before folding or deflating them. Large inflatables should not be crushed into a small container, since creasing and pressure can damage valves and seams. During long storage periods, clean and dry them according to their care instructions.
Towels and Fabric Gear
Wet towels should hang on a drying rack rather than remain inside the toy bin. Fabric left in a humid container can develop unpleasant odors quickly. Store clean, fully dry towels in a separate covered location.
Maintenance That Keeps the Organizer Fresh
Empty the container periodically and rinse away grass, sunscreen residue, insects, and dirt. Scrub with mild soap, rinse thoroughly, and let every part dry before refilling it.
Check drainage holes for leaves and debris. Inspect drilled openings, handles, hooks, and the base for cracks or sharp edges. Replace the organizer when the plastic becomes brittle or structurally weak.
At the end of the swimming season, wash and dry the toys individually. Store the empty organizer in a sheltered location if severe freezes, falling branches, or extreme weather could damage it. Turning it upside down can prevent standing water, provided it is secured against wind.
Common DIY Pool Storage Mistakes
- Sealing wet toys inside: Drain and ventilate the container before closing it.
- Using a hazardous-product container: Select only a clean bin with a safe history.
- Drilling too many holes: Preserve structural ribs and reinforce heavily loaded areas.
- Leaving sharp edges: Deburr every cut to protect hands and inflatables.
- Creating a tripping hazard: Keep the organizer outside traffic paths.
- Storing pool chemicals with toys: Chemicals require separate, secure storage in their original containers.
- Blocking safety equipment: Rescue gear must remain visible and easy to reach.
- Placing the bin beside a barrier: Do not create a step that children can climb.
Real-World Experiences and Lessons From Using Repurposed Pool Storage
The First Pool Day Reveals the Correct Size
A container that looks enormous in an empty garage can become surprisingly small after meeting six noodles, two kickboards, a beach ball, and an inflatable shark with strong opinions about personal space. Before modifying a bin, gather the actual equipment and perform a test load. This simple rehearsal reveals whether the container needs dividers, exterior hooks, or a taller companion bin.
The most convenient setup is often a two-container system. A tall ventilated bin holds noodles and long toys, while a smaller tote contains goggles and dive toys. Children can see where everything belongs, and adults do not have to lift a single overloaded box.
A Humid Week Demonstrates Why Airflow Matters
During hot, humid weather, a closed container can smell stale after only a short period if wet gear has been dropped inside. The practical lesson is that drainage alone is not enough. Water may leave through the bottom while humid air remains trapped around toys.
High side vents, mesh accessory bags, and a lid that stays open during drying make a noticeable difference. Establishing a simple routine also helps: rinse toys, shake off excess water, place them in the organizer, and leave the lid open until the equipment is dry.
A Windy Afternoon Tests the Design
Light plastic bins and detached lids can move during strong wind. An open container may also release beach balls with the enthusiasm of a confetti cannon. A low rolling platform with locking wheels, a sheltered position, or a broad base improves stability.
Small lightweight toys should remain in zippered mesh bags. The lid, if retained, needs a secure attachment or latch that does not create an entrapment risk. Heavy rocks should not be tossed loosely into the bottom as ballast because they can damage the container and become hazards when the bin is moved.
A Busy Family Learns That Convenience Beats Perfection
An elaborate organizing system may look wonderful on the first afternoon and collapse by the third pool party. If every toy requires a different hook, clip, or precisely labeled compartment, cleanup starts feeling like warehouse inventory management.
The systems that tend to last are intuitive: one large opening for bulky gear, one mesh bag for small toys, and a few hooks for items that need extra drying. Labels can use pictures or colors so younger children can participate. The goal is not museum-quality display; it is a clear deck and equipment that can be found next time.
End-of-Season Inspection Shows the Value of Repairability
After months of sun and wet equipment, the container may show faded paint, clogged drains, or strain around its handles. Because the organizer began as a repurposed object, repairs are usually uncomplicated. Hooks can be replaced, drainage holes cleaned, and a worn rolling platform swapped out without discarding the whole system.
However, repair has sensible limits. Cracks around the base, sharp splits, or severely brittle plastic indicate that retirement has arrived. Check local recycling rules using the resin identification number on the container; the number identifies the plastic type but does not guarantee that a community program accepts it.
Conclusion
Turning a repurposed plastic container into DIY pool storage is a manageable weekend project with a useful payoff. The best version begins with a safe, sturdy bin and adds thoughtful drainage, cross-ventilation, smooth openings, and uncomplicated storage zones.
Place the finished organizer where it keeps toys away from the water and does not interfere with barriers, pathways, or rescue equipment. Maintain it with regular rinsing and inspection, and keep all pool chemicals in separate, secure storage. With those details handled, the backyard becomes easier to navigate, pool gear lasts longer, and the inflatable flamingo finally receives an official address.
Note: This project is intended only for clean, nonhazardous containers and recreational pool gear. Never use the organizer for chemicals, fuel, lifesaving equipment, or items that must remain immediately accessible during an emergency.