If your home-decor taste says “boutique hotel in Manhattan” but your budget says “let’s calm down,” candle holders are one of the easiest places to fake expensive style. They are small, practical, and surprisingly powerful. A good candle holder can make a coffee table look curated, a dining table look intentional, and a boring shelf look like it suddenly developed a personality.
The best part is that making chic candle holders does not require a pottery studio, a design degree, or a trust fund. In fact, some of the prettiest versions come from thrift-store glass, leftover jars, mismatched candlesticks, and simple craft finishes like metallic paint, gold leaf, twine, clay, or textured plaster. In other words, your future centerpiece may already be sitting in a cabinet next to old pasta sauce jars and a mug you forgot you owned.
In this guide, you will learn how to make stylish candle holders affordably, how to choose materials that look elegant instead of crafty, and how to style them so the finished result feels polished. You will also get practical ideas for real homes, not fantasy homes with twelve-foot ceilings and a dedicated “floral room.”
Why Candle Holders Are the Smartest Budget Decor Move
There is a reason candles and candle holders show up in magazine shoots, holiday tables, cozy reading nooks, and those suspiciously perfect living rooms online. They add glow, height, texture, and mood without asking you to repaint the walls or buy a new sofa. That is excellent news for anyone trying to upgrade a room without setting their bank account on fire. Figuratively. Please keep the literal fire situation under control.
Affordable candle holders work because they pull off three jobs at once. First, they add atmosphere. Second, they fill awkward visual gaps on shelves, mantels, and tables. Third, they make a room feel layered. Designers often use objects of different heights and materials to create that collected look, and candle holders are perfect for that trick. A mixed group of glass, brass-look, ceramic, or wood holders can make even a simple surface feel styled instead of abandoned.
Another reason they work so well is flexibility. A single glass holder can read modern, vintage, rustic, coastal, or glam depending on the candle, finish, and accessories around it. Change the candle color, add greenery, swap in a twisted taper, or place it on a stack of books, and suddenly the same object has a whole new vibe.
What Makes a Candle Holder Look Chic Instead of Cheap
“Affordable” does not have to mean “looks like it was assembled during a power outage with a glue gun and pure panic.” Chic candle holders usually share a few simple qualities, and once you know them, shopping your home or a thrift store gets much easier.
1. A restrained color palette
Neutrals, smoky glass, matte black, soft white, brass tones, stone finishes, and muted greens tend to look elevated. This does not mean bright colors are banned from the party, but if you want an expensive feel, keep the palette intentional. Two or three colors are usually enough.
2. Texture that adds depth
Glossy glass, brushed metallic finishes, ribbed details, rough plaster effects, aged wood, and matte clay all create visual richness. Texture makes a simple shape look more special, which is great when your base material started life as a discount-store jar.
3. Variation in height
One lonely candle holder can be pretty. Three at different heights can look editorial. Grouping short, medium, and tall pieces creates movement and helps the arrangement feel deliberate.
4. A little imperfection
Oddly enough, perfection is not always the goal. Slightly mismatched finishes, vintage wear, and handmade texture can make a candle holder feel collected and charming. The key is to keep the irregularities stylish, not chaotic.
Best Budget Materials for DIY Candle Holders
Before you start making anything, it helps to know which materials give you the most style for the least money.
Thrifted glass
Clear or tinted glass is the reigning champion of affordable elegance. Votives, hurricane holders, bud vases, old candle jars, and small bowls can all become beautiful candle displays. Glass reflects light well, works with nearly every decor style, and can easily be upgraded with paint, gold leaf, ribbon, or seasonal accents.
Old candle jars
Do not throw away pretty candle jars once the wax is gone. Clean them thoroughly and reuse them as holders for tea lights, votives, or flameless candles. They already look designed because, well, they were.
Wood scraps
Wood adds warmth and looks especially good in modern farmhouse, Scandinavian, and rustic spaces. A sanded block with drilled openings for tea lights can look minimal and expensive when finished properly.
Air-dry clay or plaster finish
These are wonderful when you want a handmade sculptural look without expensive tools. A simple clay wrap or textured finish can transform a basic holder into something that looks artisan-made.
Metallic finishes
Gold, brass, bronze, and pewter-inspired finishes are classic because they catch candlelight beautifully. The trick is choosing a soft or aged metallic look rather than an overly shiny finish that screams “spray-painted at top speed.”
Five Affordable Ways to Make Chic Candle Holders
1. Gilded Glass Jar Candle Holders
This is one of the easiest ways to get a designer look for very little money. Start with clean glass jars, candle vessels, or thrifted votives. Remove all wax residue and labels so the surface is smooth. Then add gold leaf around the lower third, brush on metallic paint inside the glass for a soft glow, or create a frosted edge with translucent paint.
The reason this works is simple: glass already looks elegant, and metallic accents reflect light in a way that feels polished. Keep the embellishment concentrated near the base so the top remains airy and not overly decorated. Add white tea lights or slim tapers nearby, and suddenly the whole setup looks like it belongs in a very expensive dinner party photo.
Style tip: Cluster three jars together and vary the heights by placing one on a coaster, one on a small book, and one directly on the table. Instant sophistication, no private decorator required.
2. Thrifted Mismatched Candlestick Holders
One of the chicest things you can do is stop trying to make everything match perfectly. A mix of brass-look, glass, and wood candlesticks often looks better than a boxed set because it feels collected over time. Thrift stores, dollar stores, yard sales, and the back corner of your own cabinets are excellent hunting grounds.
To unify mismatched pieces, use one of two tricks. Either keep the candle color the same across all holders, or give the holders a shared finish. A coat of matte black, antiqued gold, muted green, or chalky cream can pull everything together without removing the charm of different shapes.
This is especially effective on a dining table, mantel, or entry console. Mix tall and short holders, and leave a little breathing room between them. You want “beautifully curated,” not “candle traffic jam.”
3. Sculptural Clay-Wrapped Holders
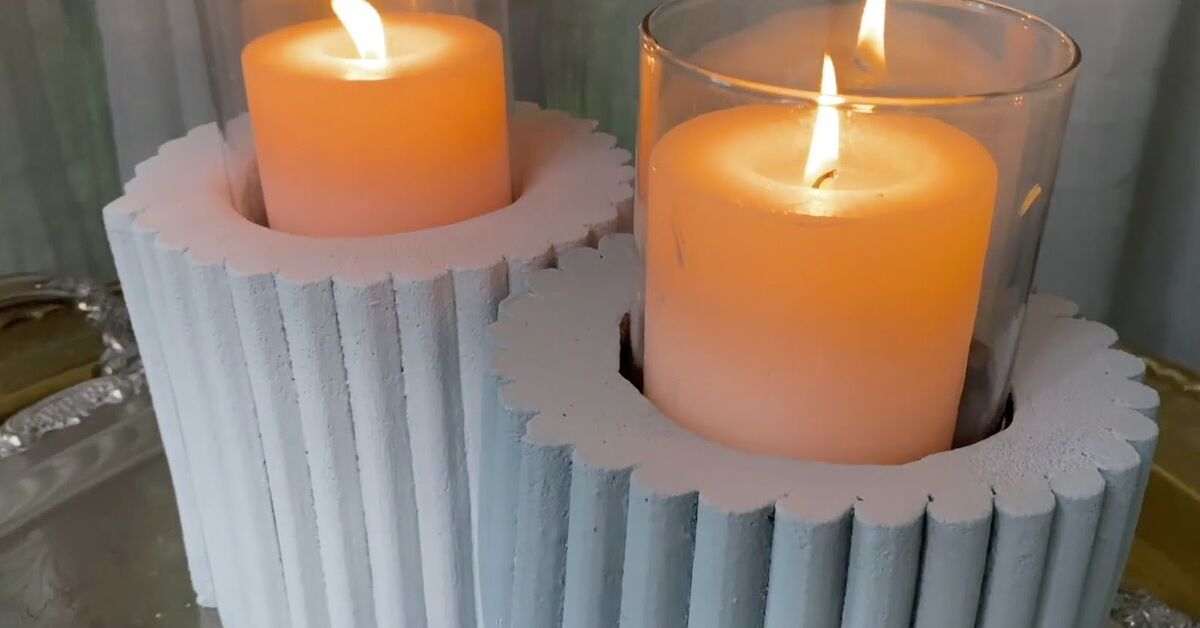
If you want your candle holders to look handmade in an artsy, boutique-studio way, clay is your friend. Wrap air-dry clay around a safe inner glass vessel, shape it with subtle ridges, arches, waves, or a slightly uneven organic silhouette, and let it dry completely before painting or sealing the outside.
This method works well because the inner vessel handles the candle, while the outer clay layer supplies the drama. You can go minimal with a soft stone color, or create a faux ceramic look with white, greige, or taupe paint. Add tiny imperfections on purpose so the piece feels sculptural rather than factory-perfect.
These holders look especially chic on shelves, side tables, or nightstands paired with linen, wood, and warm lighting. They whisper style. They do not shout it through a megaphone.
4. Nature-Inspired Hurricane Holders
A simple hurricane candle holder can be dressed up beautifully with affordable materials. Wrap the base in burlap ribbon, add a few sprigs of faux foliage, line the bottom with pebbles or moss, or place the holder on a tray with mini pumpkins, pinecones, shells, or citrus slices depending on the season.
This works because the glass keeps the silhouette clean while the natural accents add softness and charm. It is especially good for centerpieces because the holder feels decorative without blocking conversation across the table. For everyday decor, keep the embellishment simple. A little greenery goes a long way. No need to turn the candle holder into a botanical hostage situation.
5. Unexpected Upcycled Statement Holders
The most memorable DIY candle holders often come from objects that were never meant to be candle holders in the first place. Small vases, detached candlestick parts, sturdy decorative fruit, old springs mounted to a board, and vintage-style vessels can all be repurposed into statement pieces. This is where creativity earns its rent.
The trick is to choose one unusual element and let the rest stay simple. If you build a whimsical sculptural taper holder, pair it with an understated candle. If your holder has a strong metallic finish, keep the surrounding decor calm. Statement pieces need a supporting cast, not competition.
How to Style Your DIY Candle Holders So They Look Expensive
Making the holder is only half the job. Styling is what turns a nice DIY into a room-enhancing feature.
Use groups of odd numbers
Three holders usually look better than two. Five can work beautifully on a long table or mantel. Odd-number groupings feel more natural to the eye.
Mix materials, but repeat something
Glass, brass, and wood can absolutely live together in peace. Just repeat one element, such as candle color, finish tone, or shape, so the arrangement feels connected.
Add height underneath
Place one holder on a tray, a stack of books, or a small riser to create variety. This is especially helpful when your holders are similar in size.
Balance candlelight with other objects
Candle holders look best with a few companions: a bud vase, a bowl, a stack of books, greenery, or a small sculpture. Give them a supporting cast and they will perform better.
Safety Rules That Should Never Be the “Optional” Part
Chic is excellent. Safe and chic is better. Always choose holders made from or paired with heat-resistant, sturdy, non-flammable materials. Set candles on stable surfaces away from paper, wrapping, fabric, dried decorations, and anything else that could catch fire. If you are reusing old jars or glass vessels, inspect them carefully and skip anything chipped, cracked, or wobbly.
Make sure there is enough room around the flame so heat does not build up dangerously. If you are decorating with children, pets, or lots of leafy embellishments, flameless candles are a smart alternative and still look lovely in many displays. In other words, the dream is “cozy glow,” not “unexpected call to emergency services.”
Common Mistakes to Avoid
Using flimsy materials near flame: Twine, paper sleeves, faux florals, and ribbon can be beautiful accents, but they should never crowd a live flame.
Overdecorating the holder: A few intentional details look chic. Too many details look confused.
Ignoring scale: A tiny holder can disappear on a large dining table, while an oversized one can bully a small shelf. Match the holder to the space.
Choosing style over function: If a taper leans, a tea light rattles, or the base feels unstable, keep refining. Beautiful decor should not require bravery.
The Real Experience of Making Chic Candle Holders on a Budget
What surprises most people about making candle holders on a budget is that the process starts to change the way they see ordinary objects. A week earlier, an empty candle jar is just an empty candle jar. Then suddenly it becomes a smoky-glass tea light holder, a match jar for the coffee table, or the base for a layered centerpiece. A small thrifted vase that once looked random starts to look sculptural. A mismatched brass candlestick stops feeling old-fashioned and starts feeling collected. That shift is part of the fun. You are not just crafting; you are training your eye.
Another common experience is realizing that the most expensive-looking results are often the simplest. Many people go into a DIY project thinking they need ten supplies, six embellishments, and a dramatic reveal. Then the version that actually looks best is the one with a clean glass jar, a little gold detail near the base, and a soft ivory candle. Budget decor has a funny way of teaching restraint. The minute you stop trying to make everything louder, it often starts looking better.
There is also a lot of trial and error, and honestly, that is part of the charm. Maybe the first coat of metallic paint looks too shiny. Maybe the ribbon felt elegant in your head and suddenly looks like it is auditioning for a holiday parade. Maybe your “organic handmade clay shape” initially resembles a potato with confidence issues. That does not mean the project failed. It means you are editing, which is exactly what good styling requires. Small adjustments in color, height, and texture make a huge difference.
People also tend to discover that candle holders are easier to personalize than bigger decor items. You can make one set for everyday use in neutral tones, another for fall with soft greenery and warm brass, and another for parties with colored glass and taller tapers. Because candle holders do not require much material, experimenting feels low-risk. You can test a new finish without committing an entire room to it.
One of the best experiences is the way these little projects change a space almost immediately. A bookshelf looks warmer. A dining table feels more finished. An entryway seems more welcoming. And unlike many home upgrades, this one does not involve power tools, demolition, or a deep emotional argument with an instruction manual. You can create a noticeable difference in an afternoon.
Perhaps the biggest lesson is that “affordable” does not mean settling. It means editing wisely, using what you have, and leaning into materials that already know how to be beautiful: glass, metal, wood, clay, and candlelight. The final result often feels more special precisely because it was made thoughtfully. Not perfect. Not precious. Just stylish, personal, and smart. Which, honestly, is the dream for nearly every room in the house.
Conclusion
The affordable way to make chic candle holders is not about copying luxury decor piece for piece. It is about understanding what makes a holder feel elegant: good materials, thoughtful texture, balanced height, restrained color, and safe construction. Once you know those basics, you can turn humble materials into stylish decor that looks far more expensive than it is.
So raid the thrift store, rescue those empty jars, paint that odd candlestick, and make your home glow a little smarter. Your candle holders do not need to cost a fortune to look like they belong in a beautiful room. They just need a little creativity, a little editing, and perhaps a little less glitter than your first instinct suggested.